
Colorburst Quilt
This post may contain affiliate links which won’t change your price but will share a commission.I don’t know about you, but fast and easy simple quilt blocks are my favorite and this Colorburst quilt is very easy.
Colorburst Quilt
I have several…okay, more than several layer cakes of 10-inch squares in my stash and this quilt takes no time at all to make.
I actually made a smaller version of this quilt a while ago using the Love Blooms fabrics. You can see it here.
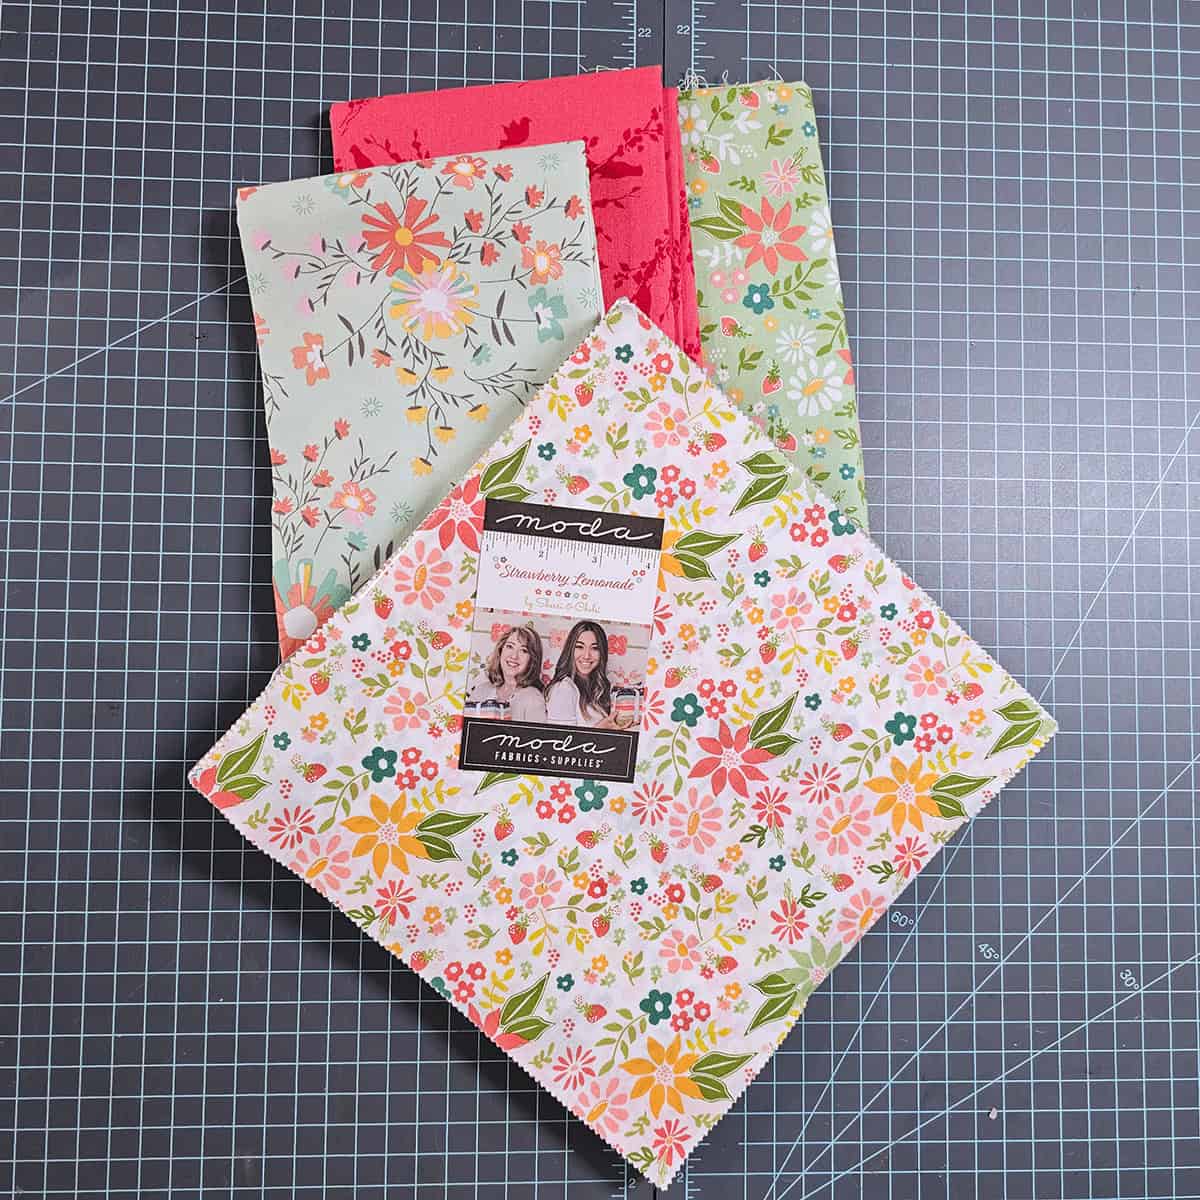
Strawberry Lemonade
Sherri & Chelsi are some of my favorite fabric designers, I love the bright, colorful designs. I used the Strawberry Lemonade 10-inch layer cake. I don’t think this is available anymore but their new line Raspberry Summer would be great to use.
PDF of this tutorial
If you would prefer a PDF of this tutorial, I have just added it to my shops. It will have NO ads in it and is 7 pages which includes a black/white coloring diagram for you.
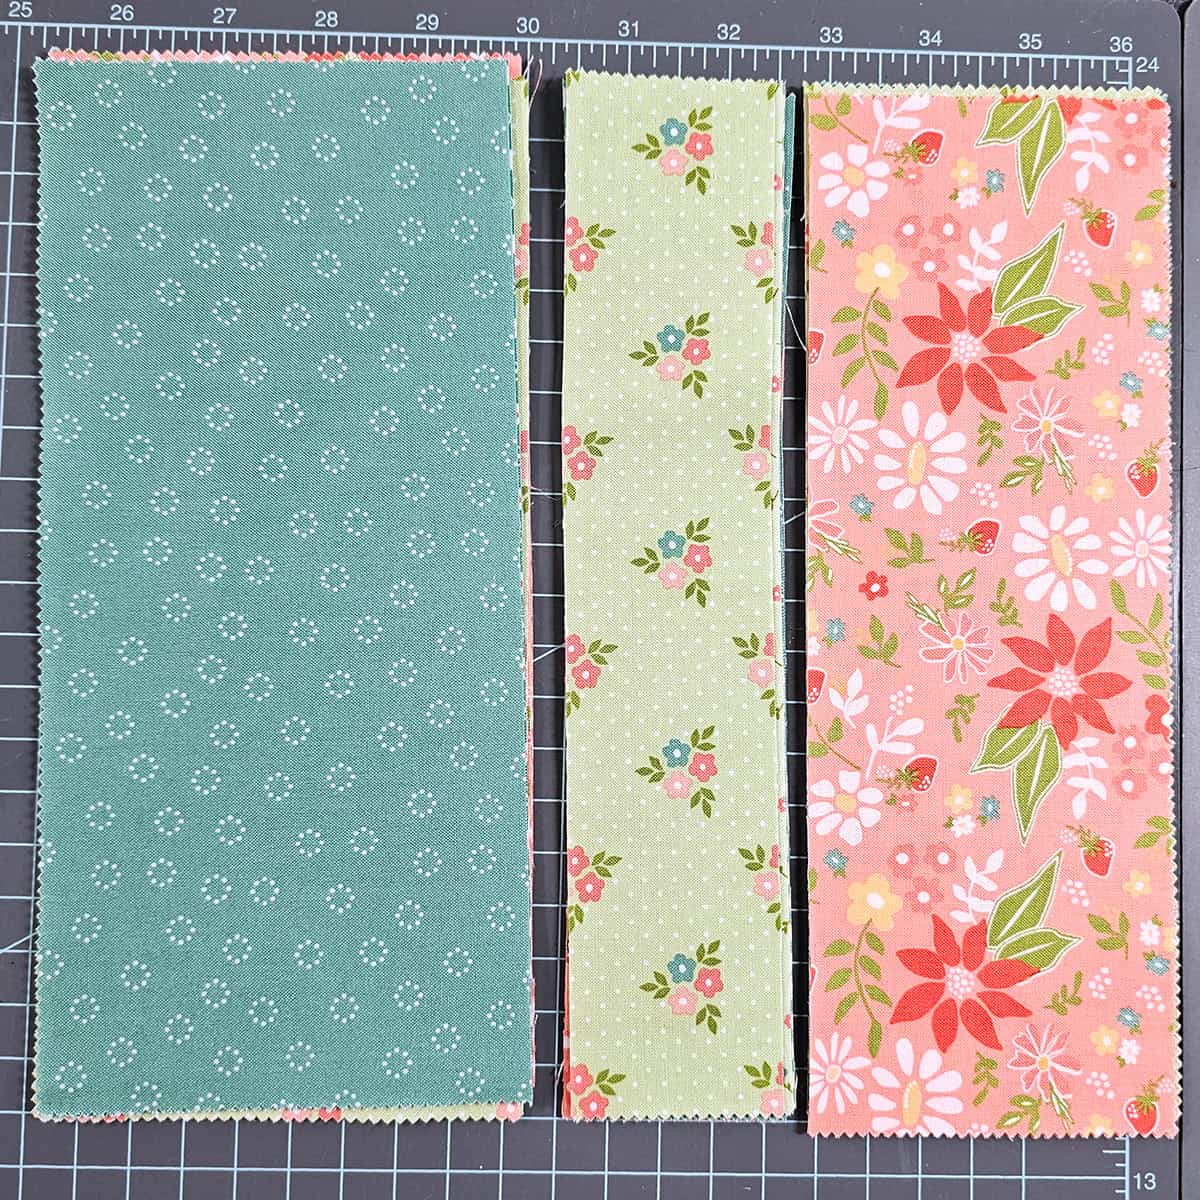
Cutting the 10 inch squares
There are 42 pieces in a layer cake and I used every single one in my quilt. Take each 10-inch square and cut as follows:
- 4 1/2 inches by 10 inches
- 2 inches by 10 inches
- 3 1/2 inches by 10 inches
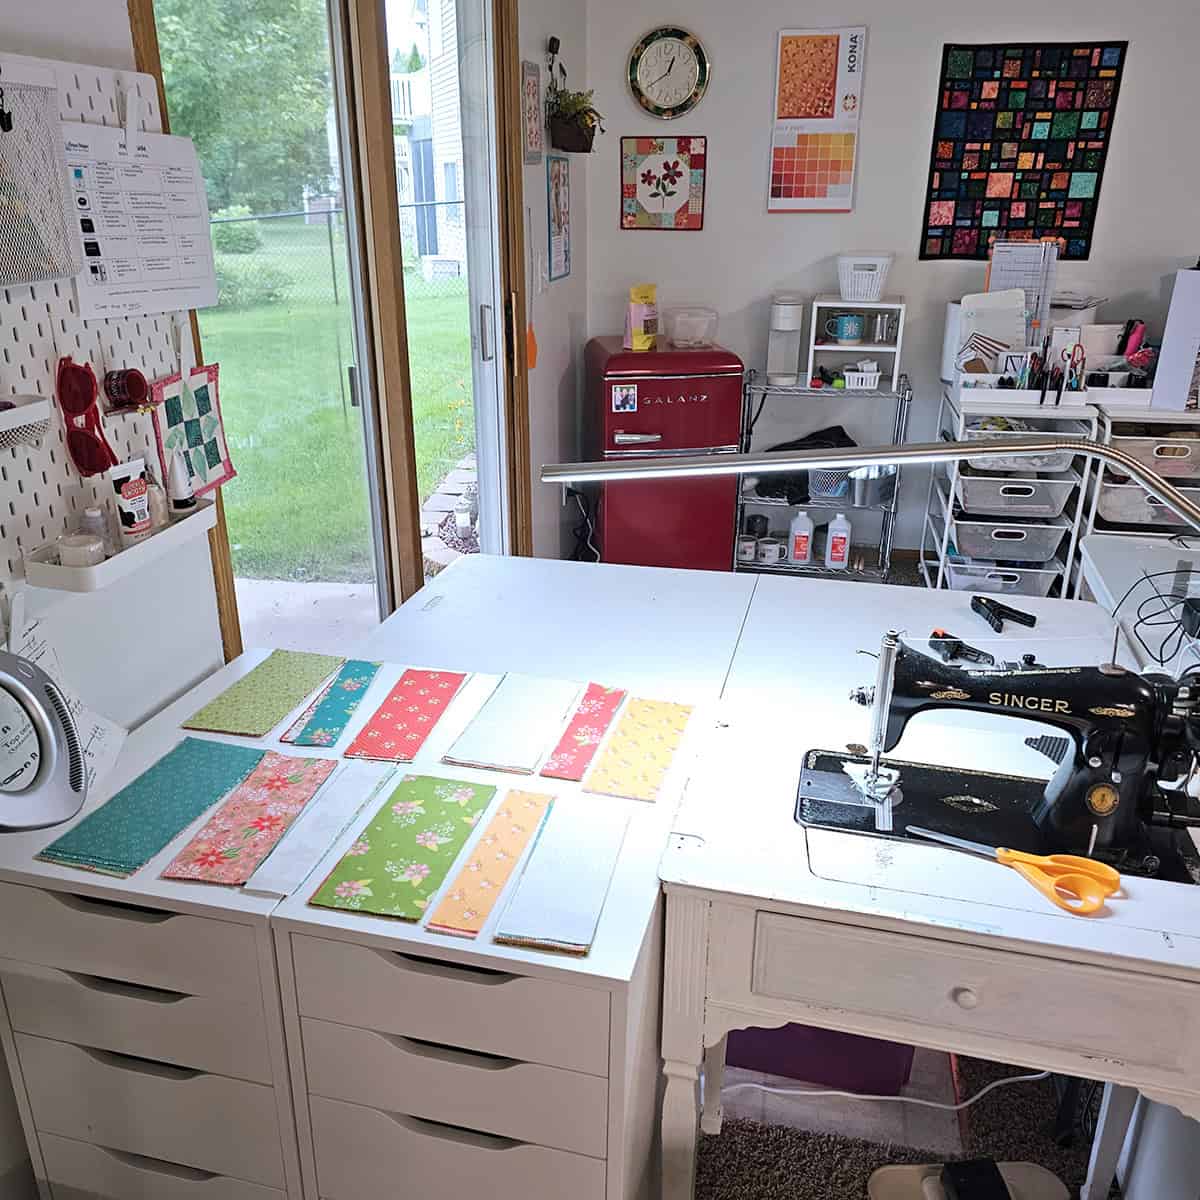
Joining the pieces
Once you have all of the 10 inch squares cut, it is time to sew the blocks together. Use a 1/4 inch seam allowance. I just randomly picked a fabric from each size to sew together keeping the 2 inch piece in the center.
Notice I had one block that I placed the 2 inch strip on the end. I used my trusty seam ripper to redo that block.
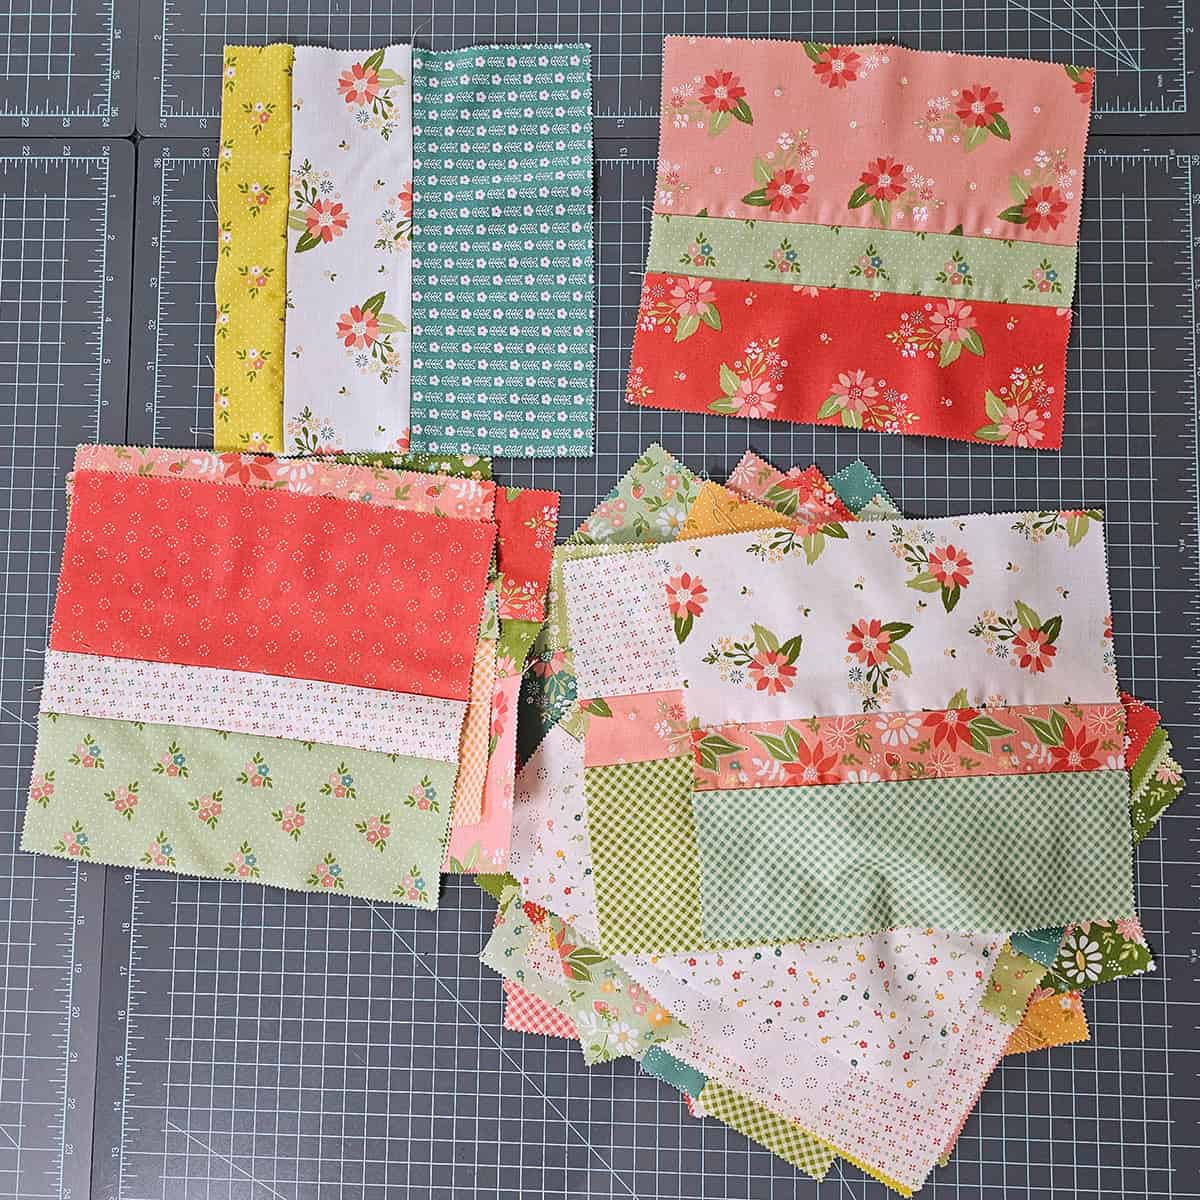
Random Piecing
Here is how I pieced my blocks. I just made several piles of the sections and then randomly joined them. When I got to the last 5 or 6 blocks I was careful to make sure I had 3 different fabrics for each block.
The light over my sewing machine is the Daylight Slimline 3 LED. I really love this light.
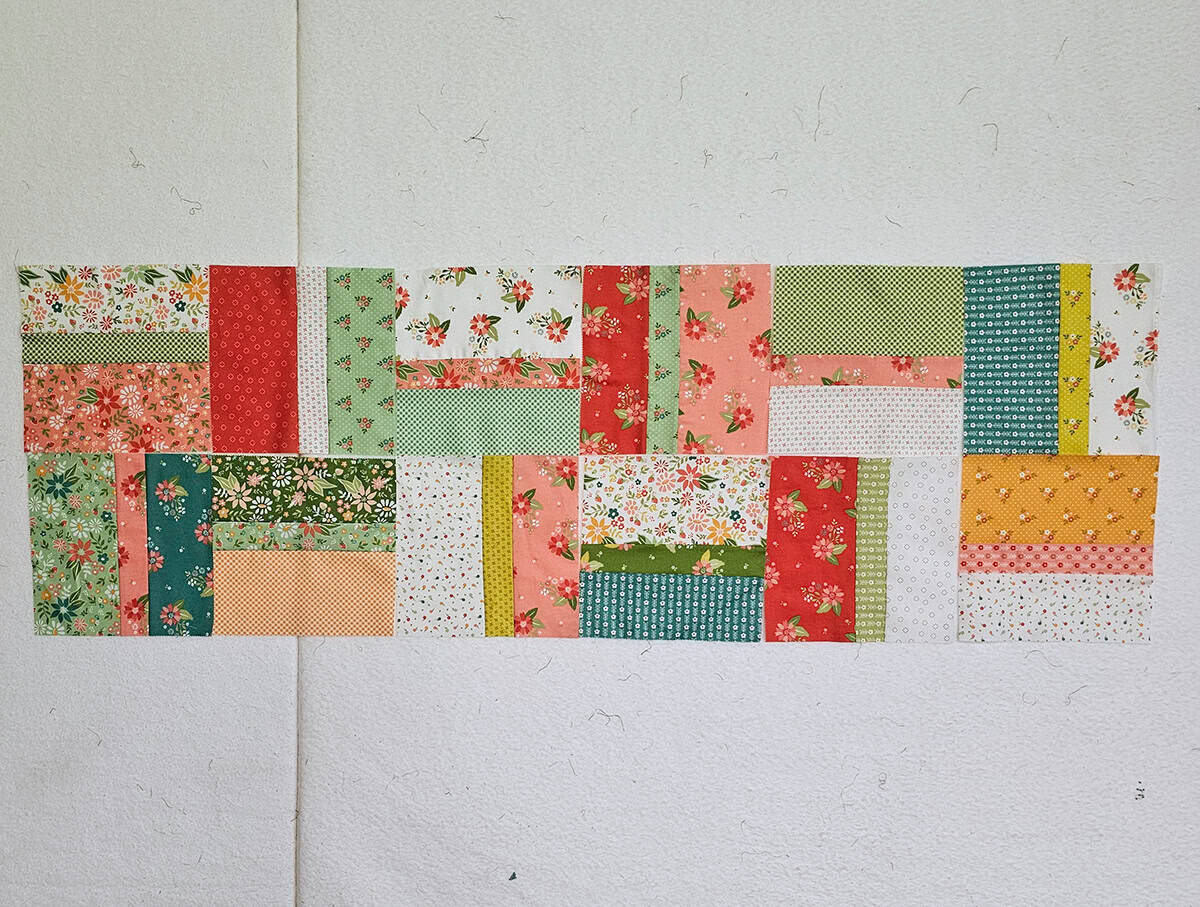
Trim Blocks
Once you have all of your blocks sewn and pressed, it is time to trim them. Your blocks are not square, they are 9 inches x 10 inches and need to be trimmed.
Trim blocks to 9-inch squares. Most layer cakes have pinked edges so I like to trim a tiny bit off of one side and then trim the other side to make a 9-inch block. The finished size of the quilt blocks will be 8-1/2 inches square in the quilt.

Laying out the Quilt
I am fortunate to have a large design wall but you could also lay out your quilt blocks on the floor.
I rotated each block as you can see in the photo.
Quilt blocks
With 42 quilt blocks, you can lay out 6 rows of 7 quilt blocks. I like to lay all of the blocks out and then move them around if I have the same fabric touching. Look at the photo to see how I rotated the blocks.
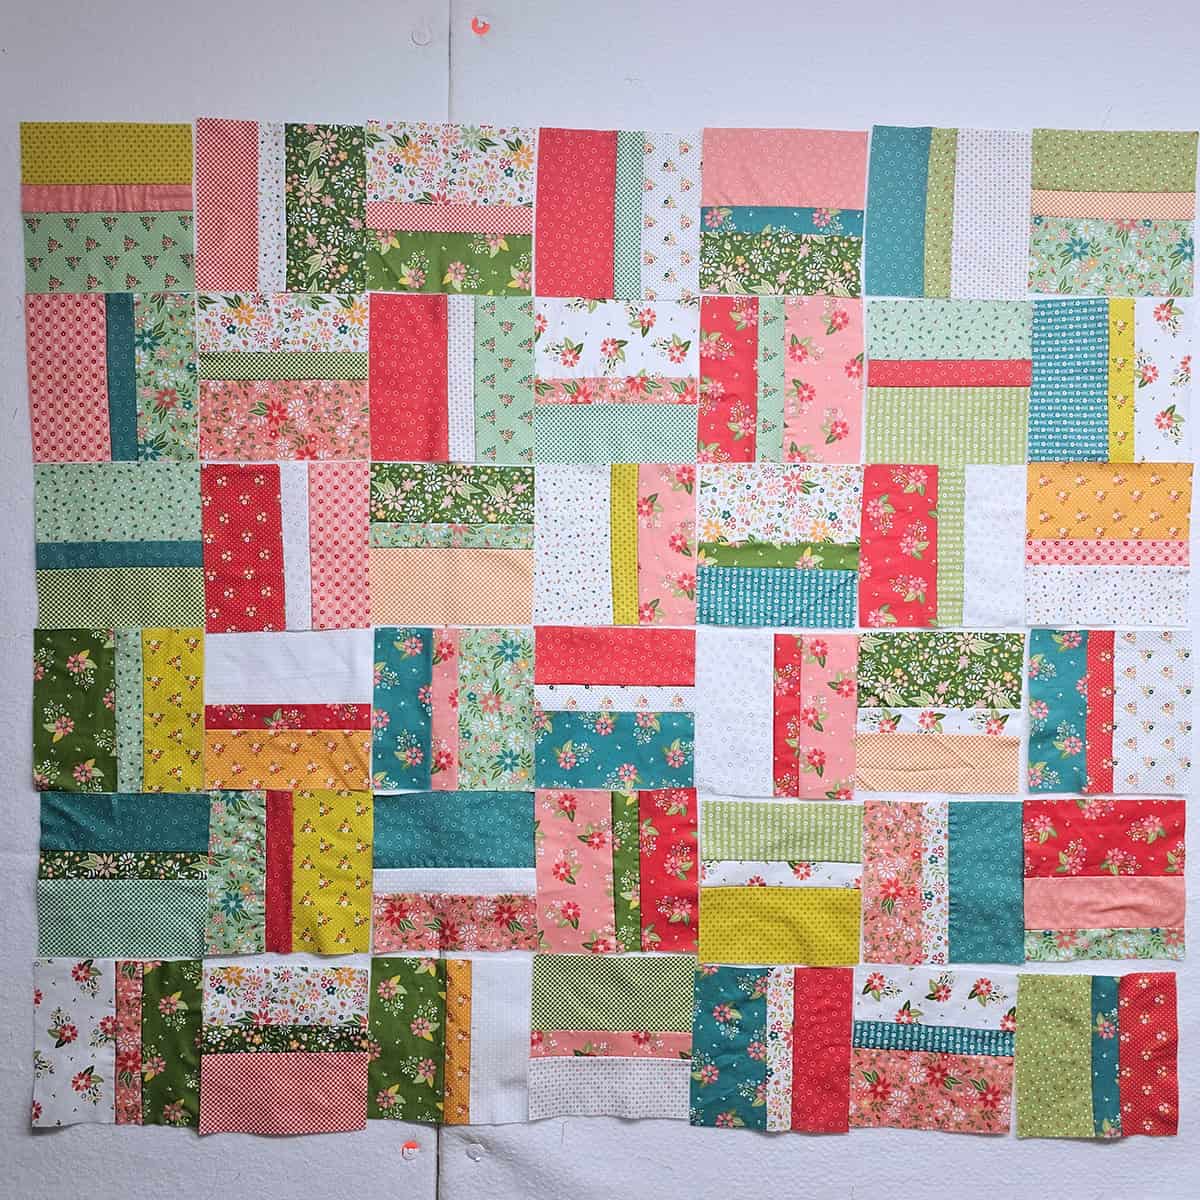
Sew Rows
Sew the rows together. I’m a little eccentric so I leave my blocks up on the design wall as I sew the blocks together. I do a bit of walking, sewing, pressing and then back to my design wall. That way I get a little bit of exercise.
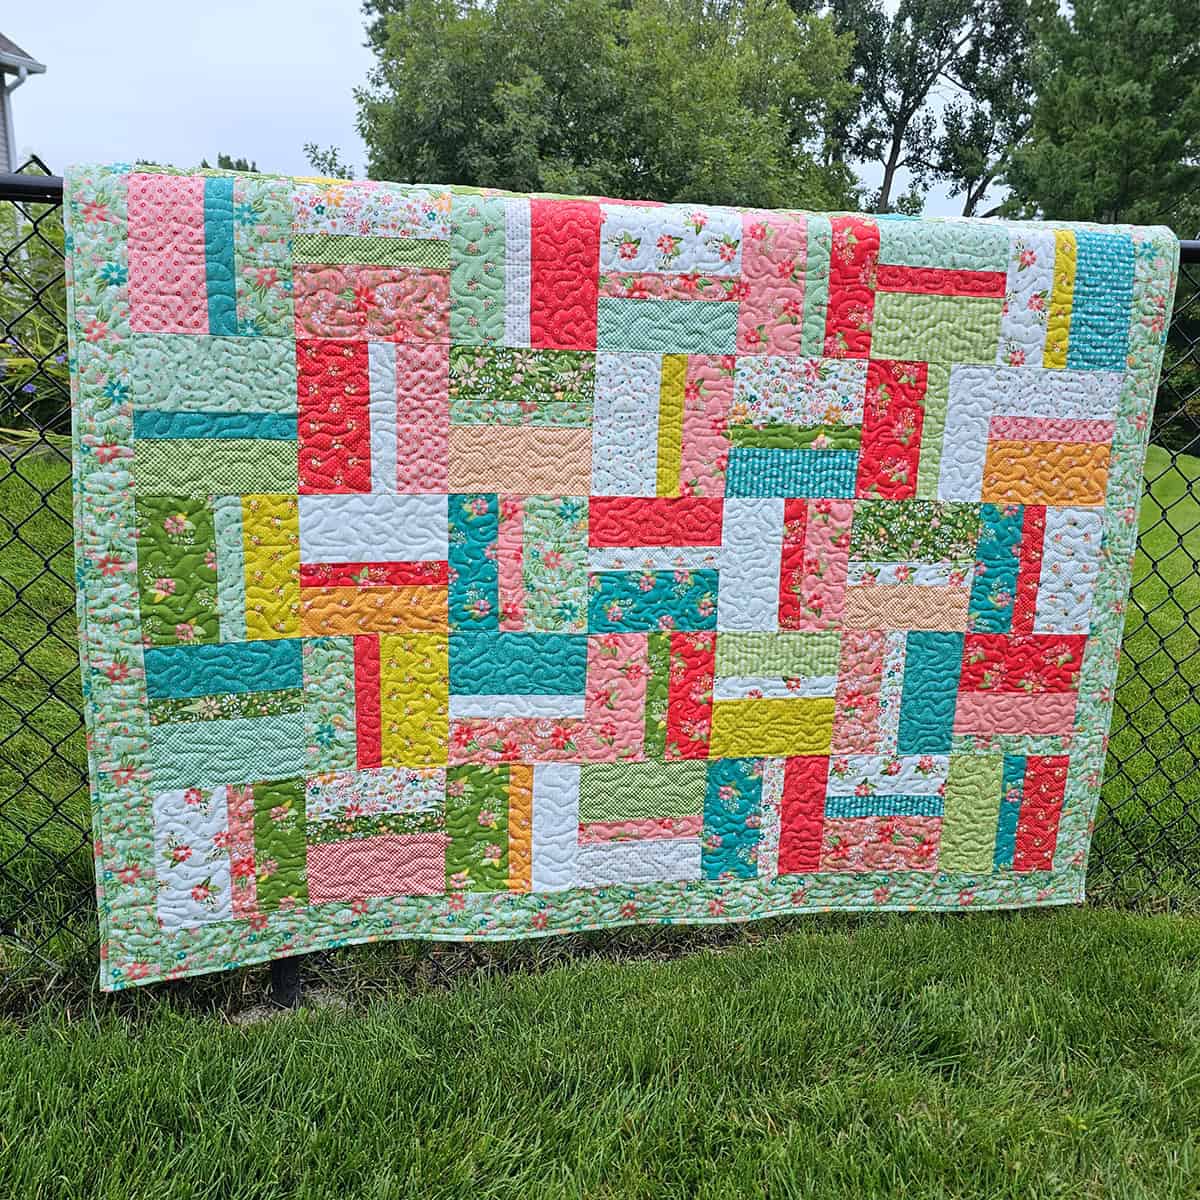
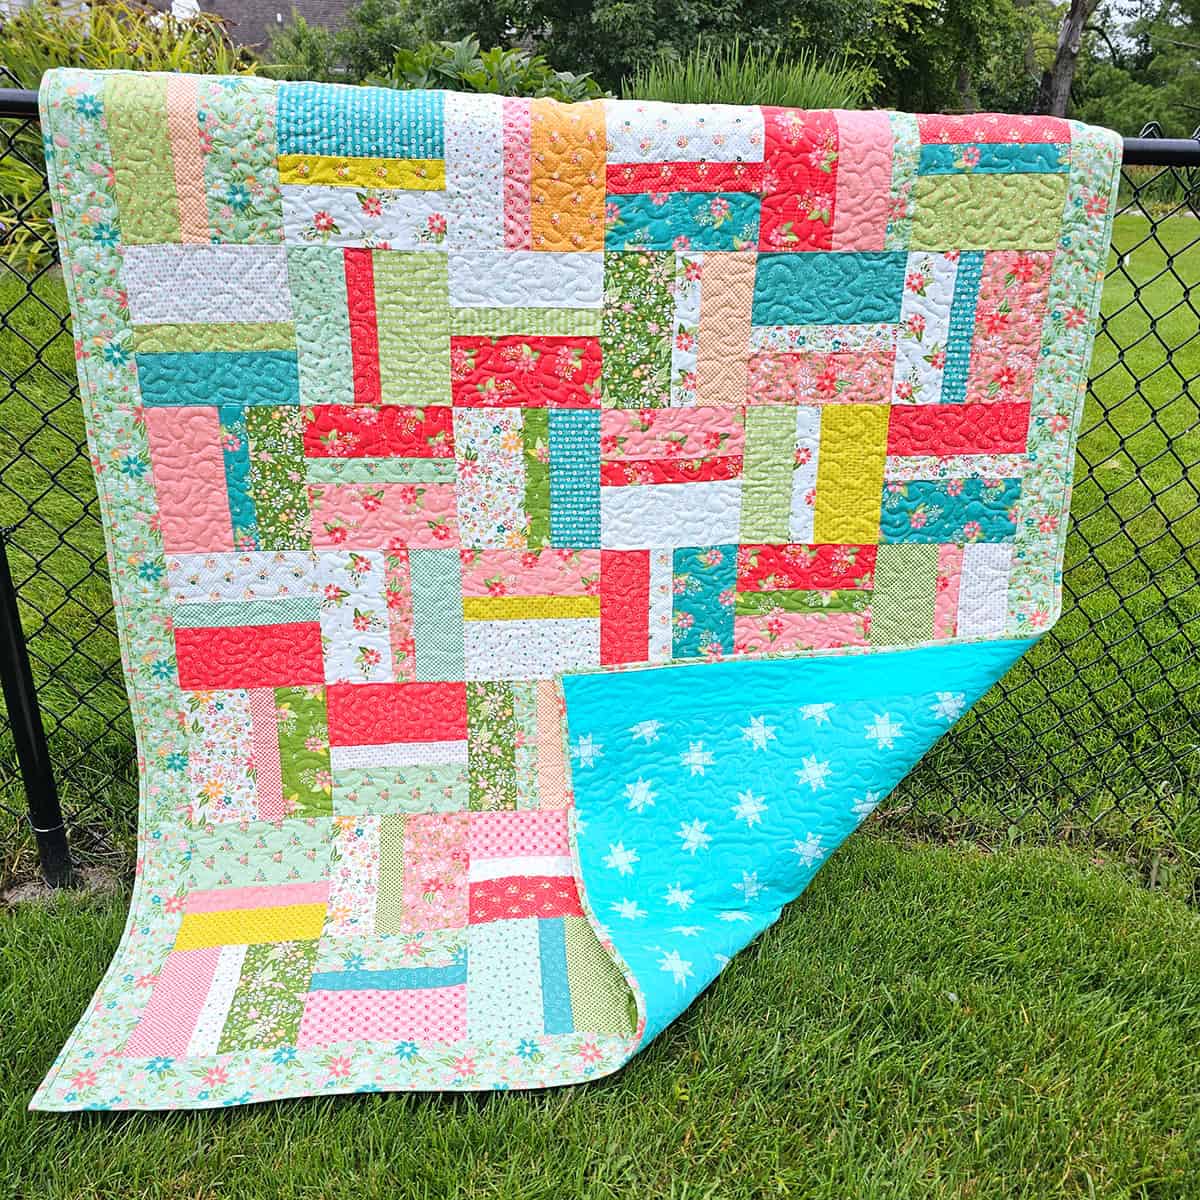
Next sew the rows together. Here is my quilt without a border.
The quilt is approximately 51 inches by 59 inches.
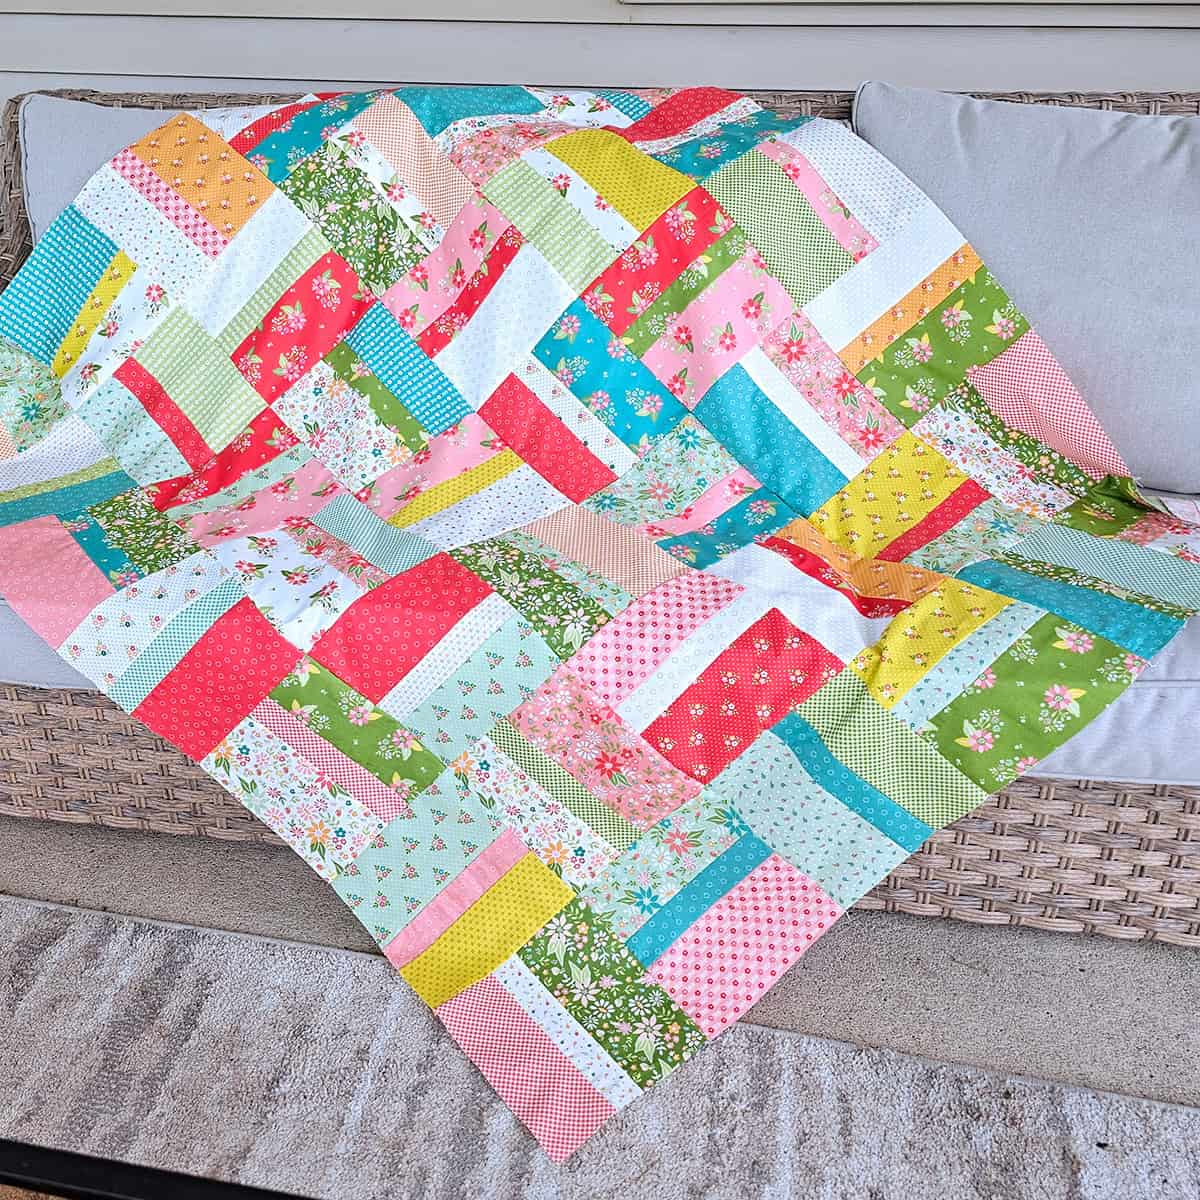
Adding a border for a 57″ x 65 1/2″ Quilt
I had a 1 and 1/4 yard piece of fabric from the Strawberry Lemonade collection that I used for the border. I cut six 3-1/2 inch strips the width of the fabric and then joined them together to use for the border.
I measured the short sides of the quilt (51 inches) and cut 2 strips that size and added them to the quilt.
Then I cut 2 more strips that were 65-1/2 inch each and added them. This gives me a 3 inch border. If you have more fabric you could add a larger border or use several fabrics to have borders of several colors.

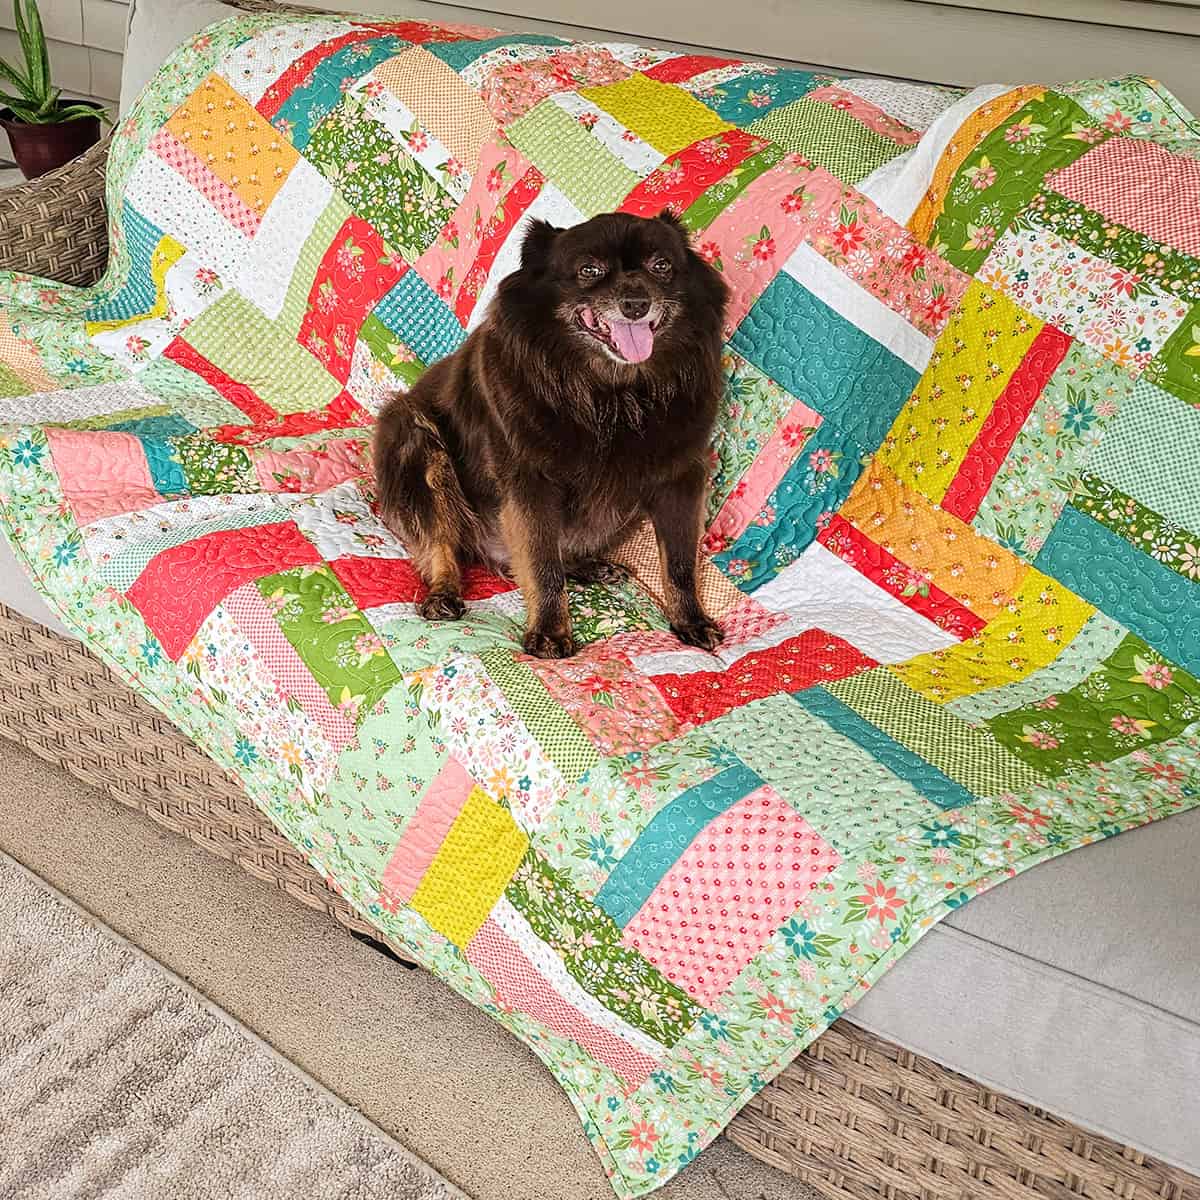
Quilt Finished
I quilted this on my Noltings longarm sewing machine. I had to get a photo of my little model Rusty.
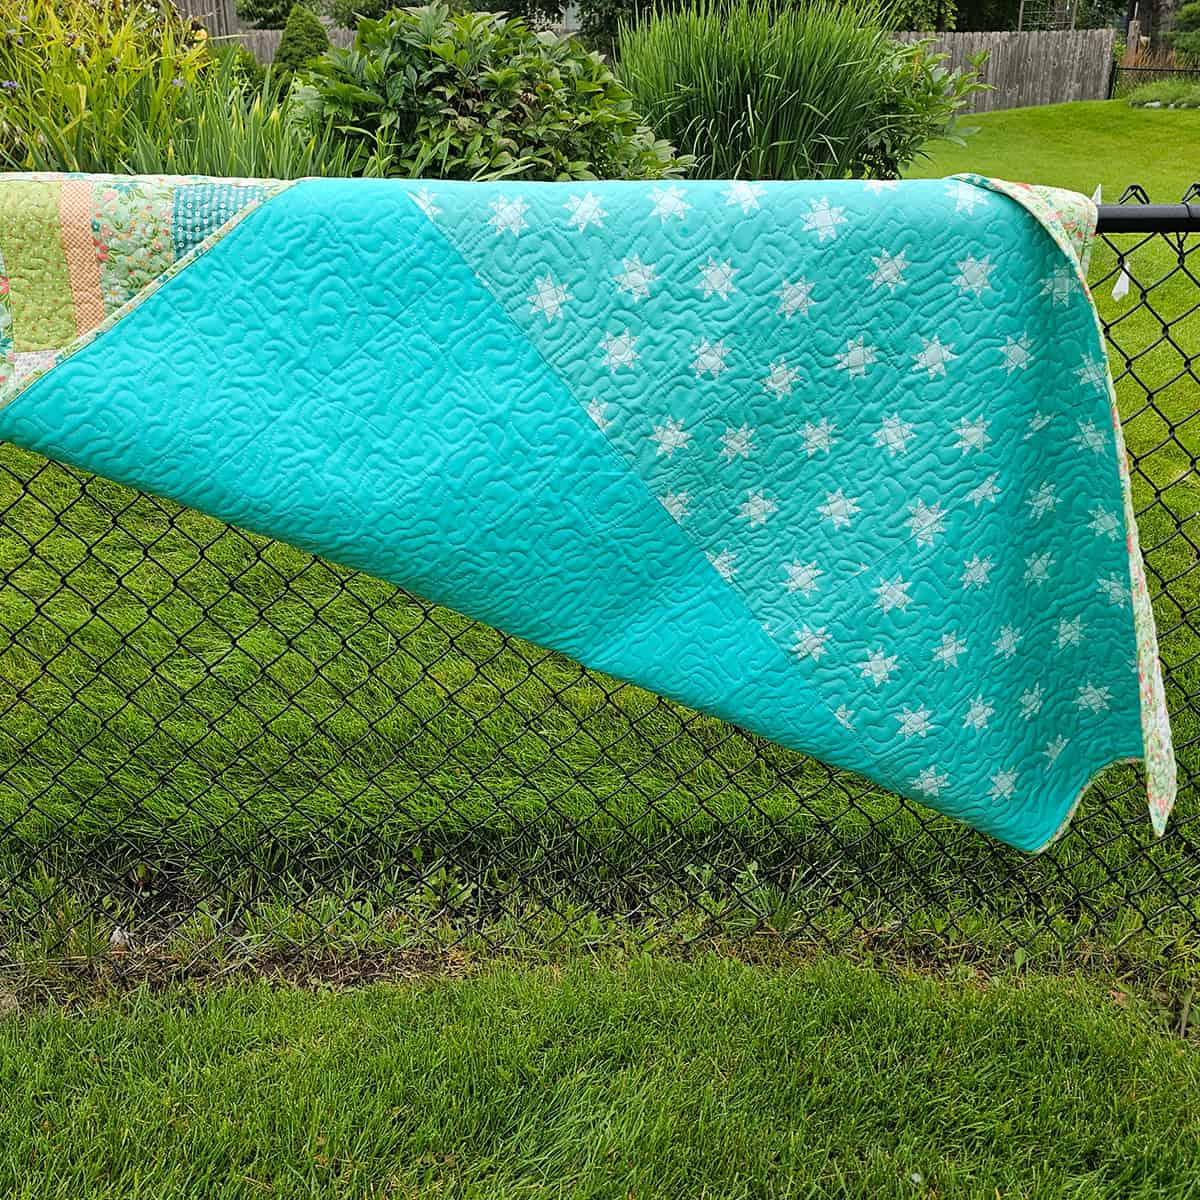
Backing Fabrics.
I had a teal Bella cotton and also some of the backing fabric I used on my Quilt Town Stacks quilt for the back. I almost goofed up as I forgot to add extra backing when using the longarm. There was just enough backing.
I also had just enough fabric to add 2-1/2 inch binding of the same fabric.
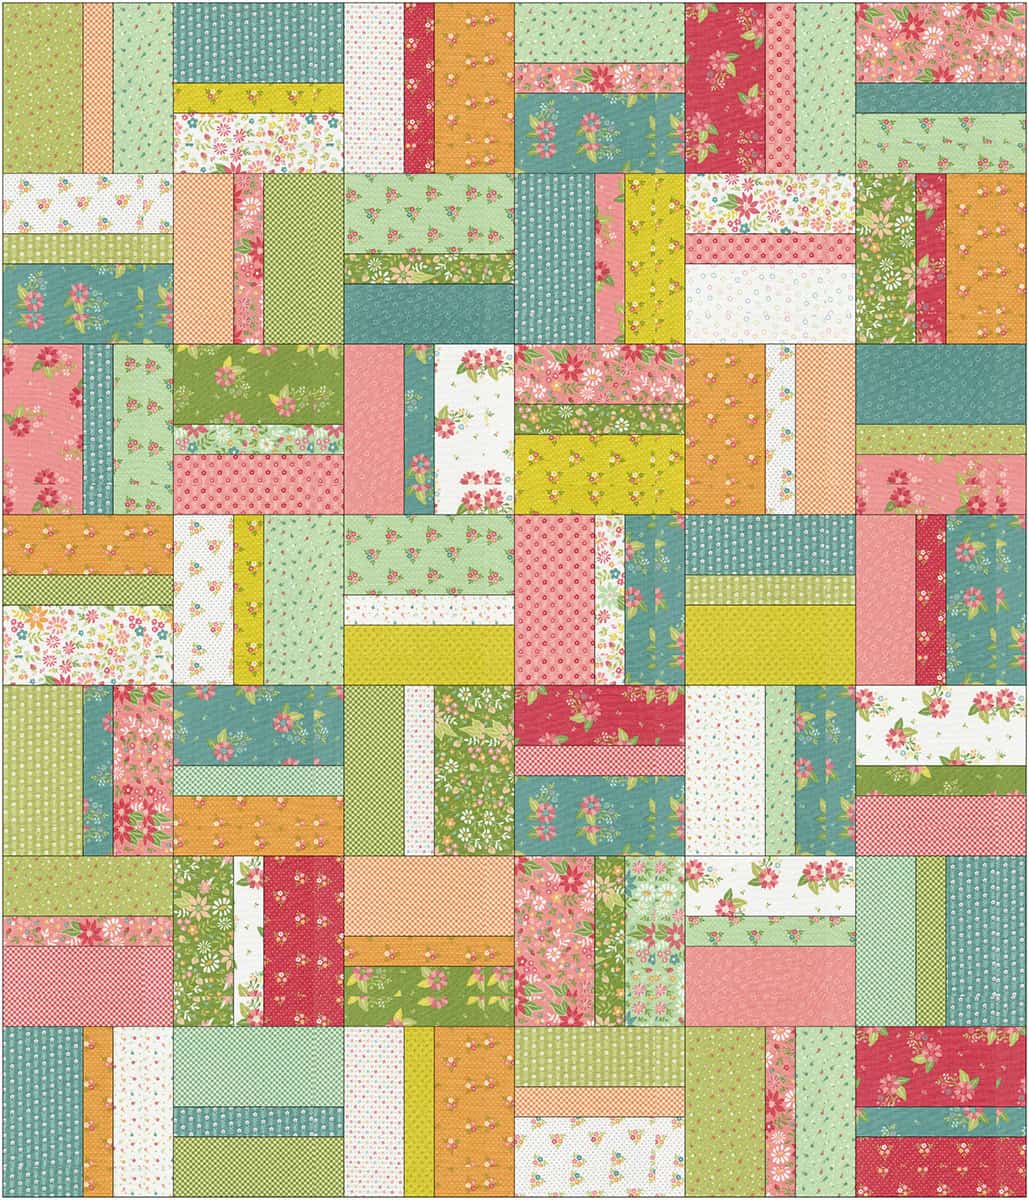
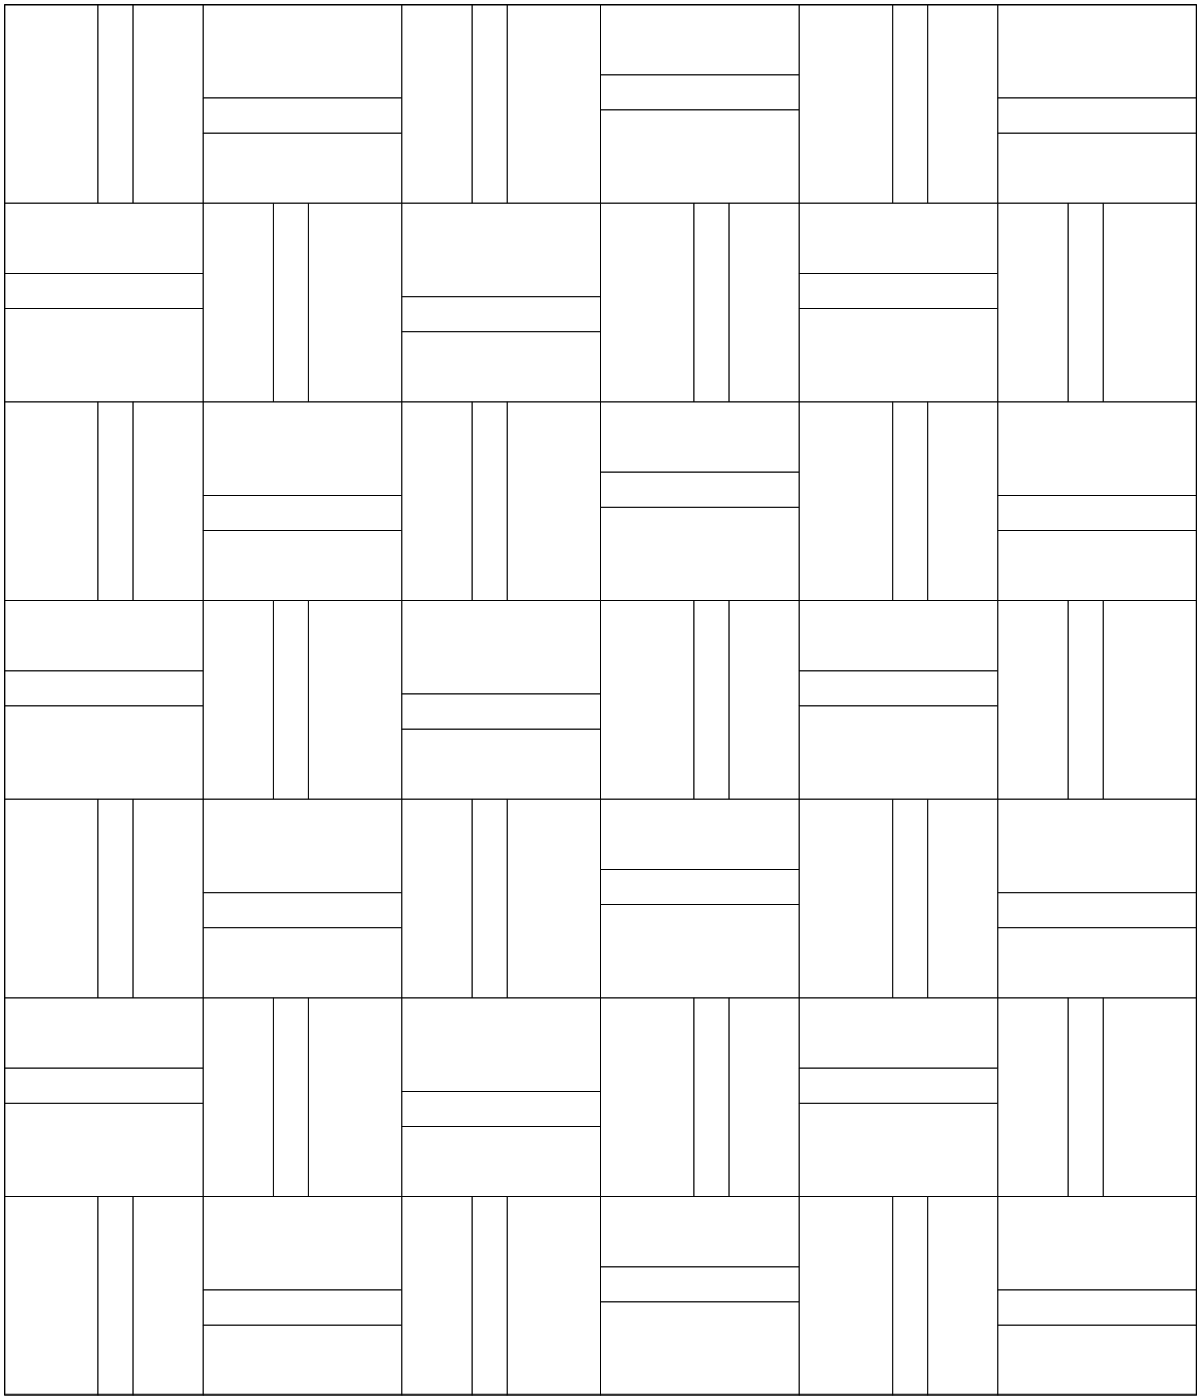
Electric Quilt
Here is a mockup I did in Electric Quilt, I also have a black/white diagram that you can use to color in fabrics you like.
Colorburst Quilt
I hope you have enjoyed this quilt tutorial for the Colorburst quilt and if you make one please email me a photo of it.
PDF of this tutorial
If you would prefer a PDF of this tutorial, I have just added it to my shops. It will have NO ads in it and is 7 pages which includes a black/white coloring diagram for you.
Please note this post contains affiliate links, which means I’ll earn a small commission if you purchase through my link at no extra cost to you. Please see full disclosure here. As an Amazon Associate, I earn from qualifying purchases.
Great deals for you!
Looking for great buys on fabric and things? Check out these links
- Fat Quarter Shop Daily Deals
- Green Fairy Quilts – Daily Deals
- AccuQuilt Deals and current offers
- Connecting Threads
- Missouri Star Quilt Co- Daily Deals
- Cardmaking & Scrapbooking
- Sizzix
- The Quilt Keeper
- SewingMachinesPlus
- Electric Quilt
- My Amazon Store for all the quilting things I use and more

About Connie
Hi, I’m Connie Kresin Campbell, the quilter, writer, and photographer behind Freemotion By the River. I enjoy inspiring others with my quilt tutorials and patterns. You’ll also see my sweet adopted dogs from time to time.
Be sure and subscribe to my newsletter for more free tutorials and printables.
I like this pattern very much and will be trying it soon. Before you assembled the quilt, did you notice that one of your blocks is sewn together with the small strip on the outside? In the photo under the caption “Quilt Blocks” it is the block in the lower right corner in the second row along the edge. It never ceases to amaze me that we can handle pieces over and over and still overlook that one of them isn’t correct. Guess that is what makes them handmade and special. Thanks again for a wonderful pattern with so many possibilities. Happy Spring.
You are very observant Sue, I never realized I did that or should I say it is always fun to add a mistake “on purpose”..LOL
Love the colors you used! Love the dog pics. My dogs love to snooze at my feet while I quiltstay warm! We’rein a cold spell here in Omaha.
We are having a cold spell here in Iowa also.
Connie, I may have said this before, but in case I haven’t, I think it’s great that you admit to making mistakes and show them in your posts. It makes you all the more “human” and helps me to realize even the pros make mistakes. Thanks for sharing.
Love it, and looks so easy. Rusty approves too.
Very pretty quilt. I don’t have a 10″ layer cake, but I could cut out 10 inch squares of other coordinating fabrics.
Such a pretty quilt with an easy piecing technique! Thanks for the tutorial Connie.
I love your Colourburst Quilt and as I have literally tons (slight exaggeration) of scraps, this is the perfect quilt to make. I’ve made two string quilts with a small portion of my scraps and this quilt will use up some more. I like looking at all your designs.
A Canadian fan. 🇨🇦
You amaze me! All your quilts are beautiful. One thing…..DO YOU EVER SLEEP?
I love this design! It would also be a good scrap buster.
I love how happy Rusty looks. Rescue pets are so sweet. Right now we have a 15 year old cat that adopted us 7 years ago. Before her, we had adopted a 7 year old lab/border collie from CARE. He lived to be 17. They give us a lot of joy.
Hi Connie – Just a thought after reading your instructions – after cutting the 10 squares – would it work to “turn” each section under
like the “9 Fat quarter quilt” which I love making? Seems like each
block then would be different in itself and you wouldn’t have any
repeats? Your thoughts Thanks for all your great ideas Addie
Another pretty and bright quilt. I also used a layer cake (and charm pack) of the Strawberry Lemonade fabric and really liked the results. I, too, like Sherri and Chelsi’s fabrics and so many other designers too!! I think I have a layer cake so I may be able to make this.
It’s such a nice summery looking quilt. Nice pattern too. I’ve been using the Raspberry Summer fabric for a quilt and it is a nice line too. You can send some heat to us. We’ve only hit 80* two times this month so far. It’s been so foggy and cool.
Thanks for another beautiful quilt , you have so many great ideas. I love the colors. Stay well you two
Beautiful quilt. I love the fabric collection also, so bright and happy colors.
I have several of the Slimline lights for my machines. They give very good light, but take up very little room.
This is beautiful!
Another lovely quilt design – beautiful colours and not too difficult to make. It has Rusty’s stamp of approval.
Thank you for sharing.
I’ve just started making a Split Rail Fence quilt.
This Colour burst quilt is next.
It will take me a while to get both quilts made.
Yeah, Rusty!
Oh I love this quilt pattern. Its simple yet beautiful. And Rusty looks as cute as ever!! He is a great model.
Pat B.
Thanks for the great tutorial. I have just the layer cake for this quilt.
Connie , This is so pretty . It’s so summery & colorful . It would be a great summer tablecloth for a picnic or outdoor party .
Thank you Connie! I keep finding stacks of layer cakes as Im “organizing” my craft room lol! Love this pattern!
So pretty! Thanks for sharing. 🙂
Thank you for all the inspiring quilt tutorials you provide. They are always easy to follow and sew into pretty quilts.
These are lovely! I agree, quick and easy is the best, particularly with so much going on during the summer. Thanks for sharing this pattern. I will definitely add to my future projects.
Connie:
Love the pattern and your choice of fabric…love Sherri & Chelsea too…and I just happen to have Laguna Sunrise which would be perfect. As always, I love Rusty the best!
Beth