
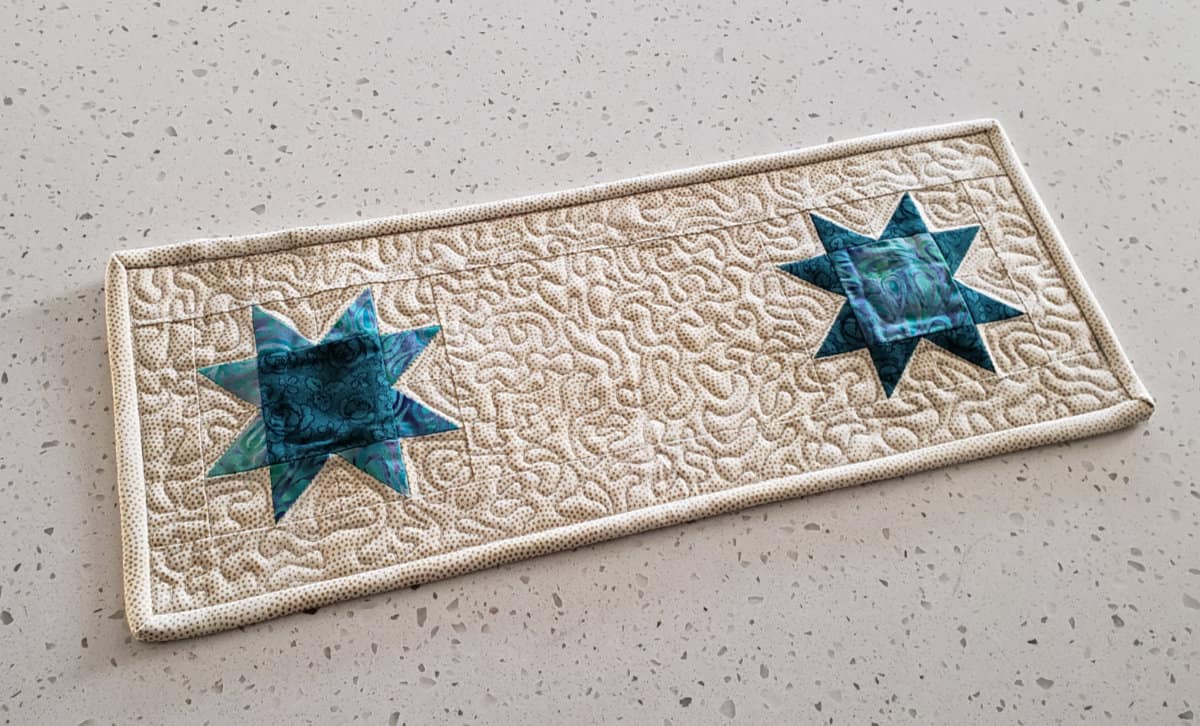
Sawtooth Star Mini Table Runner
This post may contain affiliate links which won’t change your price but will share a commission.
Sometimes it is fun to try out a new quilt block and then create a simple quilt project like a mini table runner.
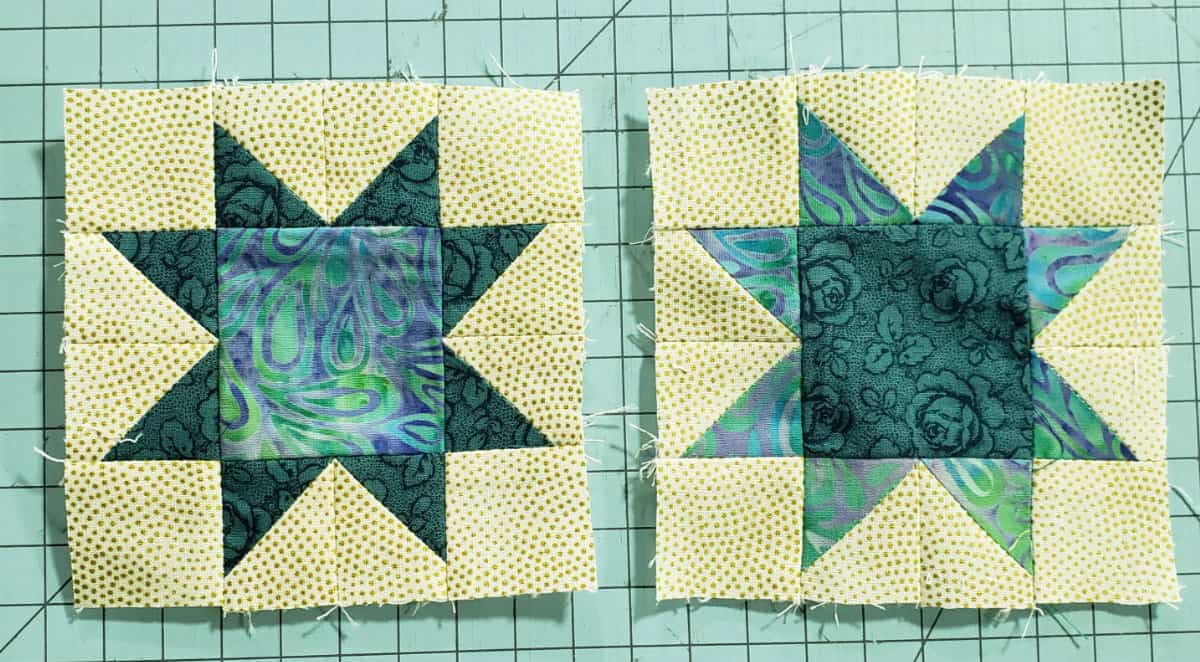
That is what I did with two tiny 4-inch sawtooth star quilt blocks.

Sawtooth Star Quilt Block Sizes
I originally shared the 8-inch Sawtooth Star quilt block and then the 4-inch Square and Points quilt block and also printable directions for the blocks in 5 different sizes.
Time got away from me and I never did anything with the quilt blocks until now. I decided to use my seam ripper and change the Square and Points quilt block to another Sawtooth Star quilt block.
I now had two 4½-inch unfinished quilt blocks.

Mini Table Runner 6½” x 16″
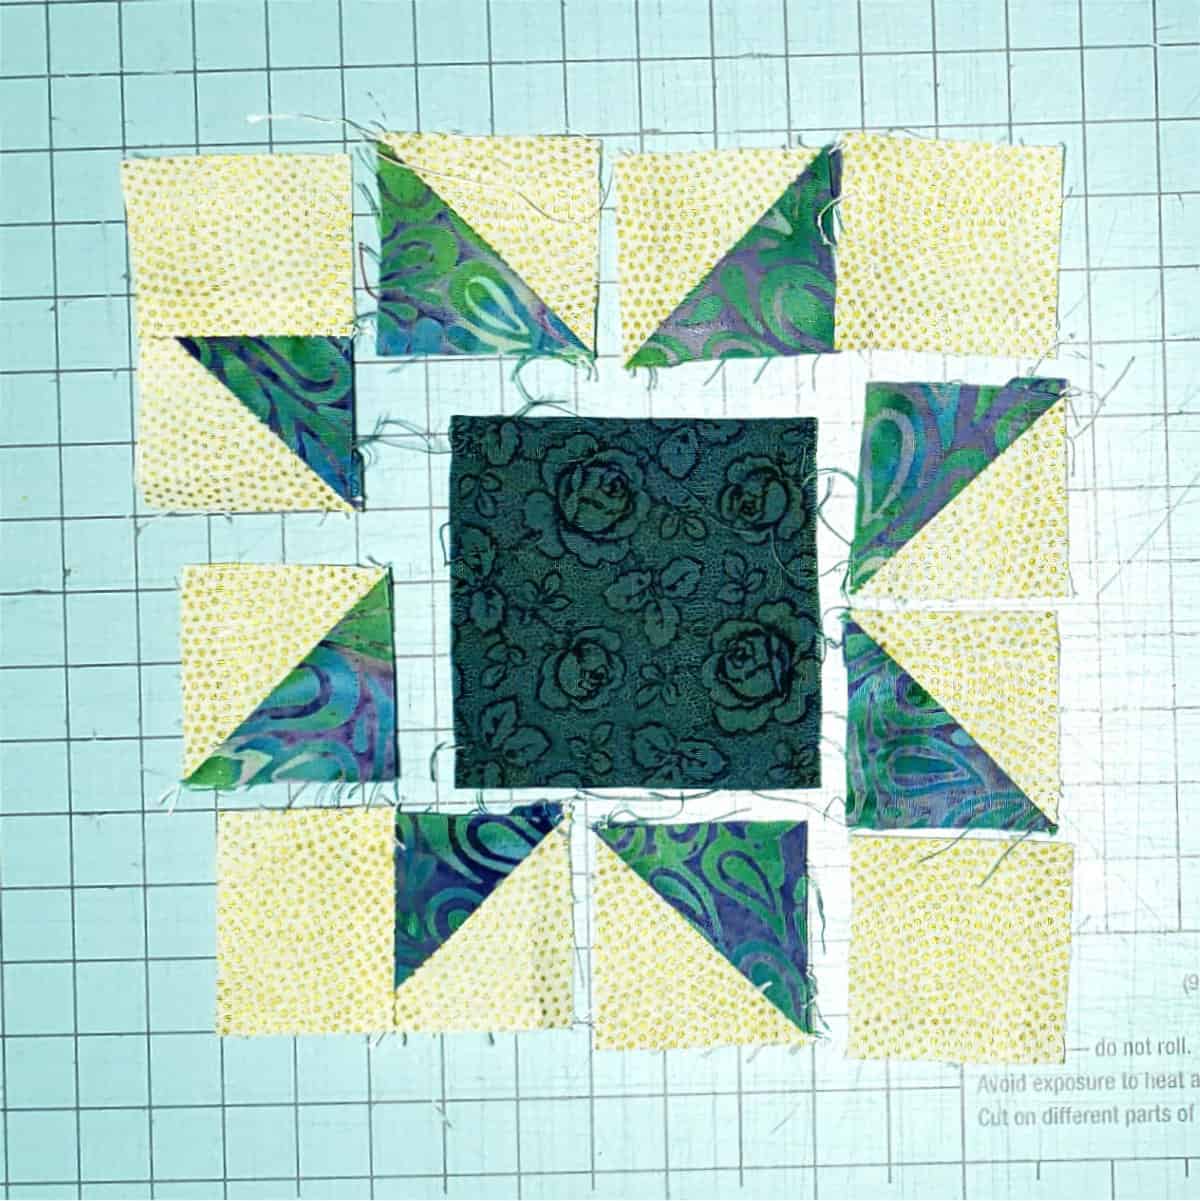
Cutting Directions:
- Teal – cut (1) 2½” x 2½” square
- Teal – cut (4) 1-7/8″x1-7/8″ squares for HSTs
- Dark Teal – cut (1) 2½ x 2½” square
- Dark Teal – cut (4) 1-7/8″x1-7/8″ squares for HSTs
- Cream – cut (8) 1-7/8″x1-7/8″ squares for HSTs
- Cream – cut (8) 1½” x 1½” squares
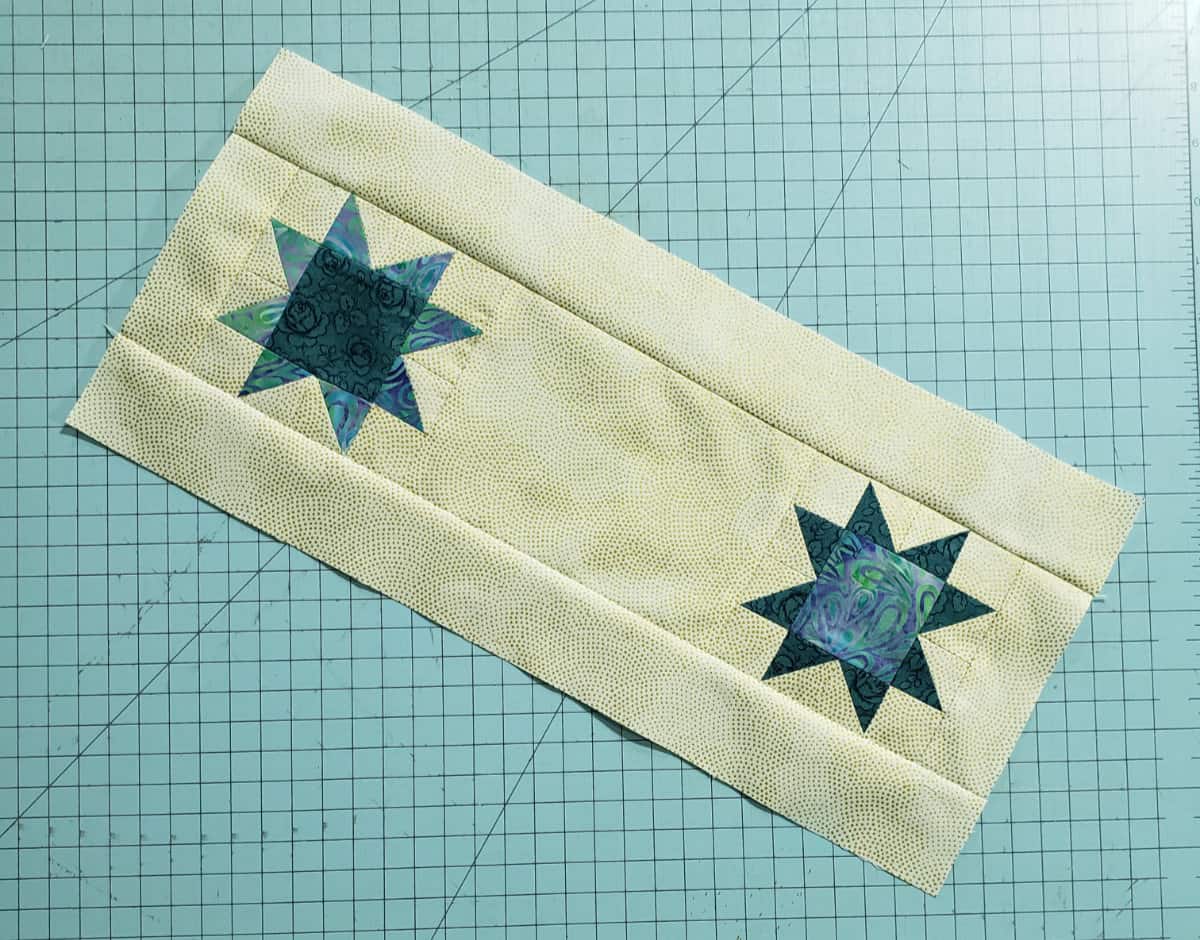
- Cream – cut (1) 4½” x 6½” rectangle for center
- Cream – cut (2) 1½” x 4½” strips for the sides
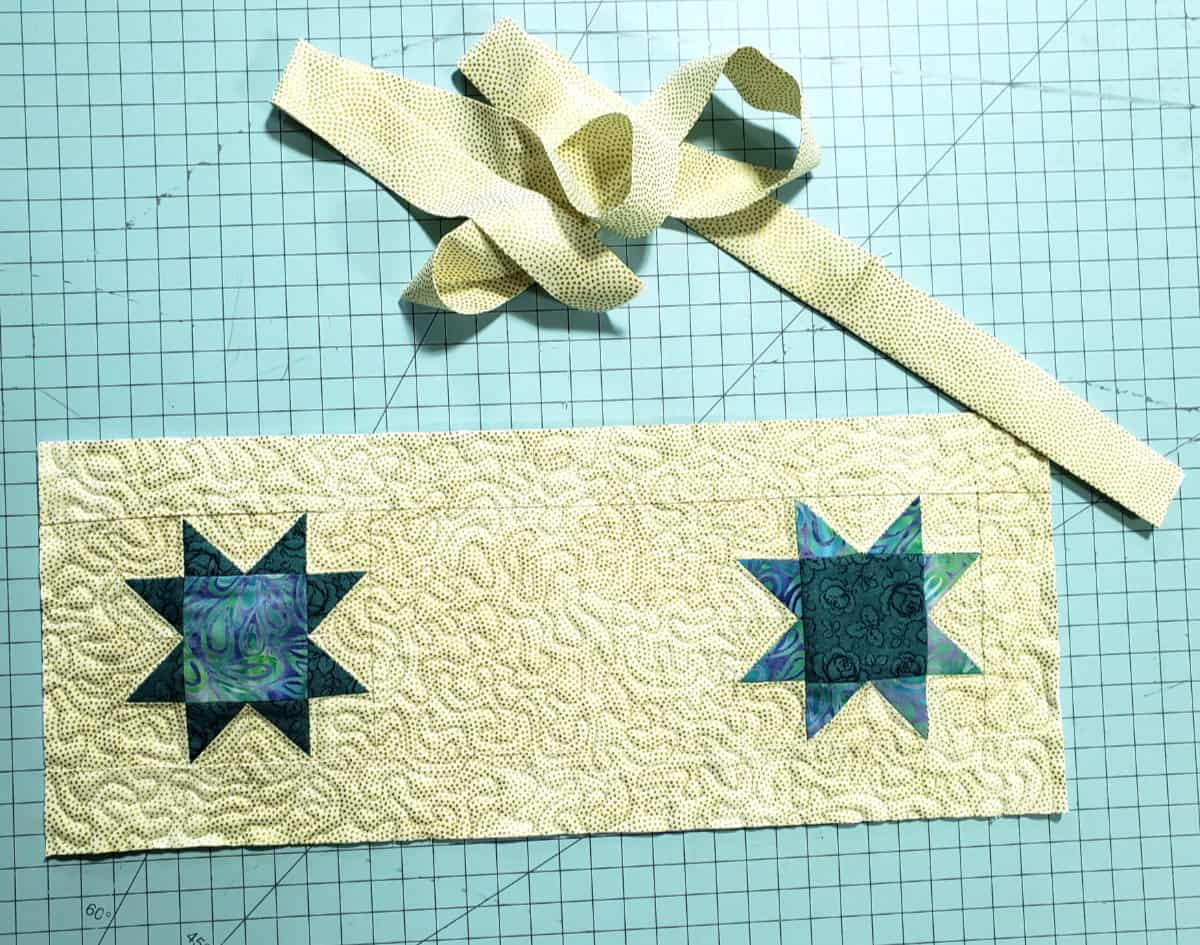
- Cream – cut (2) 1½” x 16″ strips for top & bottom (measure runner before cutting)
- Binding – cut (2) strips 2¼” x WOF
- Backing fabric and batting at least 7″ x 17″
Sew with a ¼-inch seam allowance.
4-inch Qube set
I like making small quilt blocks using my AccuQuilt GO! cutter and the 4-inch Mix & Match Qube set.
You can also piece your half-square triangles using the directions below.

Normally I would press the seams to one side but this is a very small quilt block so I decided to press all of the seams open. Be sure to read the Sawtooth Star piecing directions if needed.
Once you have both quilt blocks pieced and pressed, add the 4½” x 6½” rectangle in between the blocks for the center of your mini table runner.
Next, add the 1½” x 4½” strips to the sides. Measure your piece and then add the 1½” strips to the top and bottom.
Quilt the Mini Table Runner
Add your backing and batting to the mini table runner top and then quilt as desired. I just did some simple freemotion meandering using a 40 wt Aurifil thread.

Add Your Binding
Piece the (2) 2¼” strips together for your binding. Fold in half lengthwise, press, and sew to the front of your mini table runner. Add your binding to the mini table runner using this method.
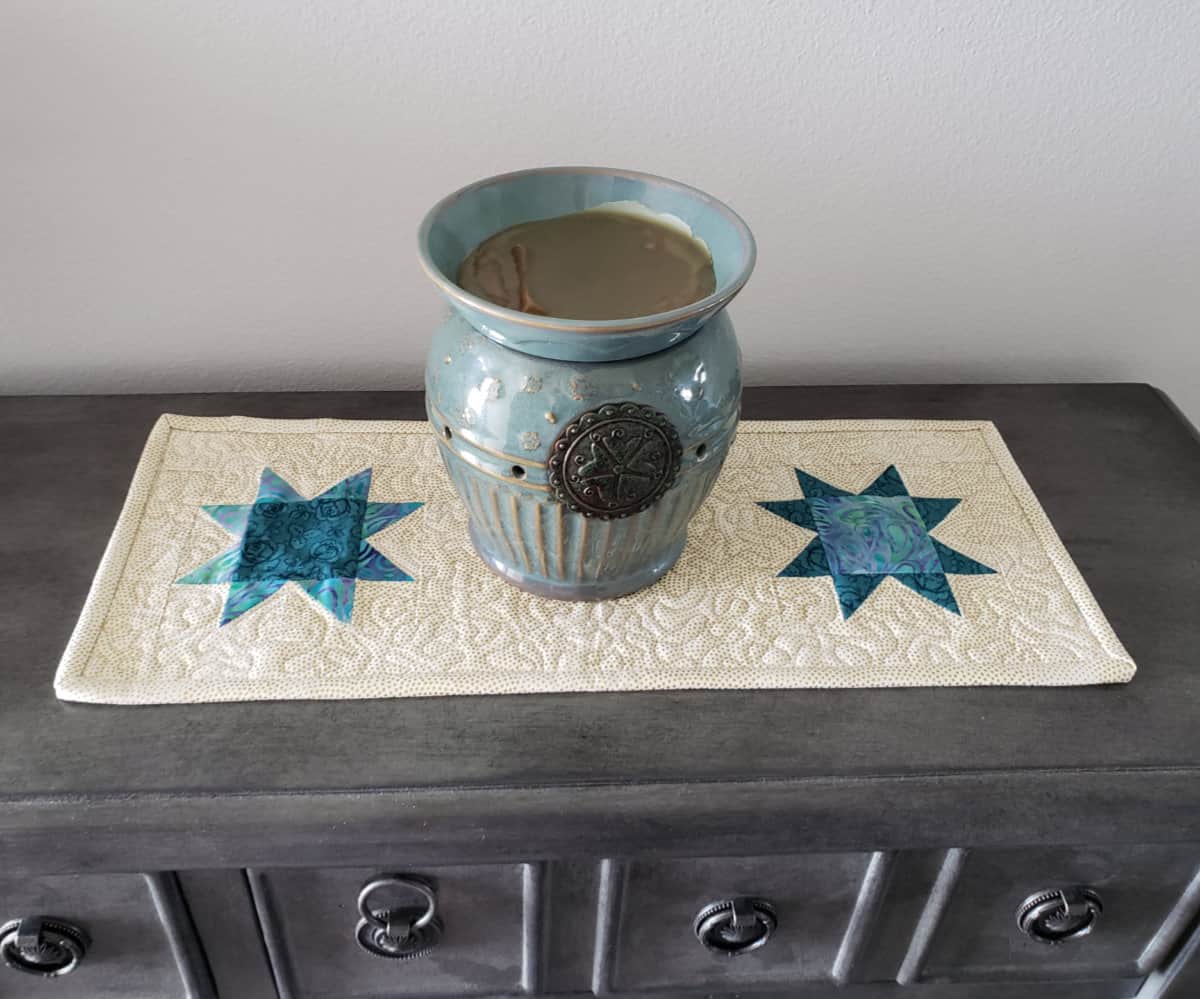
This photo shows the colors better
Please note that this post contains affiliate links, which means I’ll earn a small commission if you purchase through my link at no extra cost to you. Please see the full disclosure here. As an Amazon Associate, I earn from qualifying purchases.
My Scentsy Wax Warmer fits perfectly on my little runner. I didn’t realize until now that you can buy them on Amazon! Here are a couple you might like. Teal Scroll Ceramic Candle Warmer or this one.
The best thing about small quilt projects like this is that it is a great way to test out a quilt block or practice your freemotion quilting! I hope you have enjoyed it!
Don’t forget that you can find the PDF for the Sawtooth Star quilt block in my Library.
Great deals for you!
Looking for great buys on fabric and things? Check out these links
- Connecting Threads
- AccuQuilt Deals
- Fat Quarter Shop Daily Deals
- Green Fairy Quilts – Daily Deals
- Missouri Star Quilt Co – Daily Deals
- Scrapbooking
- The Quilt Keeper
- SewingMachinesPlus
- Electric Quilt
- My Amazon Store for all the quilting things I use and more

About Connie
Hi, I’m Connie Kresin Campbell, the quilter, writer, and photographer behind Freemotion By the River. I enjoy inspiring others with my quilt tutorials and patterns. You’ll also see my sweet adopted dogs from time to time.
Be sure and subscribe to my newsletter for more free tutorials and printables.
Connie, What a beautiful and quick table runner! Using the light background fabric really shows off the stars!
Love the idea of making this to practice free motion quilting…and to use up all those scraps we save.
Thanks for all your wonderful and helpful ideas.
Such a cute mini runner, Connie!
Love the tip about making the triangle block 1/8″ bigger. Somehow even with careful planning and measuring I often fall short. Last quilt I made was 60 triangles! Just trying to use up some fat quarters. (Impulse buys when I can think how many yards to buy – LOL)
Beautiful! Love the balancing of the mini runner!