
Sawtooth Star quilt block
This post may contain affiliate links which won’t change your price but will share a commission.
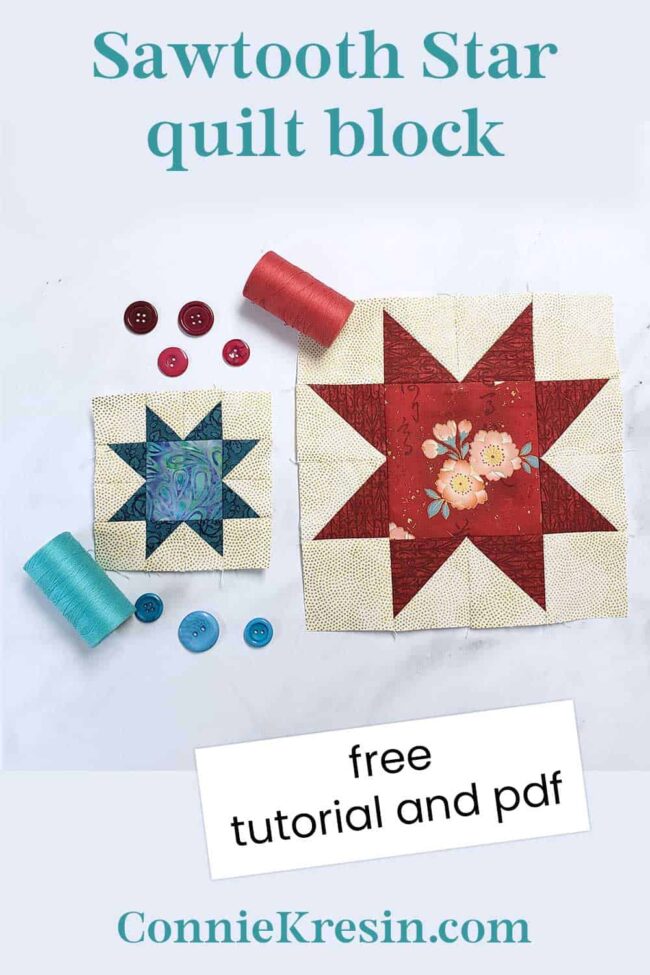
I think it is always fun to see a quilt block in different sizes. The small sawtooth star quilt block is 4½-inch unfinished and the larger one is an 8½-inch unfinished block. I also have a downloadable pdf with 3 other sizes of blocks.

Sawtooth Star quilt block tutorial
To make the sawtooth star quilt block, you will cut your pieces the same size as I showed you for the Square and Points block. Someone mentioned it looked like a buzzsaw and I think that sounds like a neat name.
8-inch finished quilt block
Directions are for the 8-inch quilt block, I also have cutting directions for the 4-inch, 6-inch, 10-inch, and 12-inch blocks that can be downloaded from my resource library.
Cutting Instructions:
- Red print – cut (1) 4½” x 4½” square
- Dark Red – cut (4) 3″x 3″ squares for HSTs (instead of 2-⅞” x 2-⅞”)
- Cream – cut (4) 3″x 3″ squares for HSTs (instead of 2-⅞” x 2-⅞”)
- Cream – cut (4) 1½” x 1½” squares
Sew with a ¼-inch seam allowance.

Directional fabric
The dark red fabric that I used for my half-square triangles (HST) was a stripe which is a directional fabric. To make sure the stripes all go the same way, you will need to draw on 2 of the cream squares with a diagonal line going one way and 2 going the opposite direction as shown below.
Sew a ¼-inch seam on each side of the diagonal line and then cut on the diagonal line. Press toward the dark red fabric.

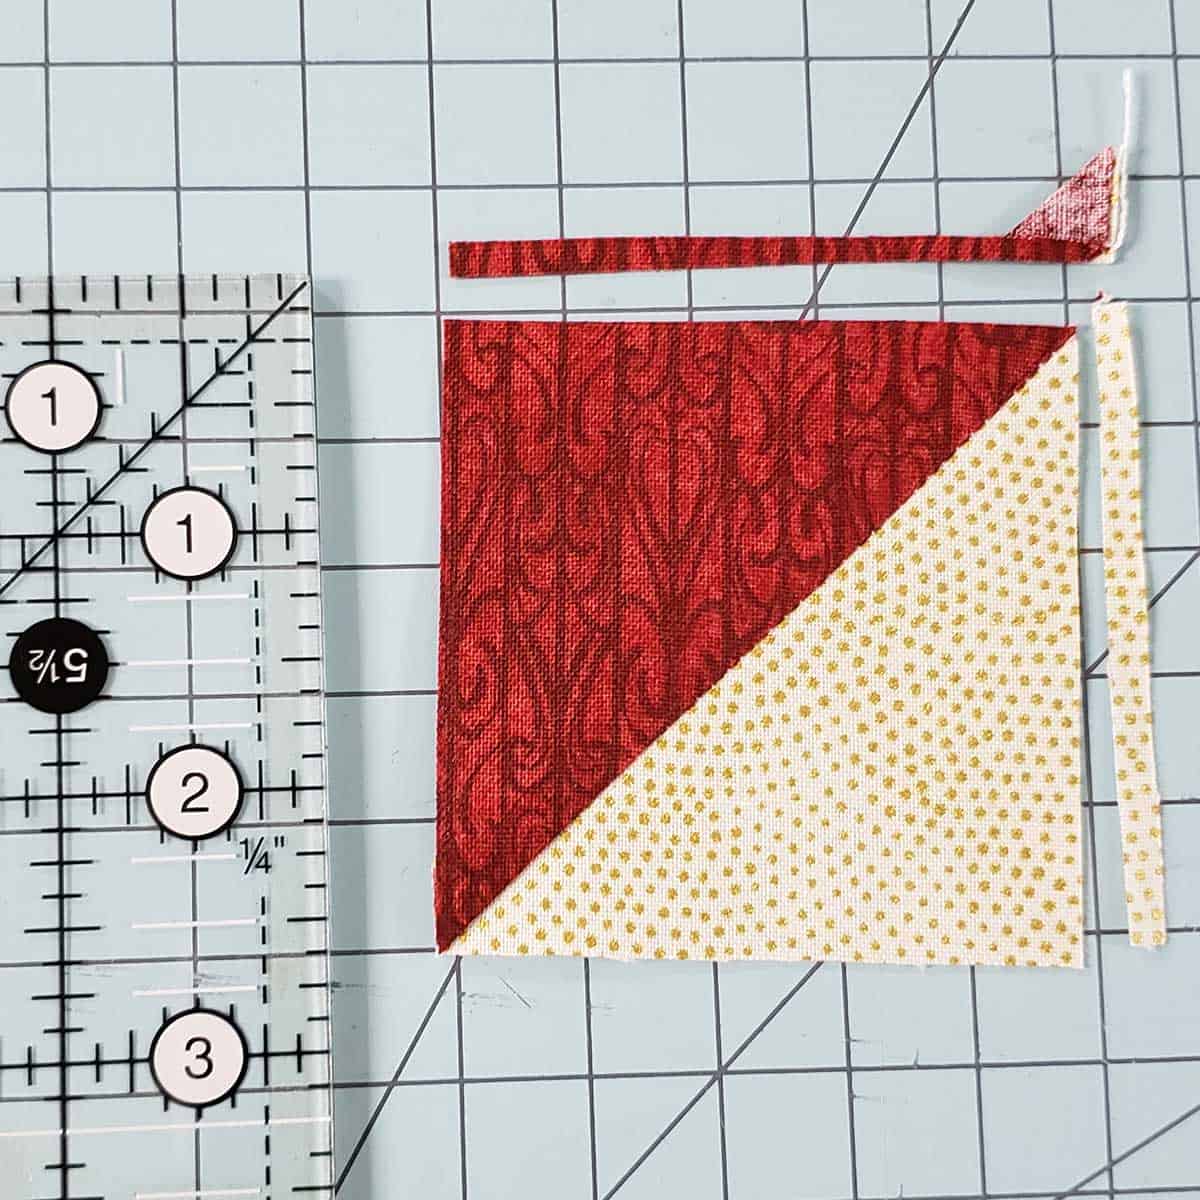
If I’m not using my AccuQuilt cutter and HST dies, I prefer to cut my squares a little bigger and then trim them to size.
To trim my HSTs to 2½-inches square, I am using the Creative Grids 6.5″ Quilting Square Ruler. I also added some washi tape just a little past the 2½” lines. I want to be able to see the lines and the tape is just to make it easier for me to see where I will trim.

This is the amount that is trimmed off of the blocks.
Use the 8-inch AccuQuilt GO! Qube
This would also be a fast and easy block to make with the AccuQuilt 8-inch Mix & Match Qube set. There are dies for the half square triangles and both sizes of squares.
Block layout and piecing
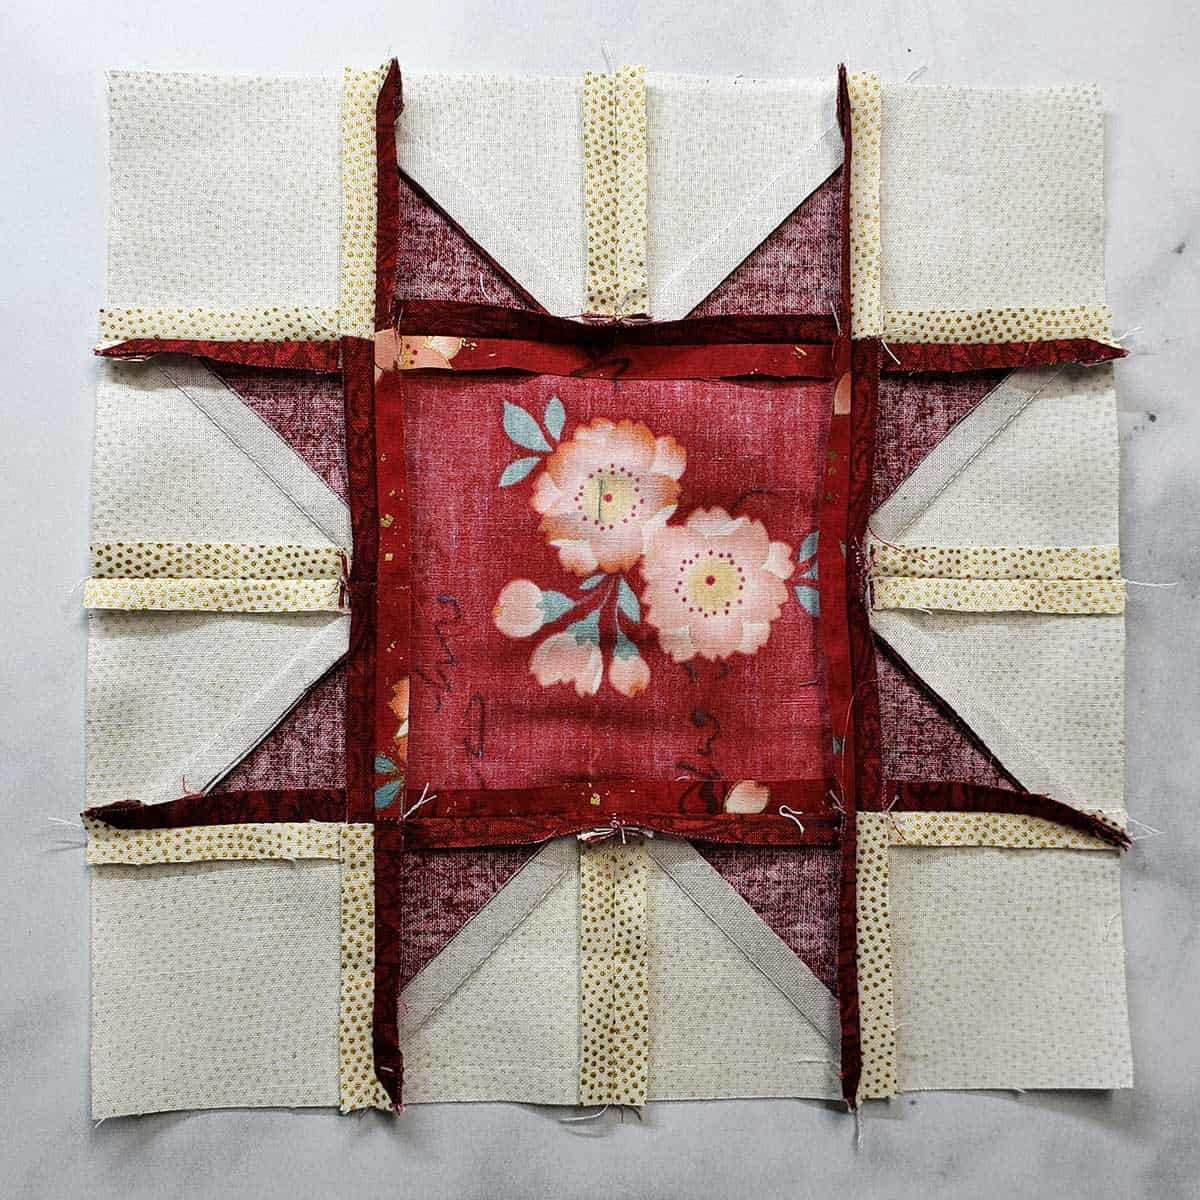
Layout the squares and half-square triangles that make up the Sawtooth star quilt block.

Sew the half-square triangles together, then add the small squares to the top and bottom row. Sew 2 half square triangles to each side of the large center square.

Finished quilt block – unfinished quilt block
Sometimes it is confusing when someone says an 8-inch block or an 8½-inch block. Here is your 8½-inch unfinished quilt block. It includes ¼-inch on each side that will be the seam allowance. This will be an 8-inch block when completed in your quilt.

I pressed the half-square triangles to the dark red fabric but all of the other seams were pressed open. If you plan on quilting by stitching in the ditch, you would want to press the seams to one direction.
I have a tailor’s clapper that works very well to flatten and press the seams. It is made out of hardwood. You just press the seam open and then place the tailor clapper on it for a minute until it cools.
This photo shows you the difference in size. One is the 4-inch and the other is the 8-inch block.

I am using a batik for the center square, the same teal rosebud print that I used in the Square & Points quilt block, and the same background fabric.

When I made the 4 inch Sawtooth star quilt block I also pressed the half square triangle blocks open because the block is so small. You can do that or press them to one side.

Get the FREE PDF quilt block tutorial
To receive the free PDF for five different sizes of the Sawtooth Star quilt block, fill out the form below and an email with the pdf will come to your inbox. Note: Current Subscribers can re-enter their names but won’t be double subscribed.

Don’t forget to check out the Square and Points quilt block tutorial
Great deals for you!
Looking for great buys on fabric and things? Check out these links
- Connecting Threads
- AccuQuilt Deals
- Fat Quarter Shop Daily Deals
- Green Fairy Quilts – Daily Deals
- Missouri Star Quilt Co – Daily Deals
- Scrapbooking
- The Quilt Keeper
- SewingMachinesPlus
- Electric Quilt
- My Amazon Store for all the quilting things I use and more

About Connie
Hi, I’m Connie Kresin Campbell, the quilter, writer, and photographer behind Freemotion By the River. I enjoy inspiring others with my quilt tutorials and patterns. You’ll also see my sweet adopted dogs from time to time.
Be sure and subscribe to my newsletter for more free tutorials and printables.
Thanks Connie.
Thanks, Connie. Also, thanks for the useful, different sizes. Surely makes life easier.
Hi Connie from the not-quite-yet frozen North (Canada). I plan to use all 5 sizes in one throw-size quilt. I’m not sure yet on the colour scheme but I know it’ll be a challenge arranging the blocks to fit into the size I want. Thank you so much for pattern. I’m also hoping you can help me obtain the free FQS 2017 QAL pattern for the Bella Skill Builder quilt. The link to the free pattern is no longer available. I’m hoping you still have an electronic copy you’d be willing to share with me please. Thank you in advance and Happy Halloween to you and your family.
Hi, I want to make a baby quilt using the 6 inch block but am not sure of measurements, would appreciate your PDF download for the different sizes as I might end up making a 8 inch star as well. Thanks, I have made some of your patterns and am going to make the River? one that I purchased a while ago, can’t remember full name of the pattern of hand, memory fails me sometimes. Thanks, Lucy