
Sienna Table Topper Tutorial
This post may contain affiliate links which won’t change your price but will share a commission.Are you like me and love quick quilt projects? I made this one yesterday after I was looking at a quilted wall hanging I made back in 2018 and never posted on my blog! Where does the time go??
I’ll share that one soon but I wanted to remake the blocks to make sure I “remembered” how to make them. Something else I always like doing is working with my scraps for a project that I have no idea how it will turn out when I start.
I have a bin of brown batik scraps that I used and see if you notice that the binding isn’t used anywhere in the table topper but blends perfectly!
Let’s make it!
Sienna Table Topper tutorial
15½ inch square

Materials
- Brown batik – 1 fat quarter or ¼ yard
- Brown print batik – 1 fat quarter or ¼ yard
- Dark brown batik – 1 fat quarter or ¼ yard
- Cream – 1 fat quarter or ¼ yard
- ¼ yard batik for binding
- ½ yard backing fabric
- batting
Cutting
- Brown – cut (4) 5½-inch squares
- Brown print – cut (8) 3-inch squares
- Dark Brown – cut (8) 3-inch squares
- Cream – cut (8) 3-inch squares
- Cream – cut (8) 1 3/4-inch squares
- Cream – cut (1) 5½-inch square
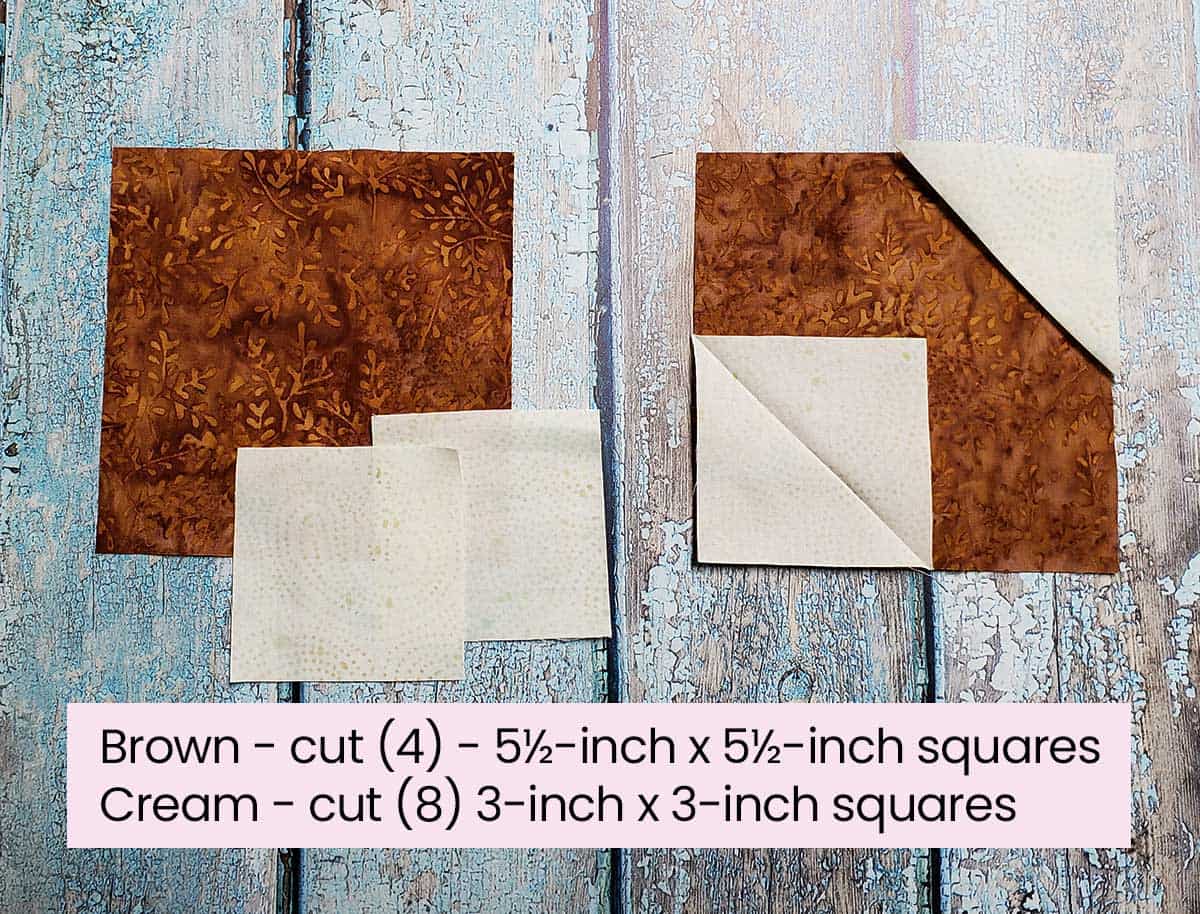

Use two of the 3-inch cream squares for each of the brown 5½-inch squares. Fold them diagonally and press. Use this crease as your sewing line and stitch.
Trim off the excess from the corners. These are large enough to use for another project so I stitched another line of stitching before I trimmed the corners.

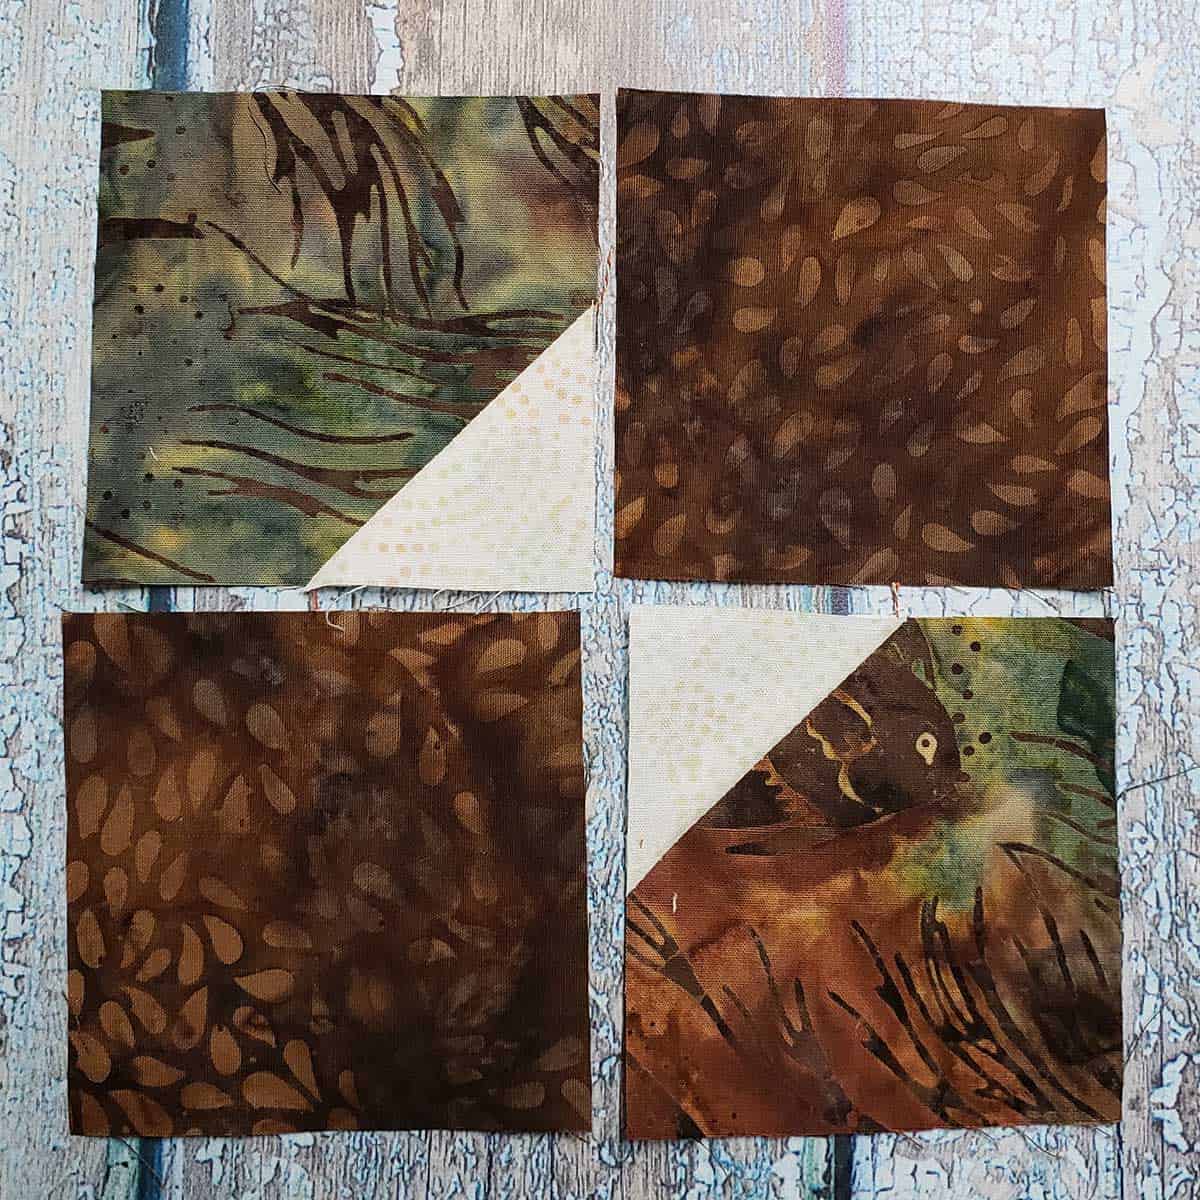
Next, sew one 1 3/4-inch cream square to each of the brown prints. These were small so I just threw away the bit I cut off each corner.

Layout the 3-inch squares as shown below and stitch together with a ¼ inch seam allowance. The finished blocks will measure 5½-inches. Make 4.
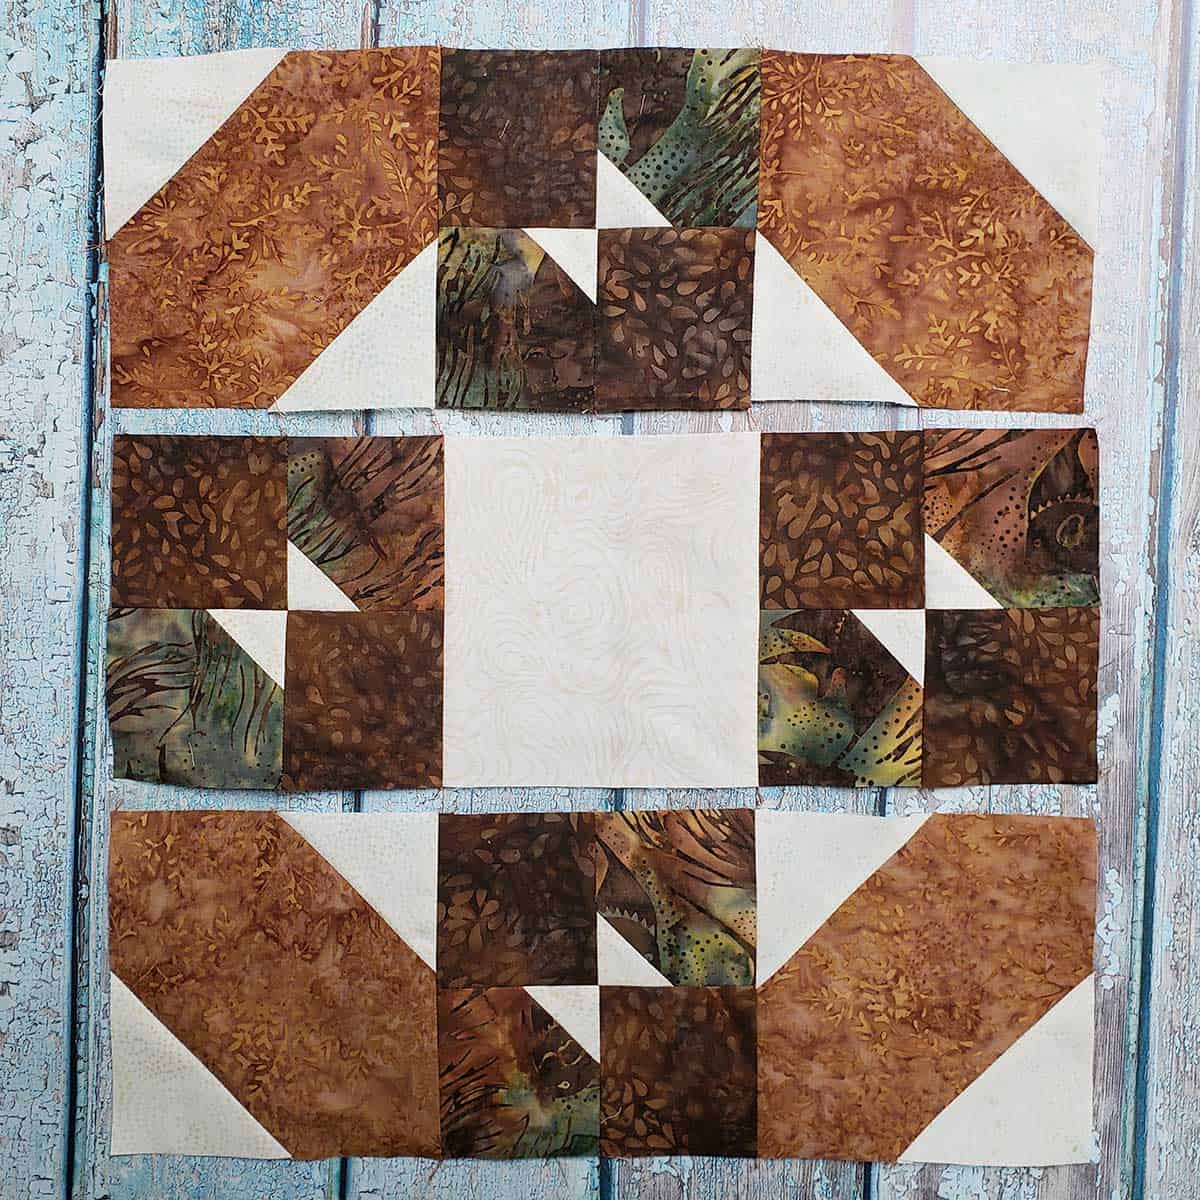
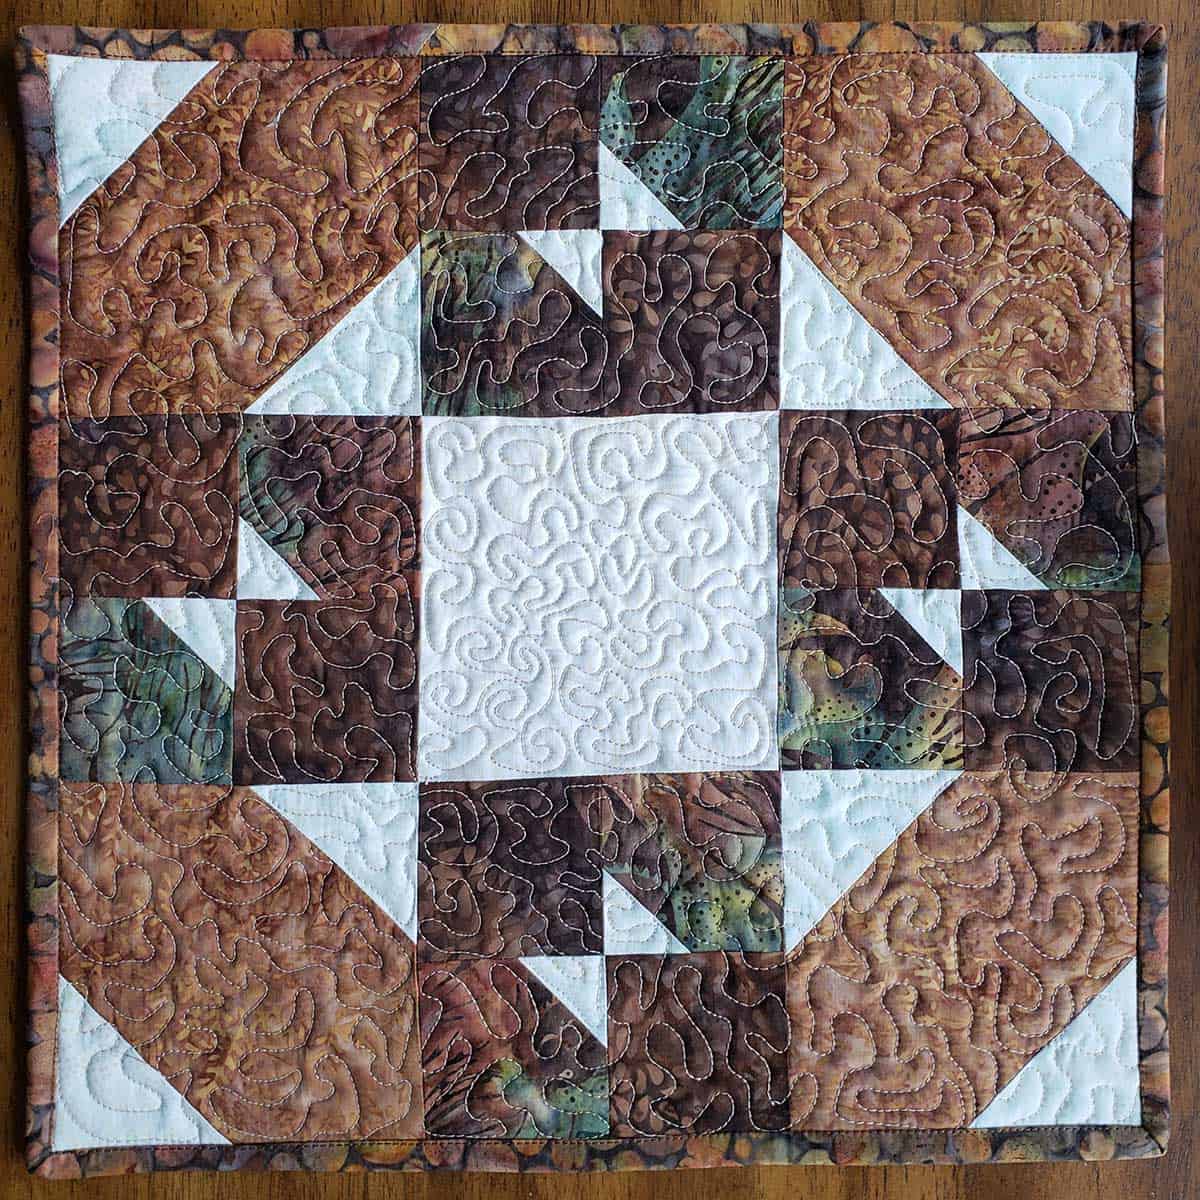
You are now ready to lay out the blocks for the table topper. If you look carefully, you can see that I used a different fabric for my center cream block. That is because I used up all of the scraps that I used for the corner squares.
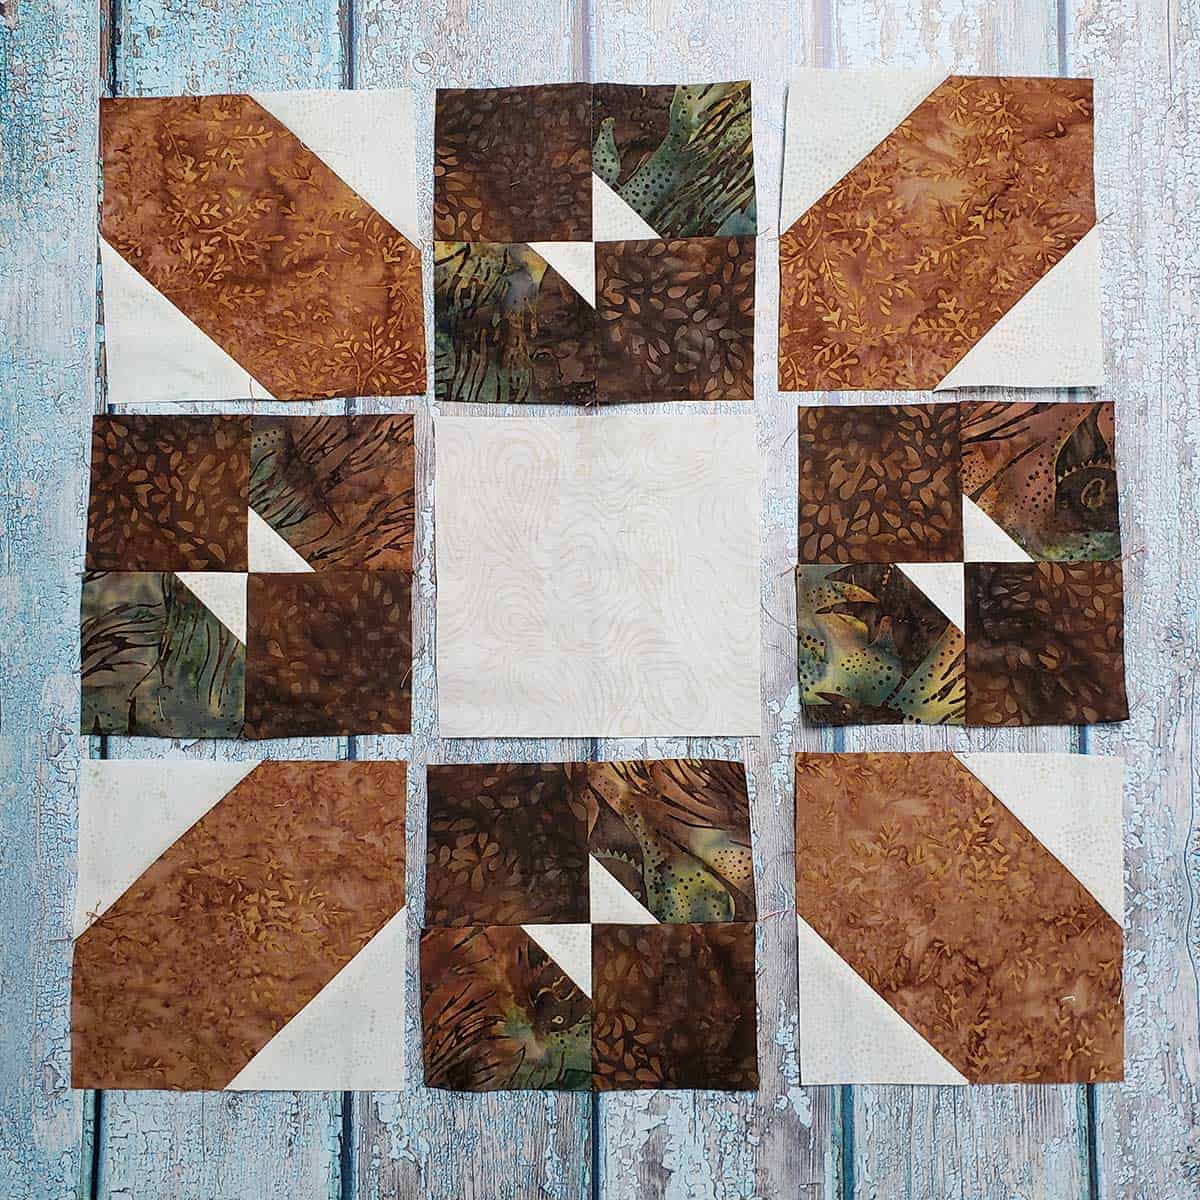
An Oops!
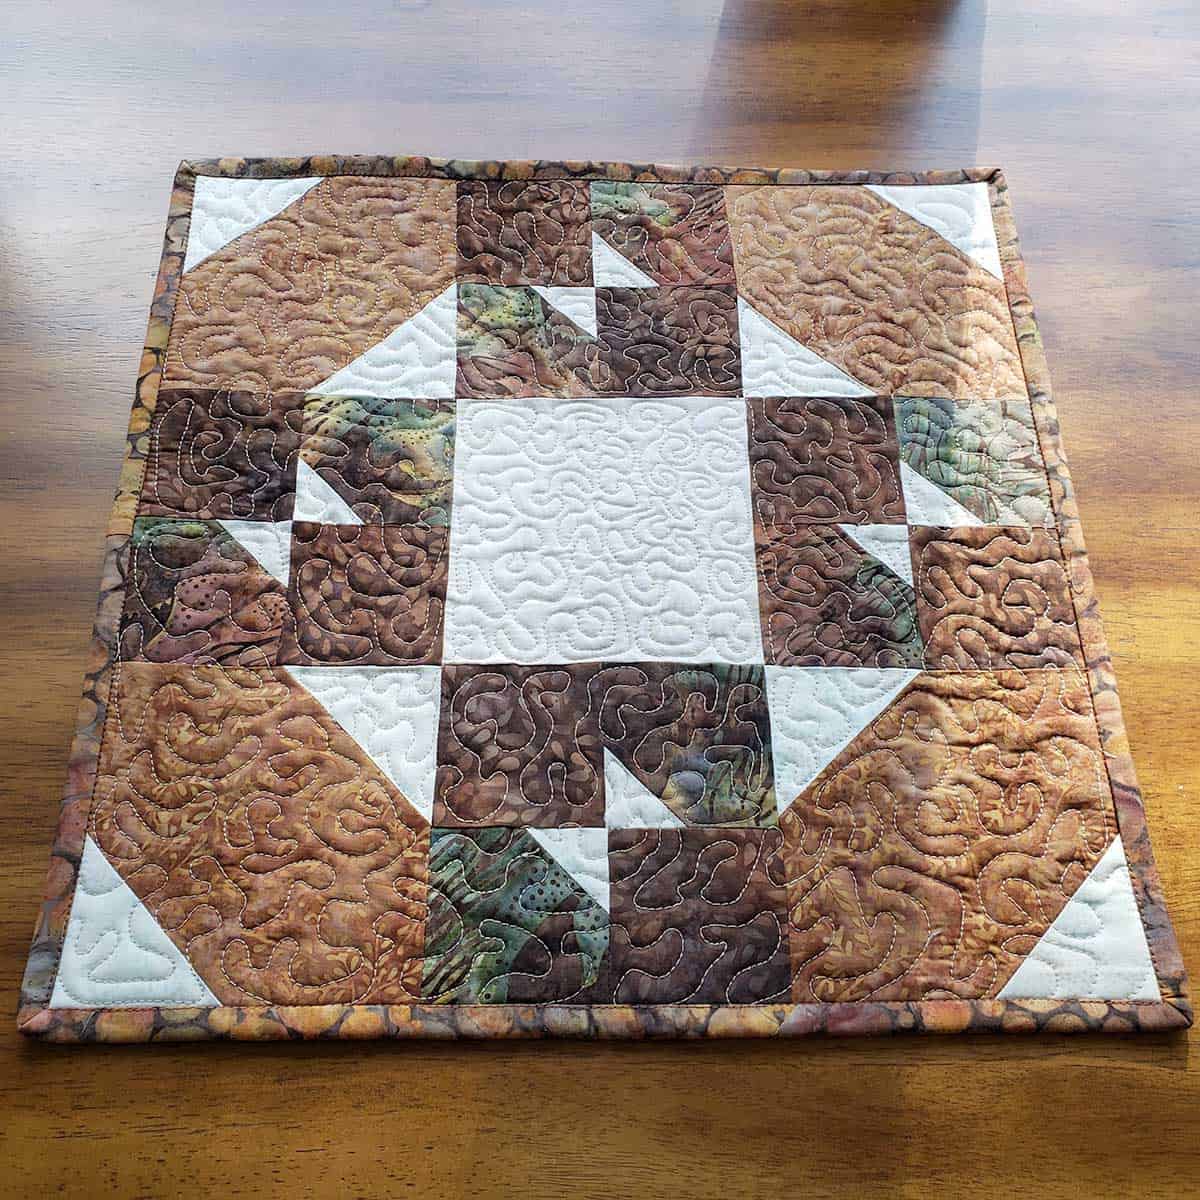
Here is another way you can layout the blocks. I was originally planning on doing this design but somewhere between the layout table and my sewing machine – the blocks changed directions. Which design do you like better?
Quilting
Once I had the table topper all pieced, I added my batting and backing. Here are a few colors of Connecting Threads thread I could use. I decided to go with the tan color.
Since this is a small quilt project, I just use regular pins to hold everything in place. If it were a quilt I would use my quilting safety pins.

Did you notice the bobbin holder? I found those last year and really love them. You put the ends through your bobbin first and then through the center of your thread.

I did a simple stipple free motion quilting on the quilt.
Binding
Remember I said my table topper was made with scraps? Well, there wasn’t enough of any of the fabrics for the binding but luckily I had some binding leftover from another quilt. I like to cut my binding 2½-inches wides and sew it on by machine.
All of the batiks are from Island Batik which is nice because the colors usually coordinate very well. I was an Island Batik Ambassador for 5 years and still love their fabrics.

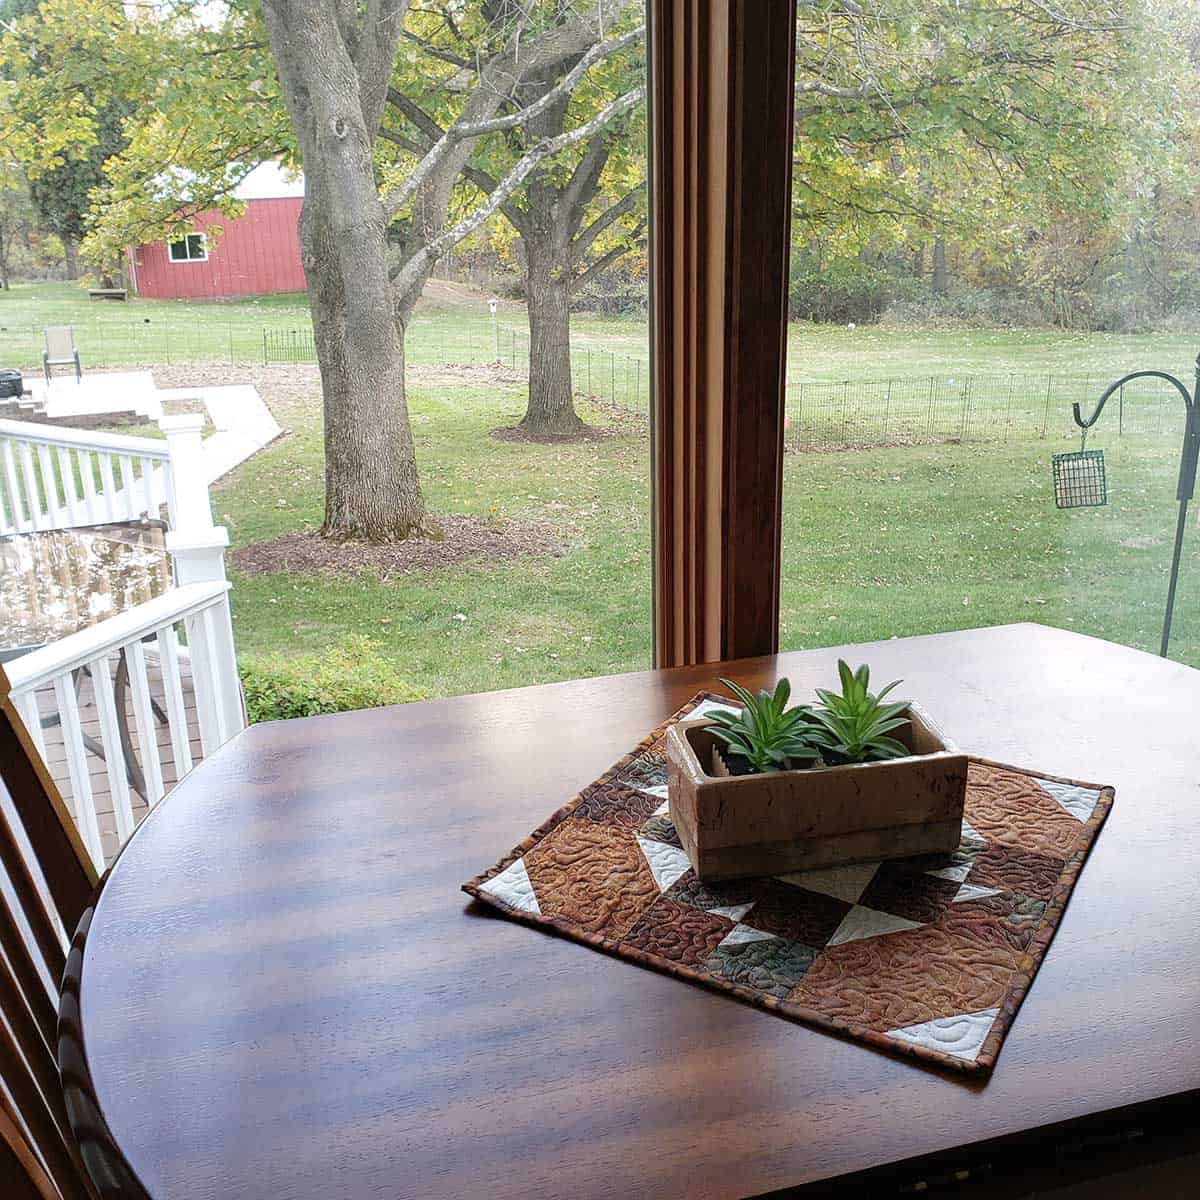
Here is the finished Sienna table topper. I don’t care what anybody says – small quick and easy quilt projects are fun to make! It has taken me longer to write this post than it did to sew it.
See the tree right outside the window? It is a dead ash tree, and we have someone coming to cut it down before winter. It is really neat to watch the woodpeckers and other birds sitting on the branches but it is too close to the house and we don’t want it coming through the roof.
I almost forgot to mention that you can also cut this out with the AccuQuilt 10-inch Mix & Match Qube and the AccuQuilt 10-inch Companion Set Corners.
Mr. Mickey says hi to everyone!
He still doesn’t care to pose, and I should have cleaned his face first but at least he is looking at me! The 3 medications he is on seem to be working, his congestive heart failure hasn’t gotten any worse. His routine now consists of me holding him at least 4 times a day which I really enjoy.
Please note that this post contains affiliate links, which means I’ll earn a small commission if you purchase through my link at no extra cost to you. Please see the full disclosure here. As an Amazon Associate, I earn from qualifying purchases.
Great deals for you!
Looking for great buys on fabric and things? Check out these links
- Connecting Threads
- AccuQuilt Deals
- Fat Quarter Shop Daily Deals
- Green Fairy Quilts – Daily Deals
- Missouri Star Quilt Co – Daily Deals
- Scrapbooking
- The Quilt Keeper
- SewingMachinesPlus
- Electric Quilt
- My Amazon Store for all the quilting things I use and more

About Connie
Hi, I’m Connie Kresin Campbell, the quilter, writer, and photographer behind Freemotion By the River. I enjoy inspiring others with my quilt tutorials and patterns. You’ll also see my sweet adopted dogs from time to time.
Be sure and subscribe to my newsletter for more free tutorials and printables.
I love the colors! Beautiful! I like the original version best. Hugs to Mickey 🤗
I like both versions, but I have a preference for the first version. Glad you can still have cuddle time with Mickey.
Love your big trees, Connie! Are you settled into your new home? You are richly blessed!
Thanks Connie for another beautiful table topper tutorial.
I have lots of charm squares in similar colours, so I can now add this project to my must make pile.
So pleaased that Mr Mickey is doing well. You and he have a special bond that happiness into your home.
You are so welcome Robyn, if you use charm squares you’ll want to change the size of the blocks you cut.
I can’t wait to make this as it will be perfect in my dining room. Thank you, Connie
Lovely table topper Connie and great tutorial. Thank you. I’m definitely planning on making this. I’m glad Mickey’s medicines are working and you are both enjoying plenty of cuddling time. He is such a sweetie.
The “mistake” one. Besides it proves that is hard to be wrong if you are a quilter.
And thank you for the many patterns.
Thank you, Connie. Like both versions but think I’ll make the original. Probably a housewarming gift for family who just moved. Bless both you and Mr. Mickey!
I like the ‘oops’ version! Thanks for sharing the pattern. I enjoy receiving your emails and patterns.
I like the original one.
I actually like it better too.
Morning Connie,
My preference is your original idea. Think I would fussy cut the center, bear, squirrel, etc.
Glad you & Mr. Mickey are having some quality cuddle time. I always enjoyed it with my kitty.
Thank you for sharing your talent.
Me too Dottie and I thought about adding applique to the center. When I get the other quilt posted you’ll see that I added butterflies to the center blocks. Coming soon!