
Crazy Quilt heart mug rug tutorial
This post may contain affiliate links which won’t change your price but will share a commission.
Have you ever thought about making a crazy quilt? A little mug rug is the perfect quilt project when you want to try a new technique,
How about a crazy quilt heart mug rug that you can give to a special someone for Valentine’s Day.

I can’t find the photos I took when I was piecing the heart. Guess I’ll have to make another one and then update this for you. I have a heart template that you can download.
Dig in your stash for some red and pink scraps, I’m using batiks but you can use any quilt fabric.
Tutorial
Crazy quilt the heart
Anyway, here is what you’ll do:
- Draw a small heart on paper, this is a great time to use old telephone books as I did for the Batik String Angles table runner tutorial.
- Start with a small piece in the center and then add a strip to one side.
- Continue adding strips to cover the heart shape.
- Draw the heart on a piece of Heat n Bond Lite and apply it to the wrong side of your crazy pieced heart.
- Cut out the heart.
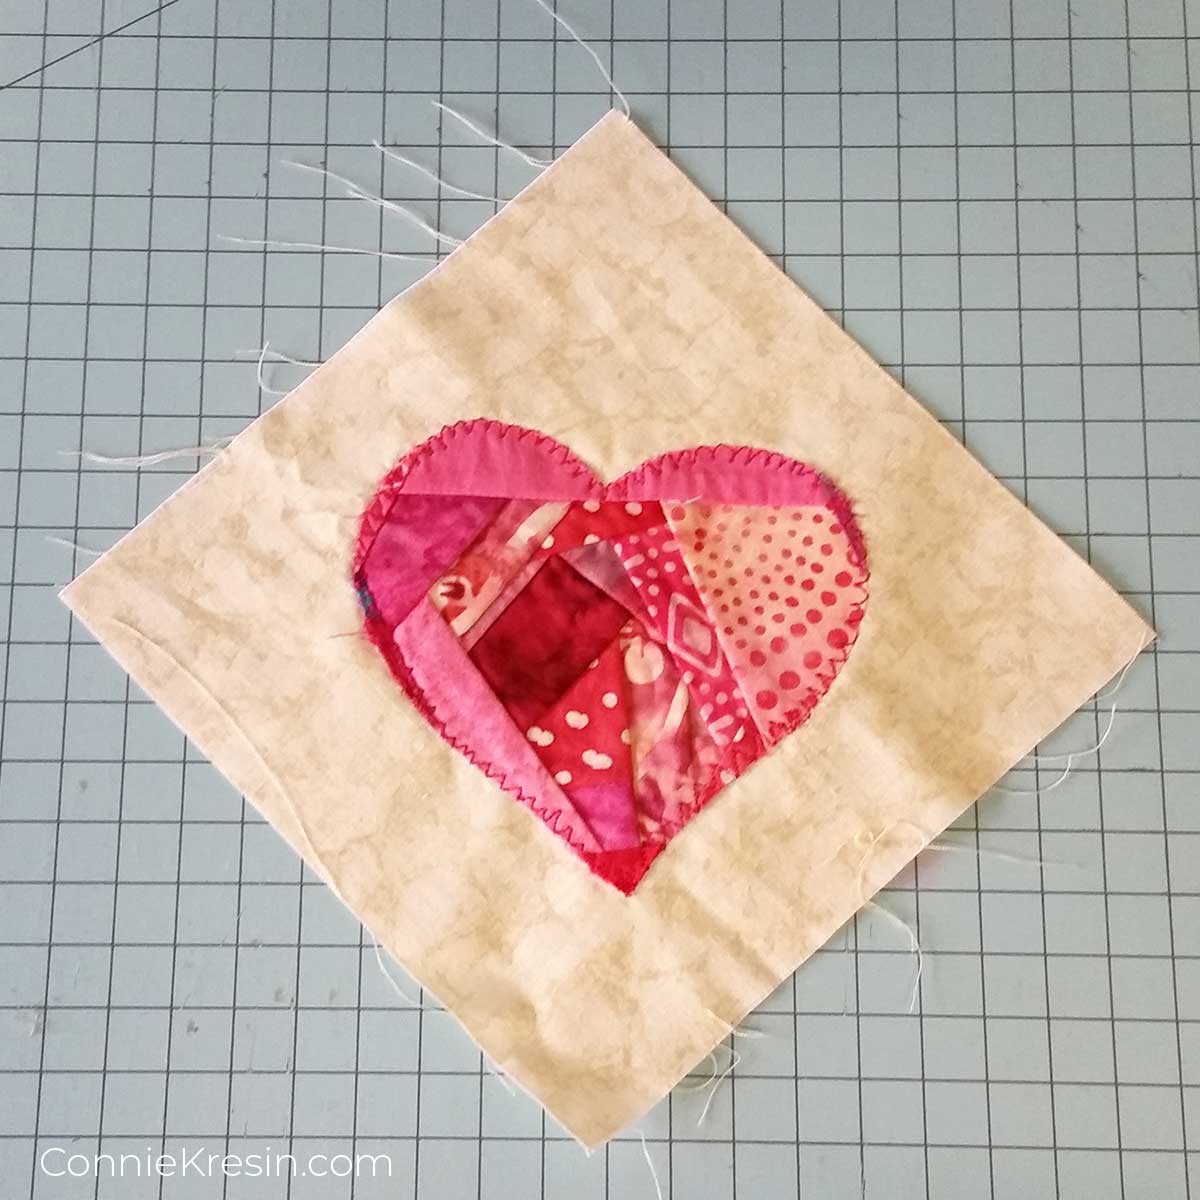
Add the heart to the background fabric
- Cut a 6″ x 6″ square of cream batik.
- If you didn’t use Heat n Bond Lite earlier, you can use glue to keep the heart in place.
- Applique as desired.
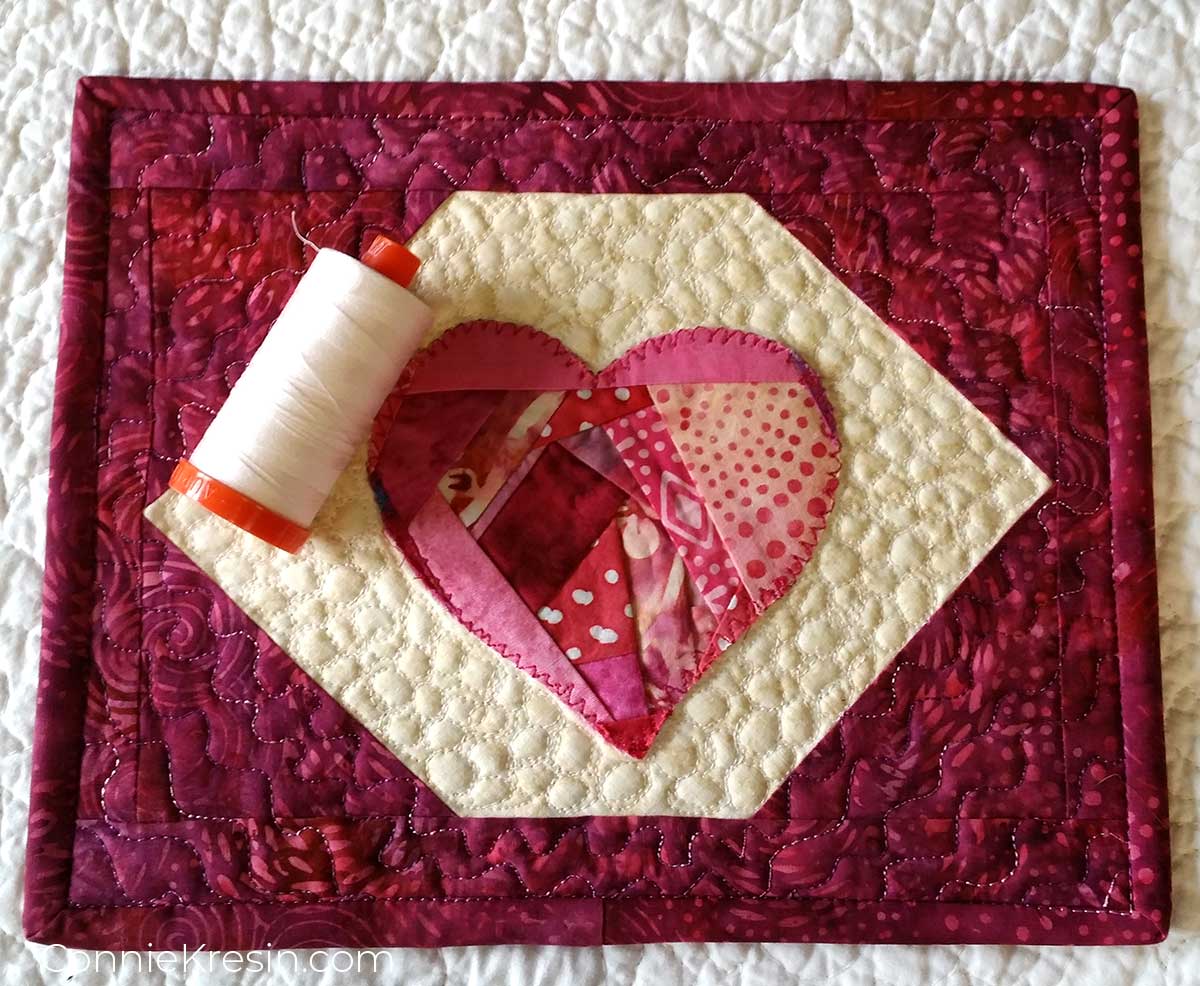
Wine batik – Cut two 3 7/8-inch squares and cut diagonally to create the four half-square triangles.
Add one to each side of the crazy heart center square.
I like to crease the half-square triangle in the center and do the same with the cream square and match the pieces up.

After adding the half-square triangle corners, trim off about one inch from the top and bottom to make it a rectangle shape.

Add a 1½-inch strip to the top and bottom and sides.

Quilting
Would you like to practice your stipple quilting or pebble quilting? This little mug rug is the perfect project.
I use a variegated polyester thread from Superior Thread for the quilting on the wine batik.

When I did the pebbling on the cream batik, I used a 50 wt cream Aurifil thread. I have no problem using polyester or cotton thread. I just use what I have on hand.
Whenever I switch the type of thread, I do a little practice on a scrap piece to make sure I don’t have to adjust the top tension.
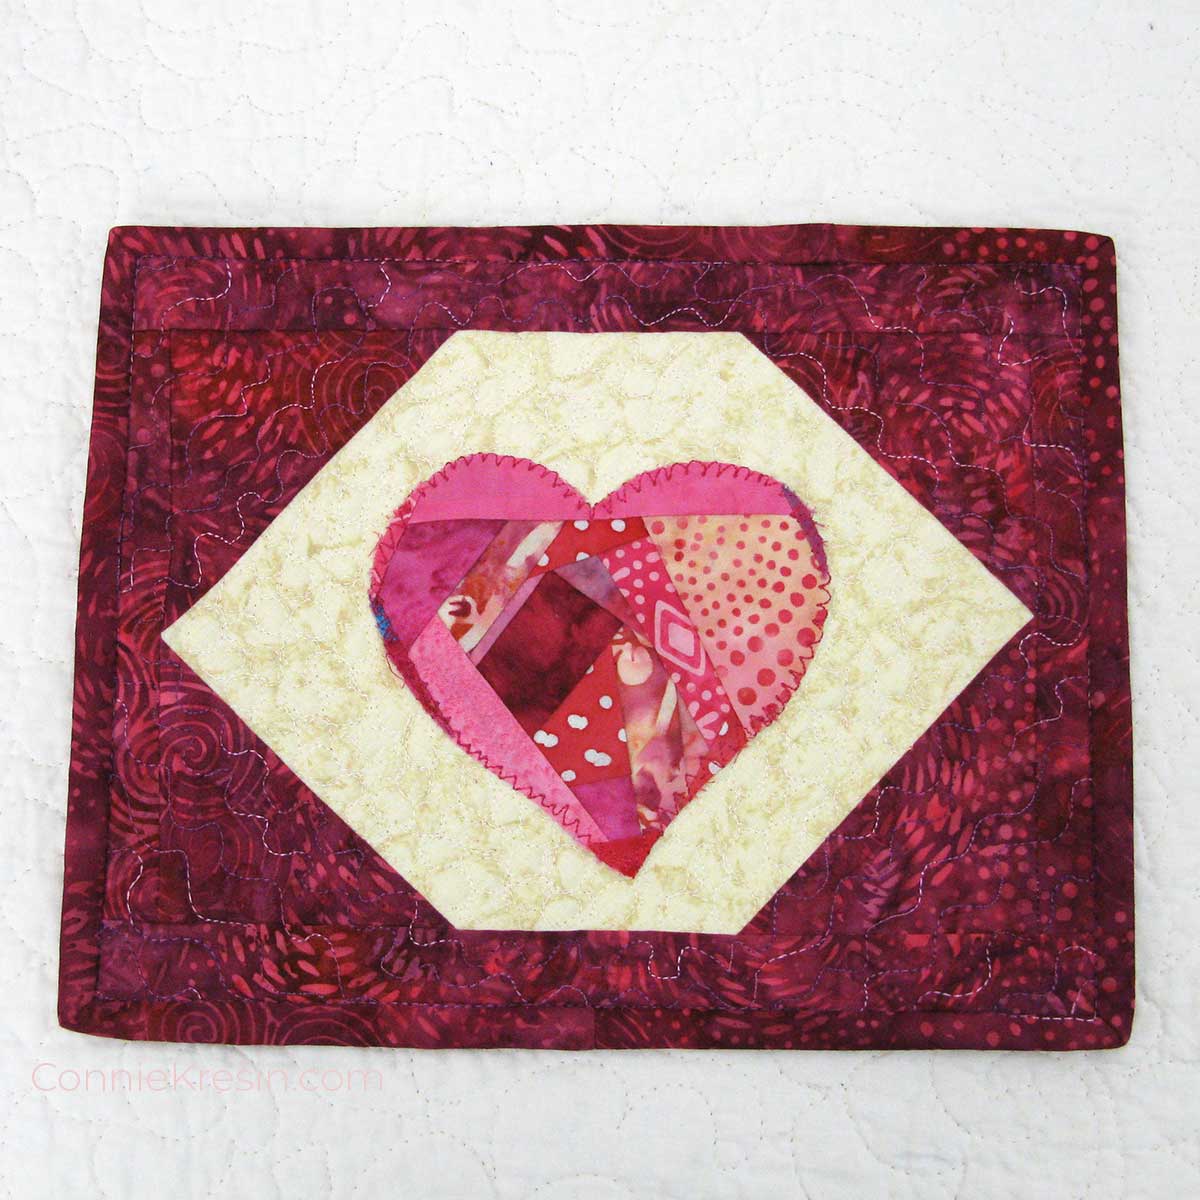
BINDING
- Cut your binding strips 2 ¼” instead of the normal 2 ½”.
- Fold the strips lengthwise and sew to the mug rug. One strip the width of the fabric should be enough for the binding.
- Finish your binding by machine using this tutorial.
Back of the rug mug
I always think it is fun to see the back of a quilted piece. You can really see the pebble quilting.
If you would like to see how to do pebble quilting, visit Leah Day and watch her teach you how to do it.

You can see other mug rugs that I made for Galentine’s Day.
Here is a template you can use for your heart. Just click on the image.

Great deals for you!
Looking for great buys on fabric and things? Check out these links
- Connecting Threads
- AccuQuilt Deals
- Fat Quarter Shop Daily Deals
- Green Fairy Quilts – Daily Deals
- Missouri Star Quilt Co – Daily Deals
- Scrapbooking
- The Quilt Keeper
- SewingMachinesPlus
- Electric Quilt
- My Amazon Store for all the quilting things I use and more

About Connie
Hi, I’m Connie Kresin Campbell, the quilter, writer, and photographer behind Freemotion By the River. I enjoy inspiring others with my quilt tutorials and patterns. You’ll also see my sweet adopted dogs from time to time.
Be sure and subscribe to my newsletter for more free tutorials and printables.
I love the crazy hearts 💘 I will have to try!! Here my last year and this years hearts !
Hi Connie
Thank you for your tutorials. They are always inspirational and have to admit though I look at all the quilting you have shown I am in awe of the beautiul work.
Thank you for sharing and when I do start sewing I’ll post the finish products.
Oi! Adorei o tutorial, principalmente a encadernação. Gostei muito do tapete de caneca para o Dia dos namorados. Vou fazer!
Love the mug rug also enjoy following your journey and the
Remodeling project. Look forward to all you share.
This is so cute and would make a great new name tag for guild this month!! Thanks for the tutorial!
Thanks for the tutorial–very cute & great colors. Love the scrappy look.
Thank you for this tutorial—very cute design and colors!
Love your Valentine Heart Mug Rugs. Your fabrics are gorgeous and passionate! Happy Hearts Dear
Very cute! And the stitching on the back looks wonderful.