
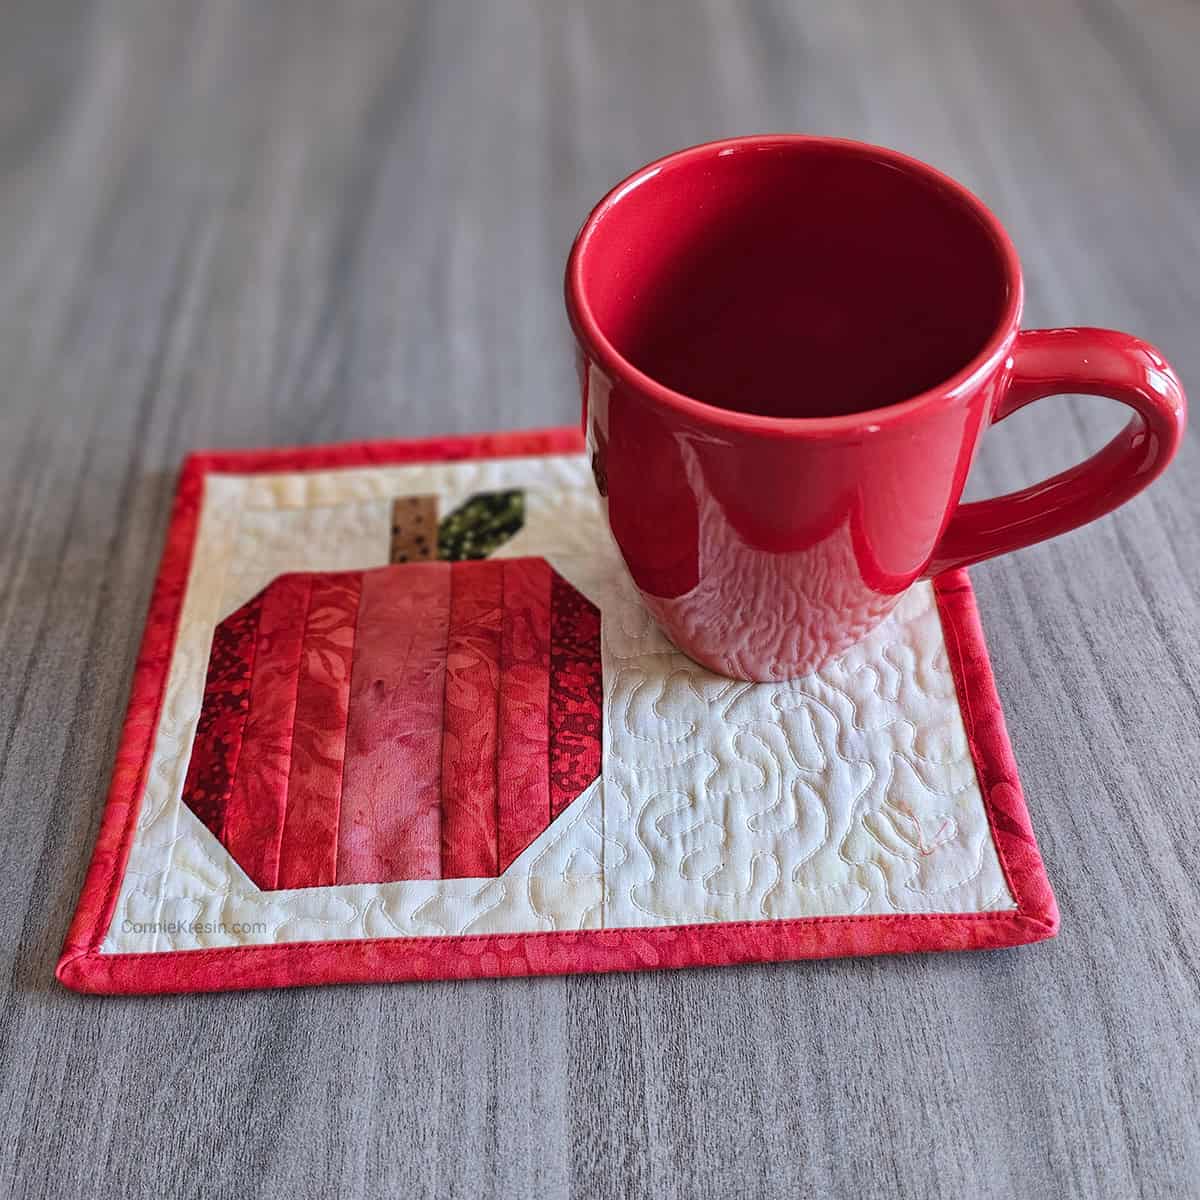
Apple Mug Rug Tutorial
This post may contain affiliate links which won’t change your price but will share a commission.A couple of weeks ago I showed a photo of the Apple mug rug that I made and today I’m sharing the tutorial.
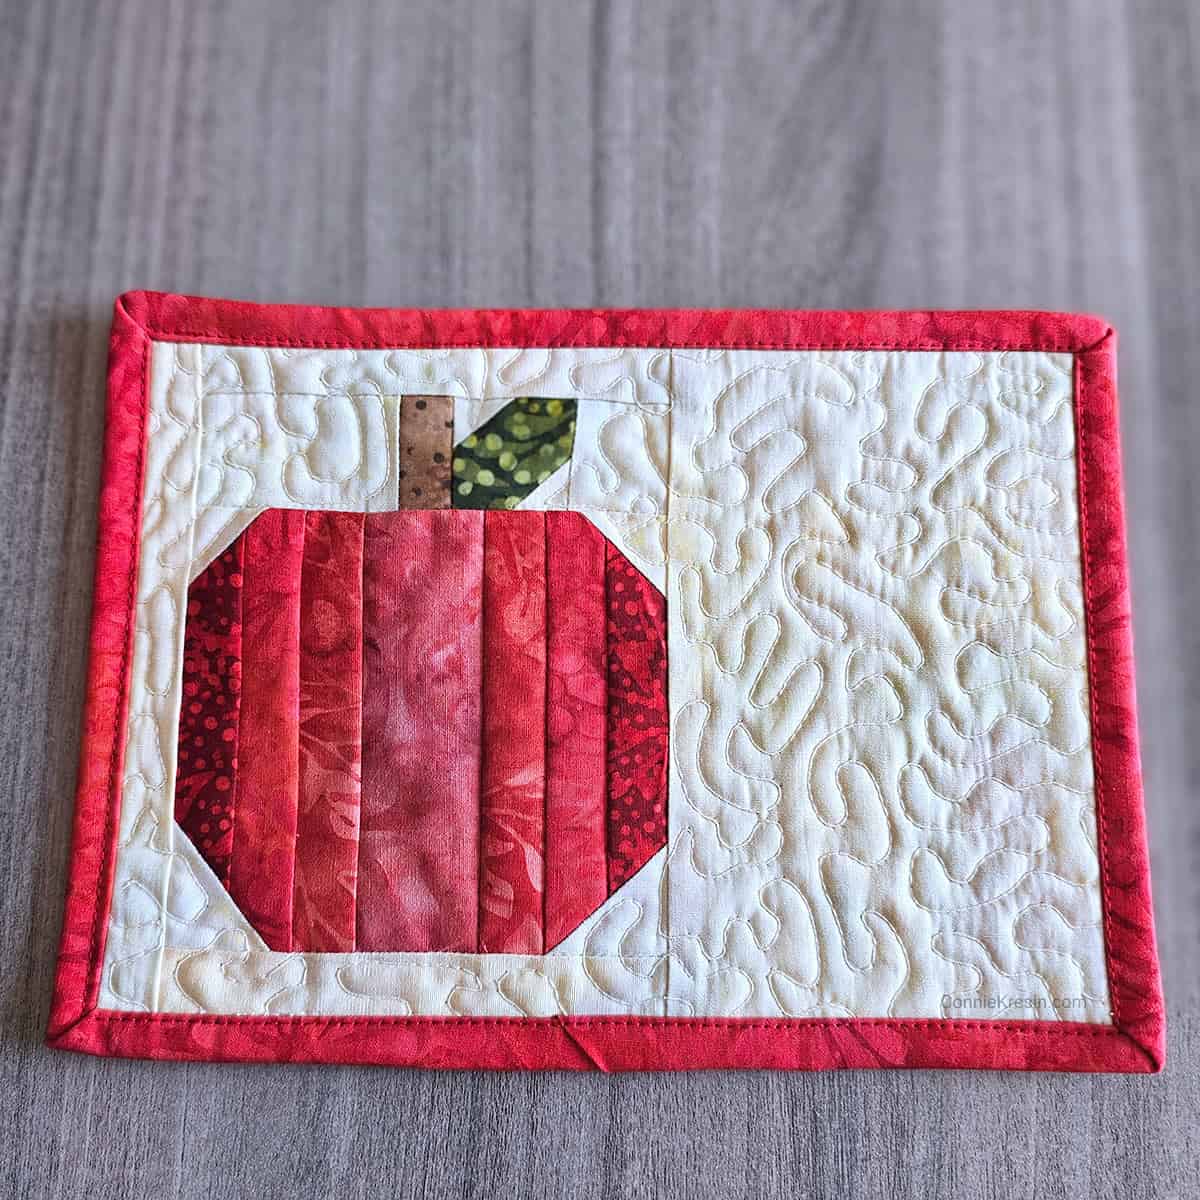
Apple Mug Rug Tutorial
This is actually the same tutorial as my Pumpkin mug rug with photos showing the beautiful red batiks that I had in my stash from previous Island Batik quilt projects.
Use Your Scraps
This is a great quilt project to make with your scraps as it uses very little fabric. Use a ¼-inch seam allowance.
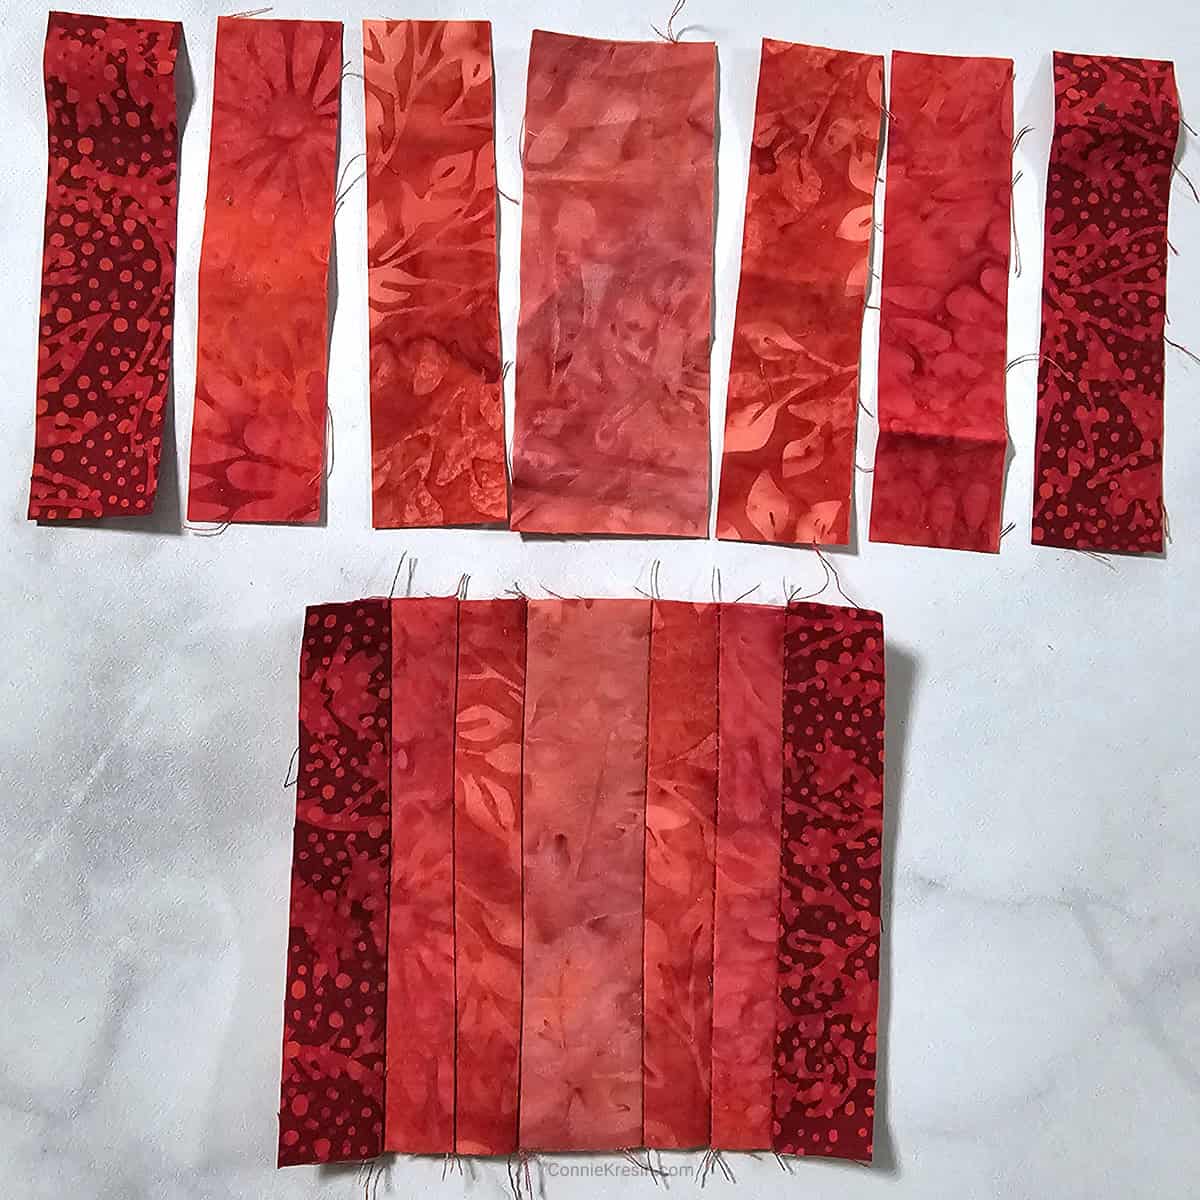
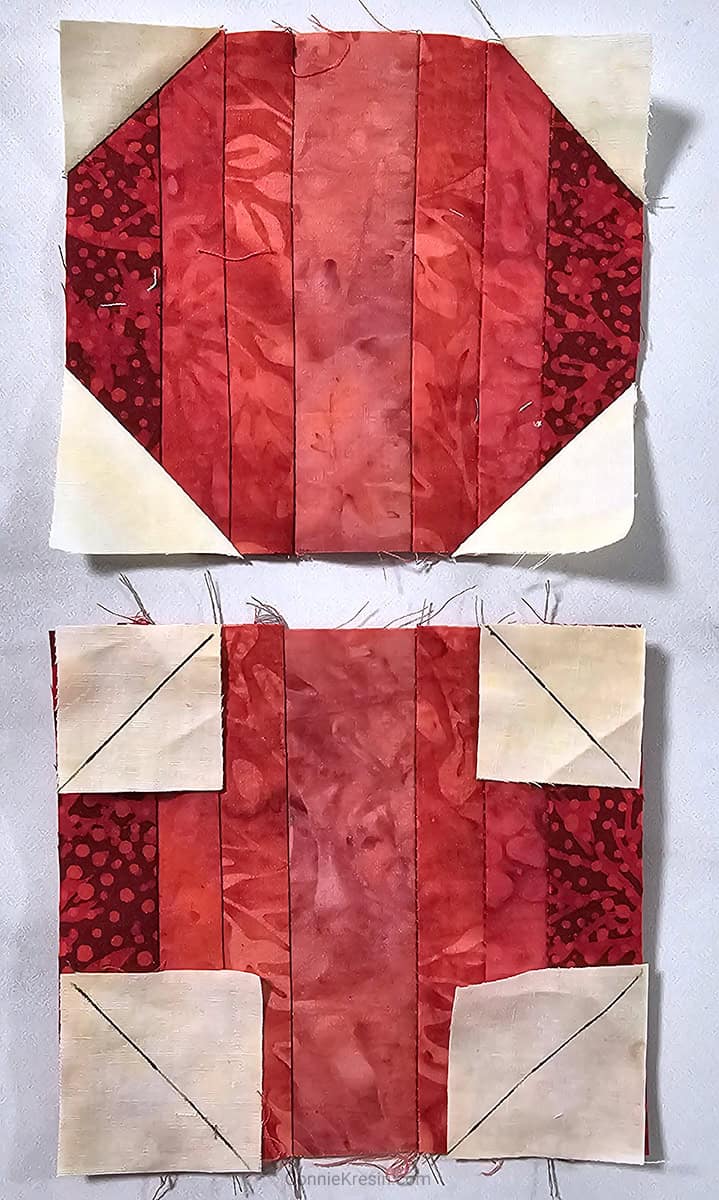
Choose 4 different red fabrics starting with a light color for the center and ending up with a darker red for the last color.
6″ x 8½” Mug Rug
Cut the following pieces of fabric for the small pumpkin and sew them together as shown.
- Lightest Red – cut (1) 1½” x 4″ piece
- Red – cut (2) 1″ x 4″ pieces
- Medium Dark Red – cut (2) 1″ x 4″ pieces
- Darkest Red – cut (2) 1″ x 4″ pieces
This should measure 4″ high by 4½” wide.
Create the Apple
- Cut (2) 1½” squares for the bottom corners
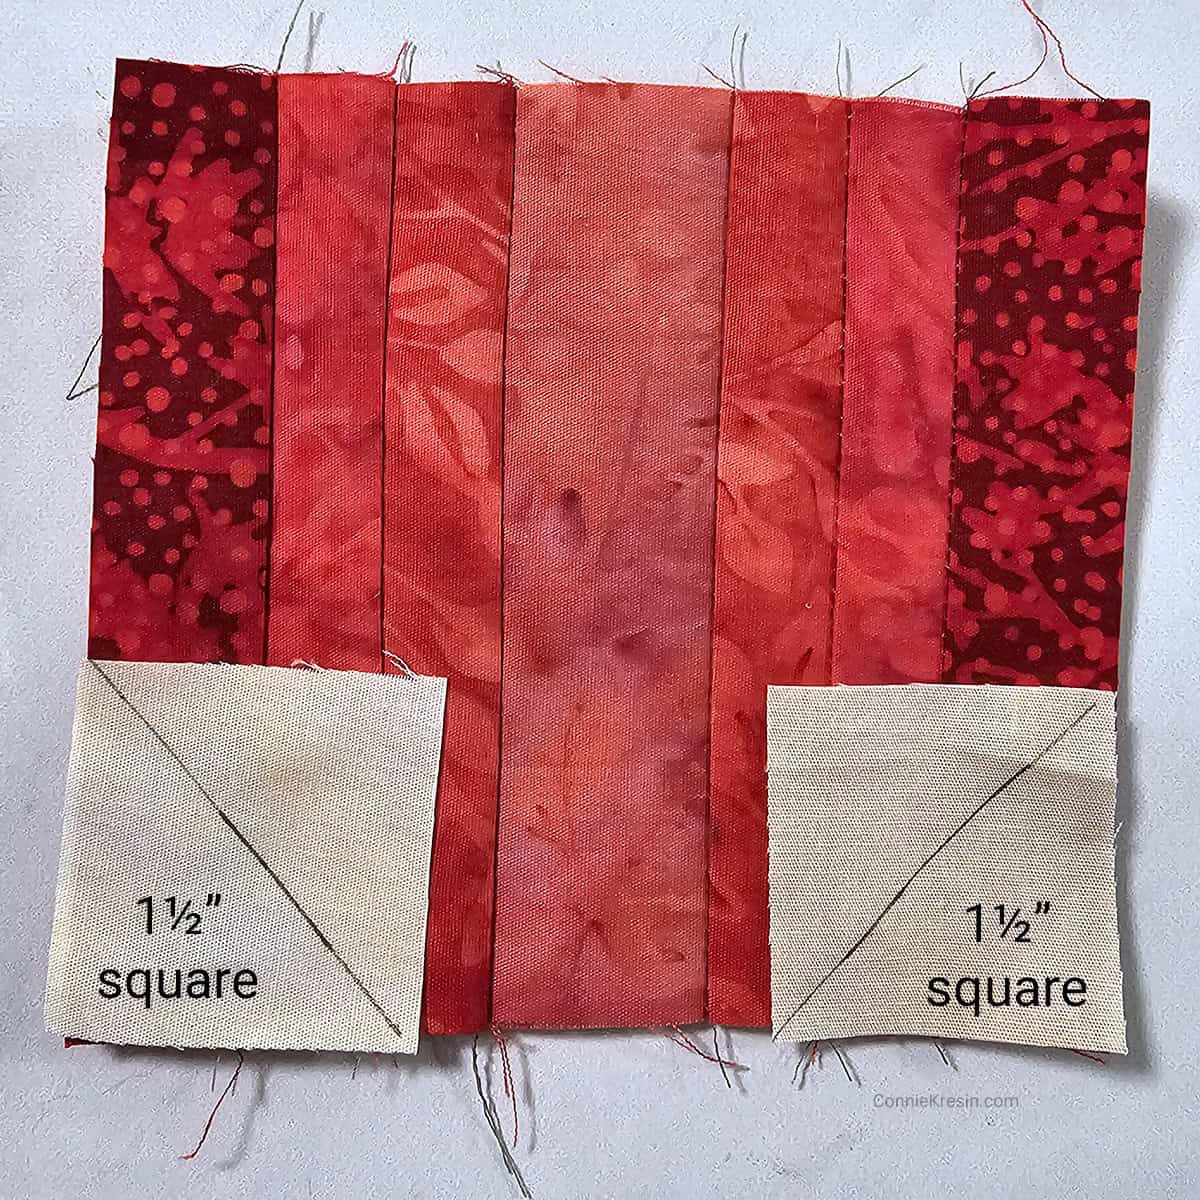
- Cut (2) 1¼” squares for the top corners
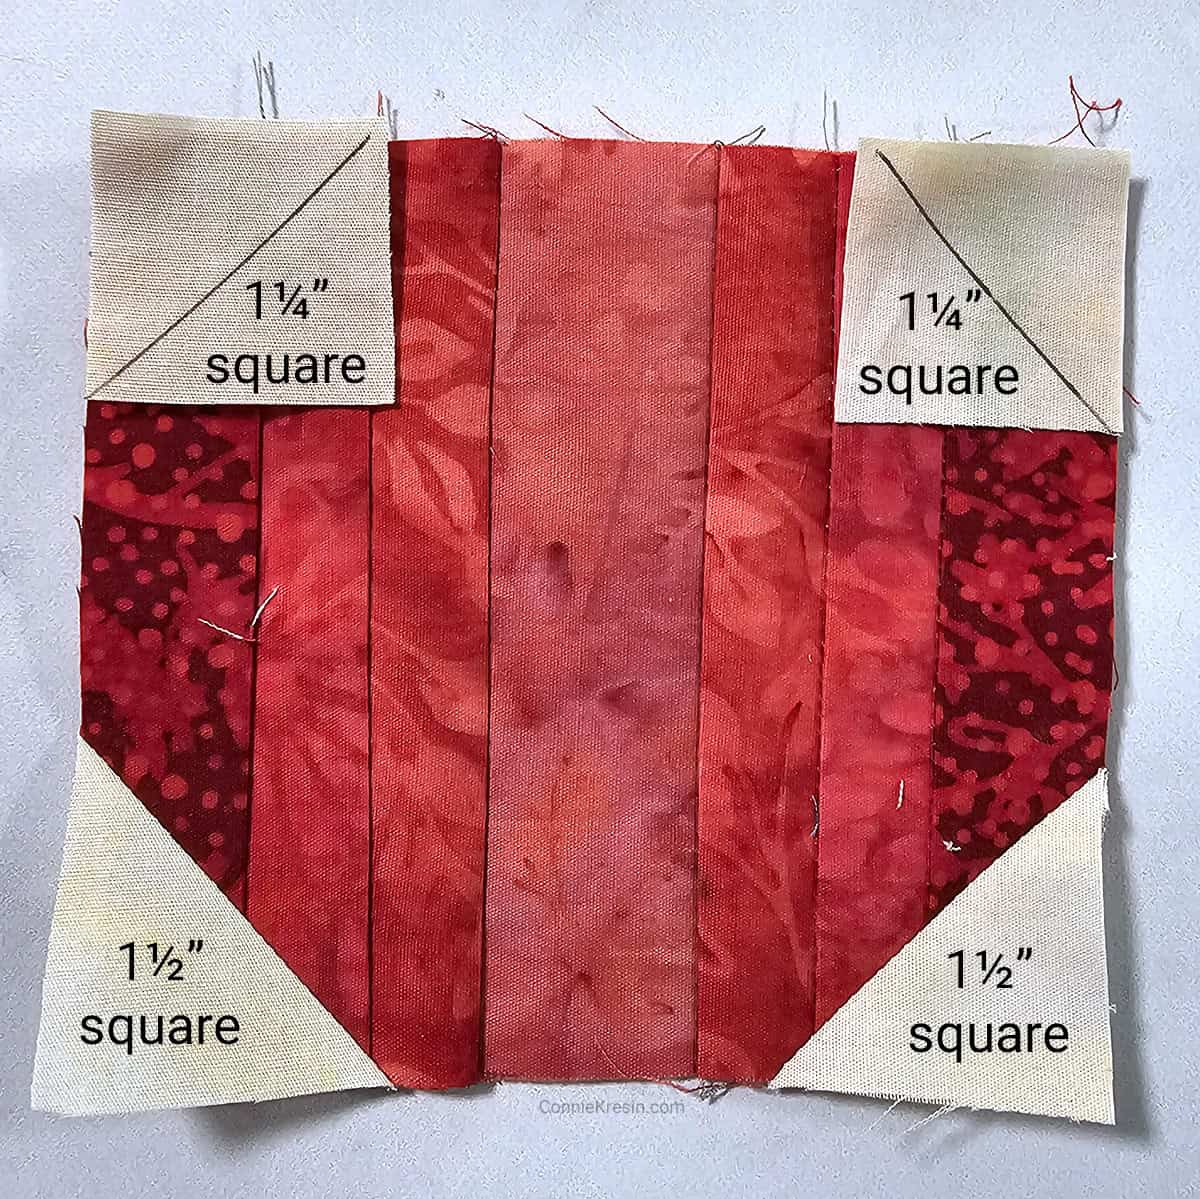
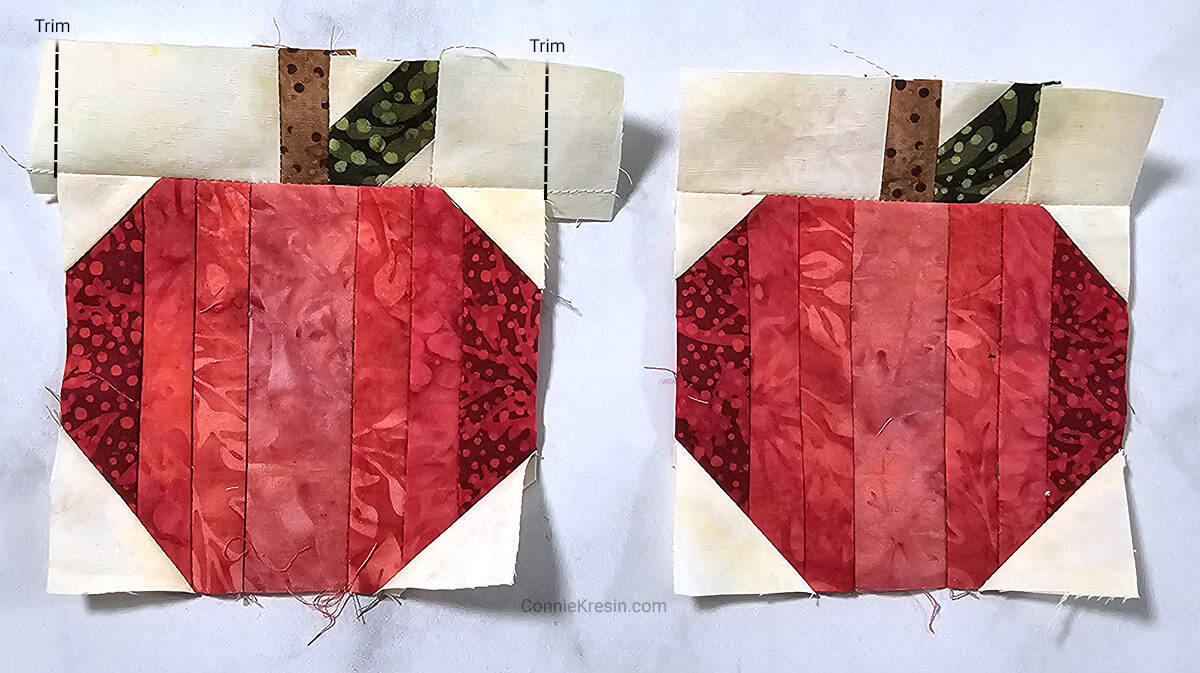
- Draw a diagonal line down the center of each block using a Frixon pen or fold in half and iron to get a line
- Place the squares in the corners of the apple block
- Stitch 1 thread width away from the line toward the corner
- Fold over and then trim off the bottom cream and red piece – if you need a better explanation of this, look at my Easy Bow Tied Quilt block tutorial.
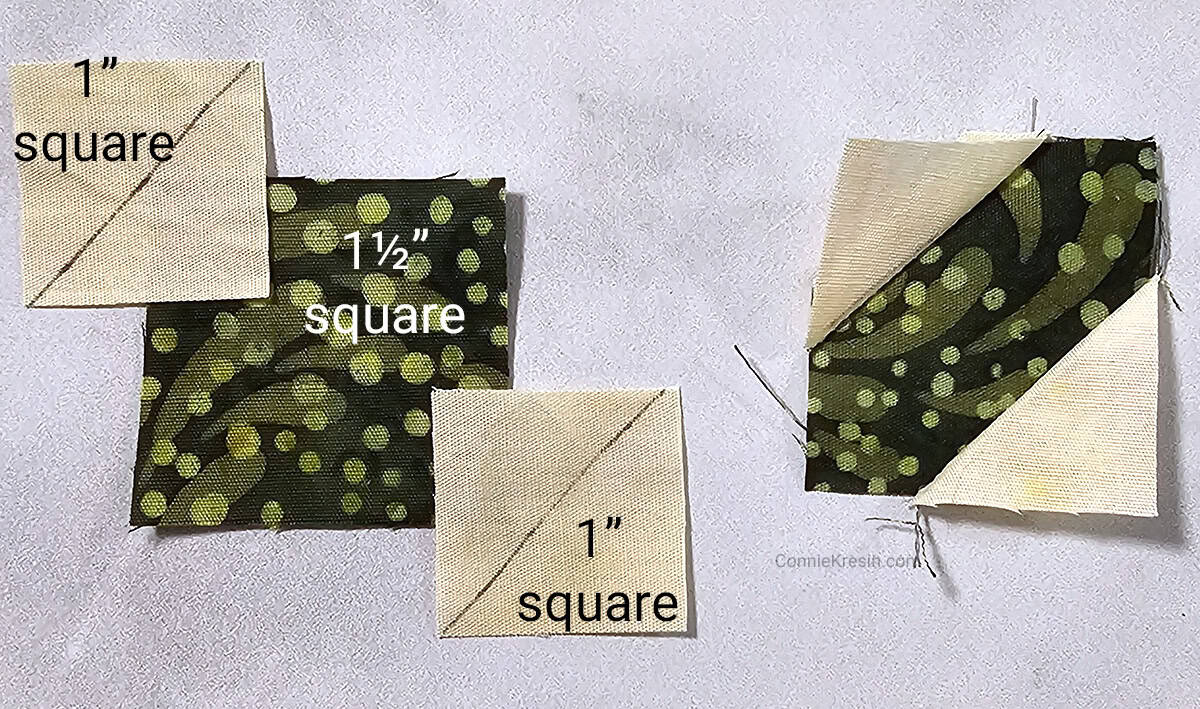
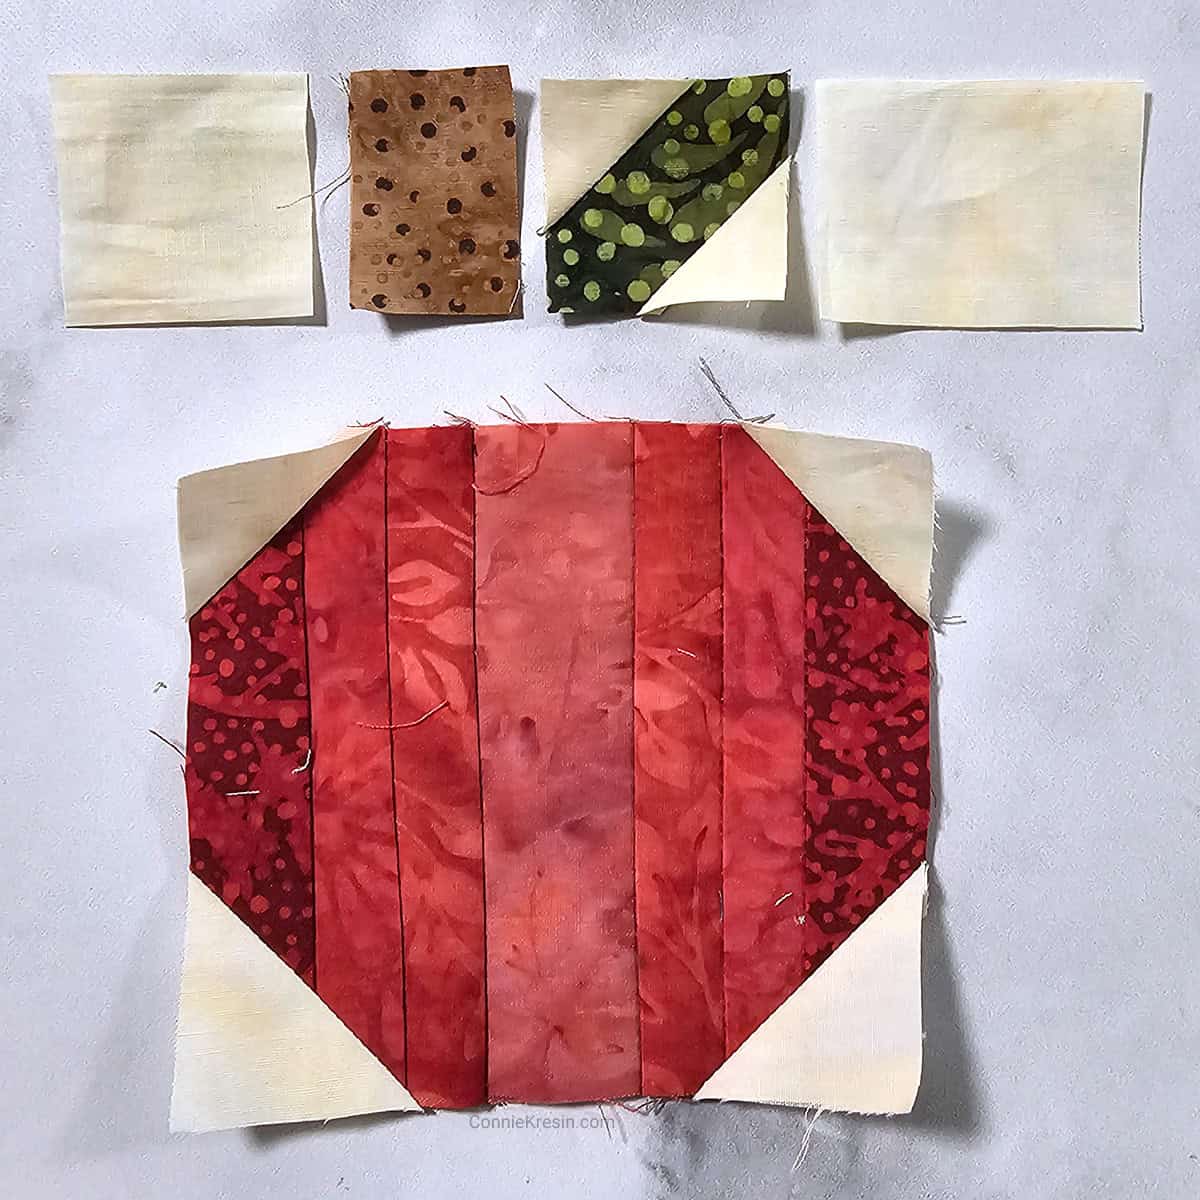
Stem and Leaf Section
- Green – for leaf – cut (1) 1½” square
- Brown – for stem – cut (1) 1″ x 1½” piece
- Cream – for leaf corners – cut (2) 1″ squares
- Cream left side – cut (1) 1½” x 2″ (this is longer than needed)
- Cream right side – cut (1) 1½” x 2½” (this is longer than needed)
The leaf block also has the corners added to it but you only add (2) cream squares and place them diagonally. Stitch 1 thread width away from the line toward the corner
Fold over and then trim off the bottom cream and green piece.
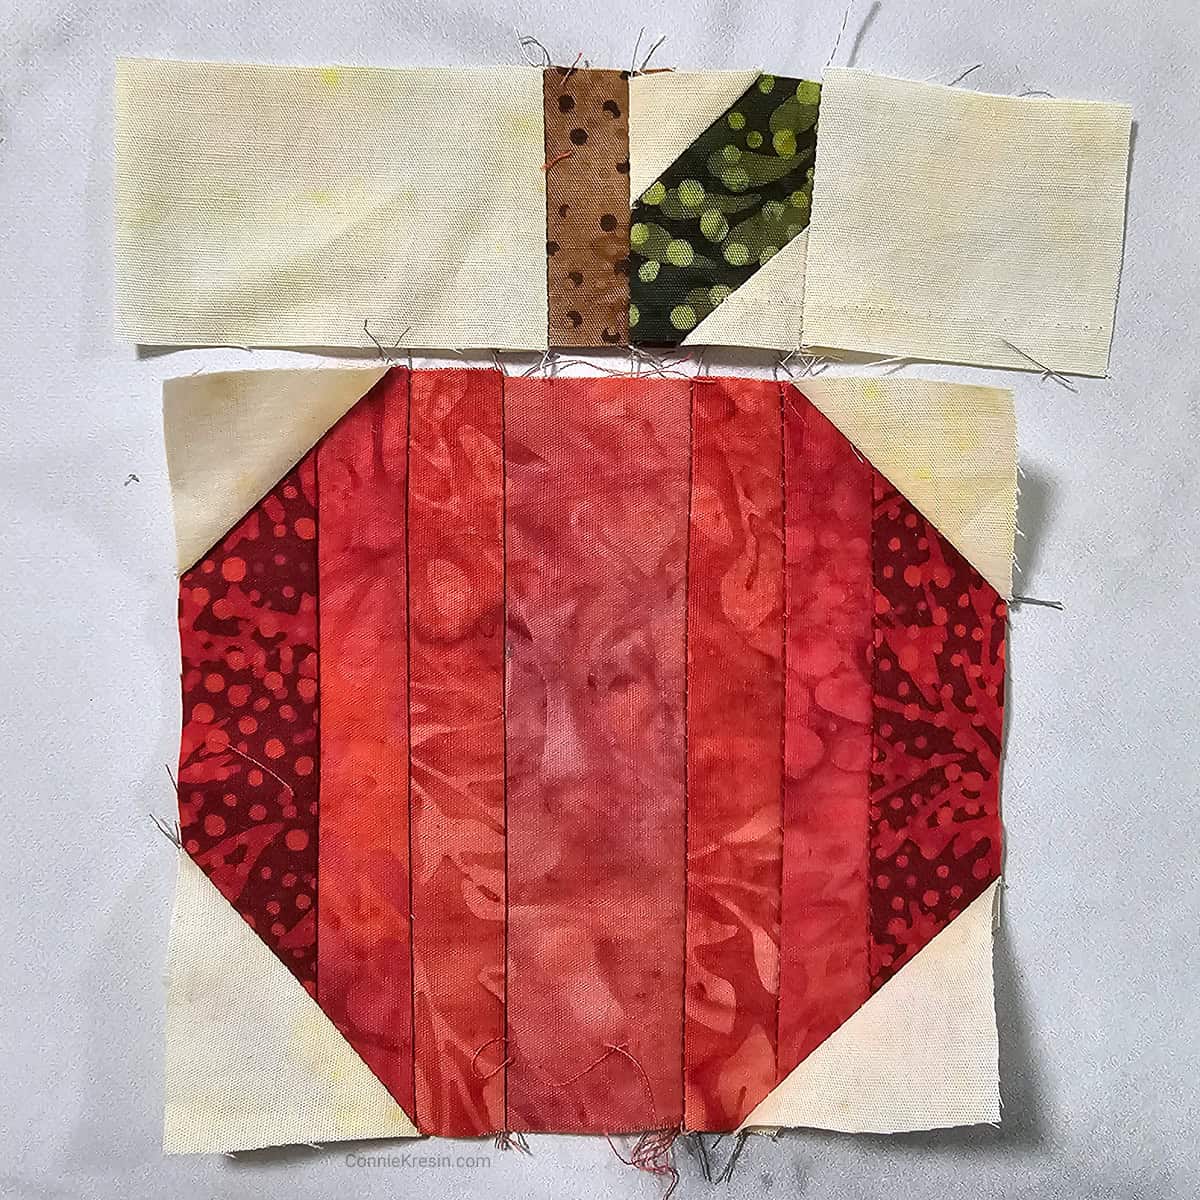
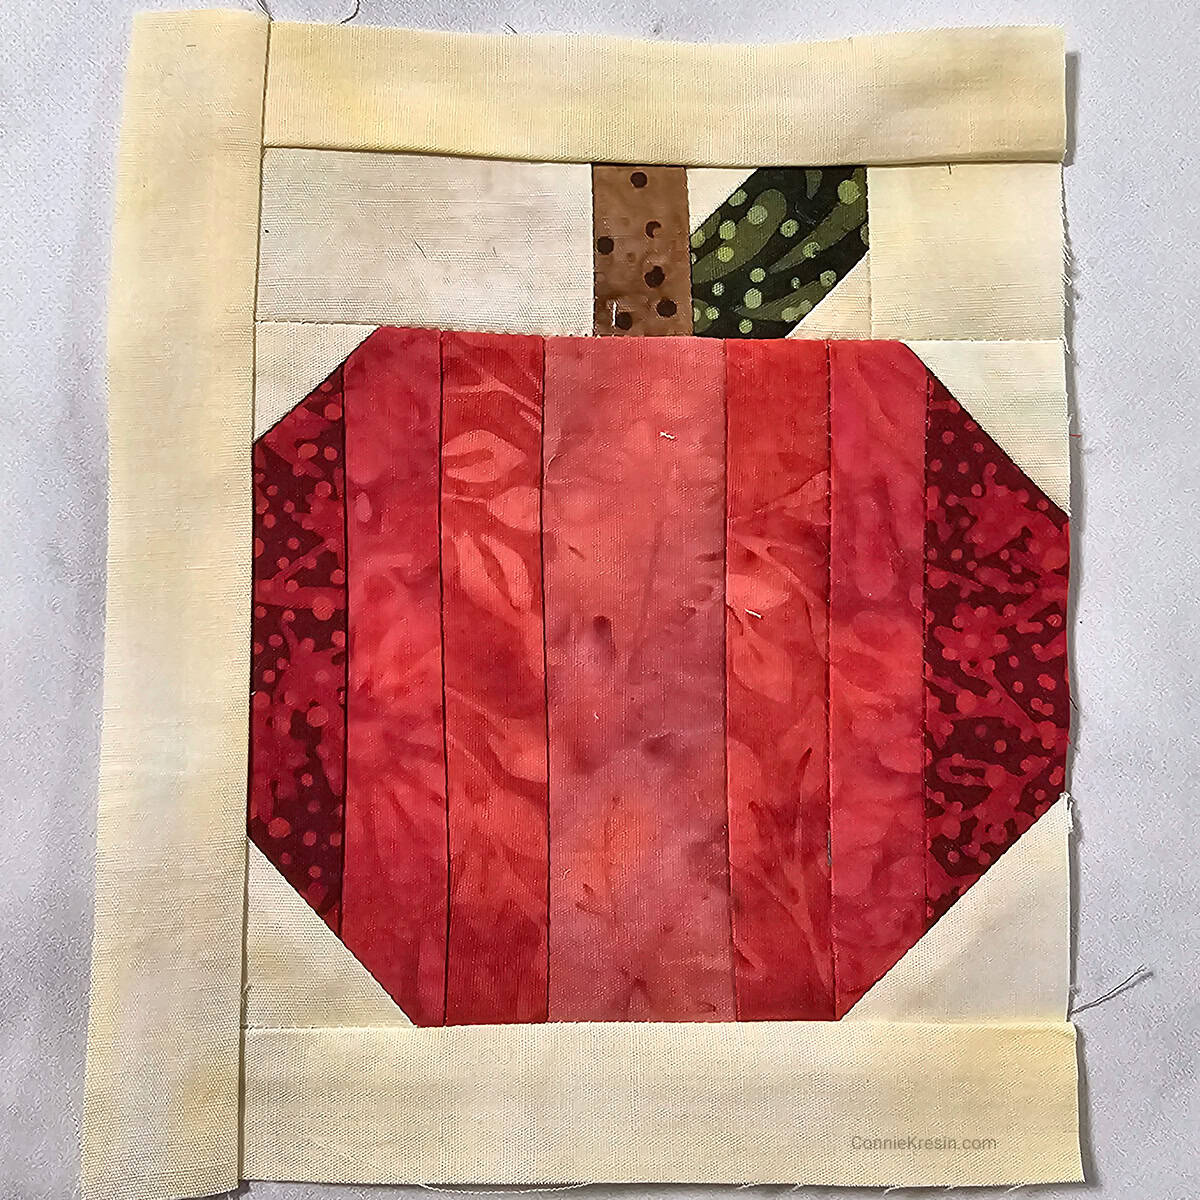
Stem Section
- The top section which includes the stem and leaf is 1½ inches wide. Sew the stem to the left side of the leaf
- Next, sew the cream sections to the sides
- The cream sections are oversized so you can decide how you want to place the top section on the pumpkin body section
- Sew the sections together and then trim off the pieces that are too long
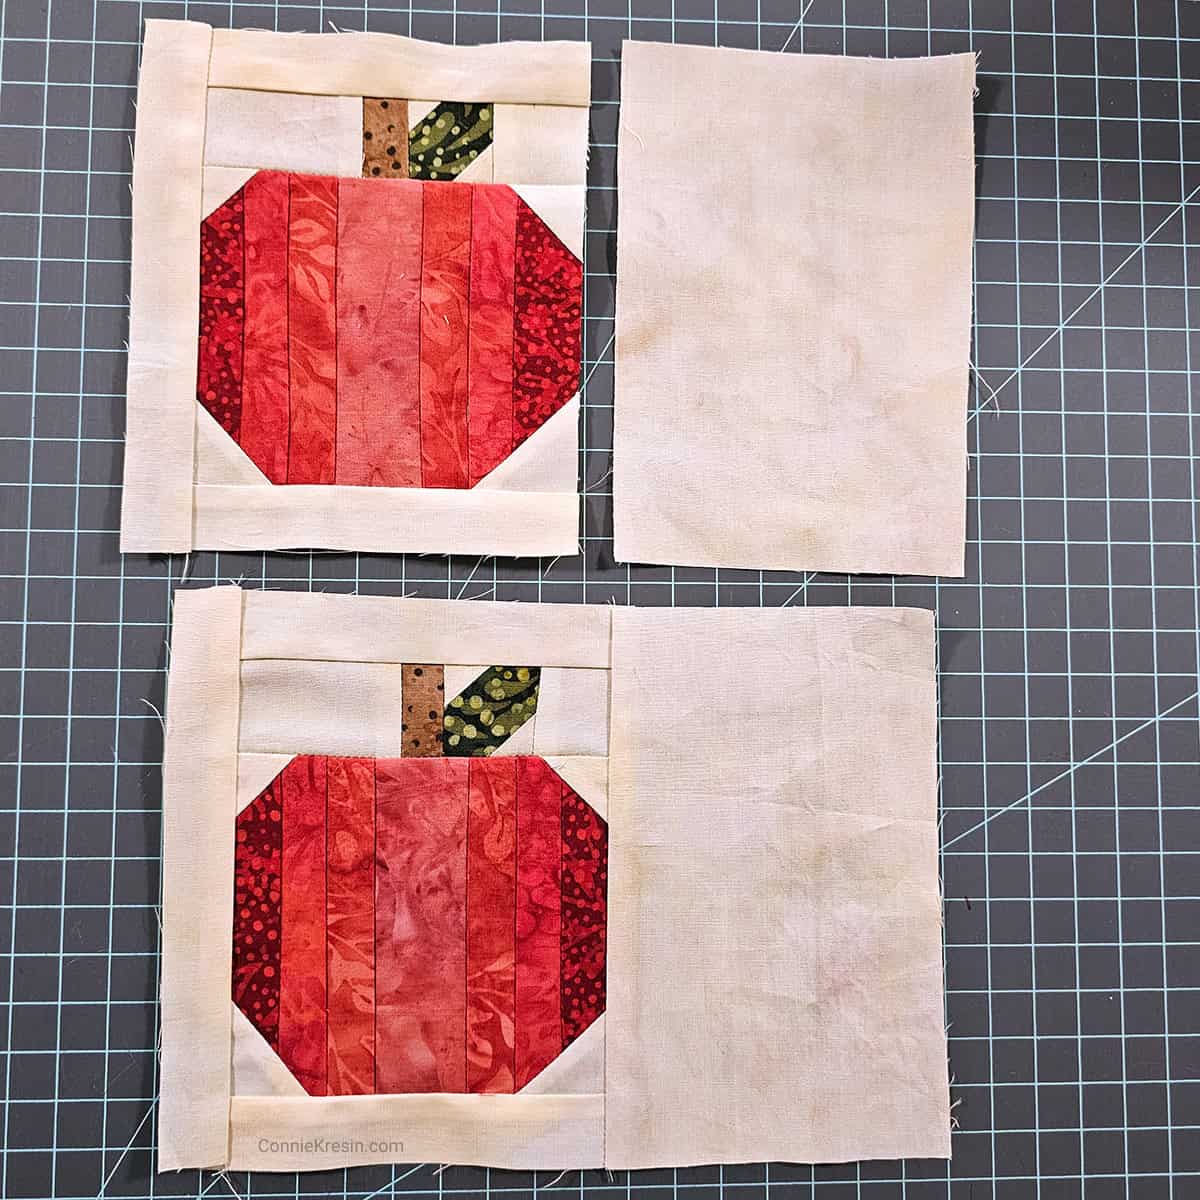
Borders
- Cream – cut (1) 1″ x width of the fabric – sub cut (2) 1″ x 5″ and (1) 1″ x 6″
- Sew a border to the top and bottom – (2) 1″ x 5″
- Sew a border to the left side using the 1″ x 6″ piece
- Cut a cream 6″ x 4″ piece and add to the right side
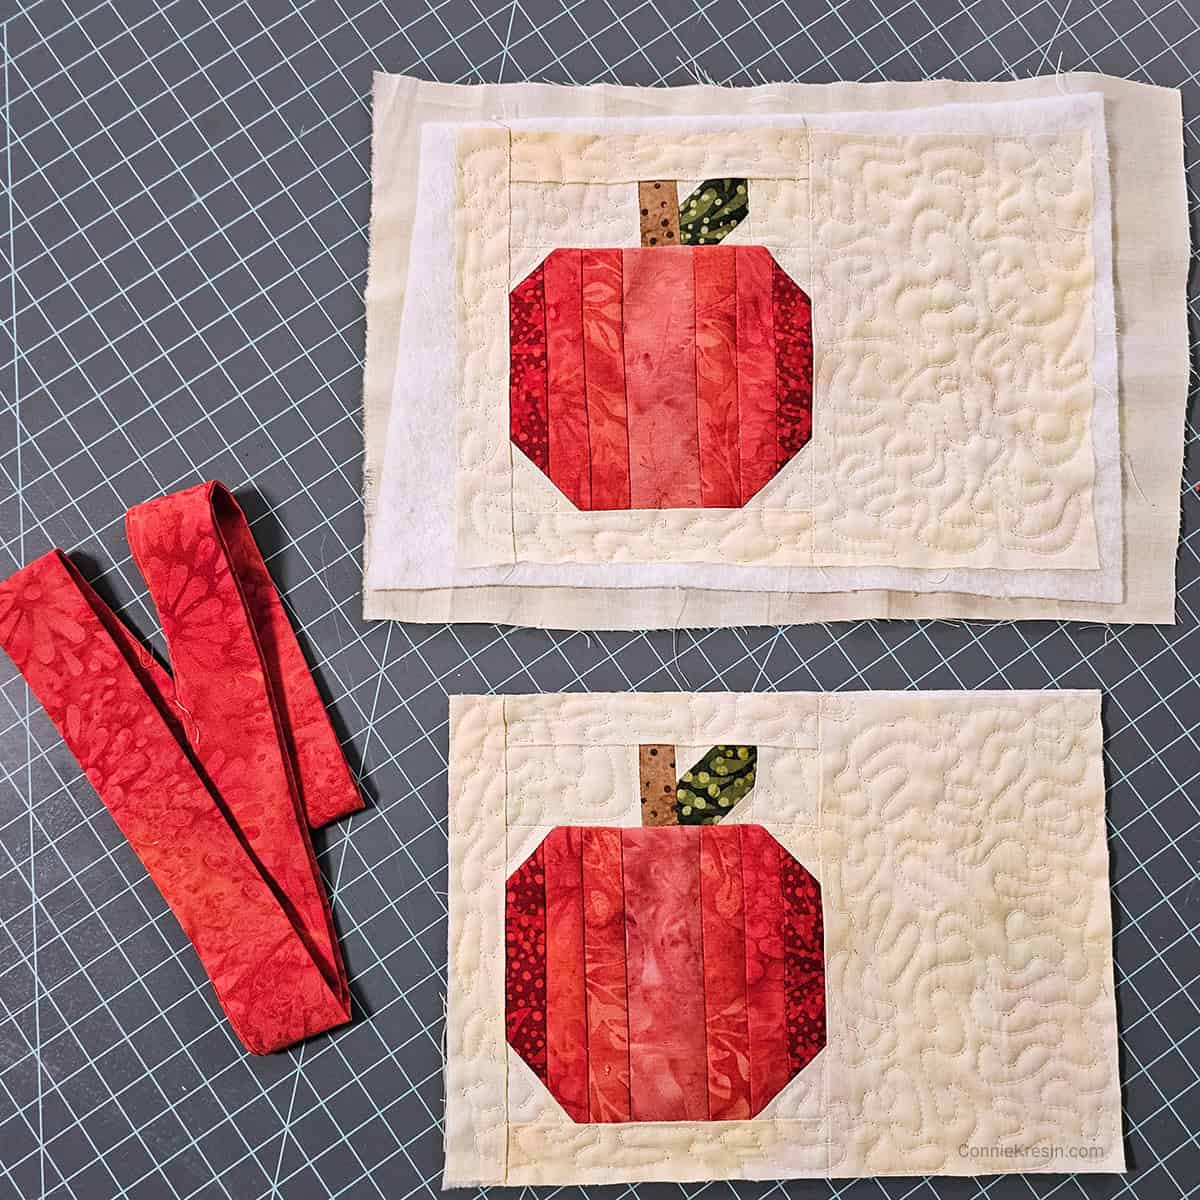
Quilt
Add batting and backing and quilt as desired. You can always just do straight rows of stitching.
Finishing
- Cut (1) 2¼” width of the fabric strip for the binding
- Fold in half lengthwise and then sew to the front of the mug rug
- Fold the binding to the back of the quilt going just a little past the ¼-inch stitching line and pin or clip and then stitch down
- Learn how to add binding to your quilt using your sewing machine
Harvest Pumpkin Mug Rugs Tutorial
You can get an ad-free printable PDF version of the Harvest Pumpkin mug rugs tutorial in my shop. The photos have been reduced in size and it is a 7 page PDF. I have included photos of the Apple mug rug, you just need to change the colors to red.
Please note this post contains affiliate links, which means I’ll earn a small commission if you purchase through my link at no extra cost to you. Please see full disclosure here. As an Amazon Associate, I earn from qualifying purchases.
Great deals for you!
Looking for great buys on fabric and things? Check out these links
- Fat Quarter Shop Daily Deals
- Green Fairy Quilts – Daily Deals
- AccuQuilt Deals and current offers
- Connecting Threads
- Missouri Star Quilt Co- Daily Deals
- Cardmaking & Scrapbooking
- Sizzix
- The Quilt Keeper
- SewingMachinesPlus
- Electric Quilt
- My Amazon Store for all the quilting things I use and more

About Connie
Hi, I’m Connie Kresin Campbell, the quilter, writer, and photographer behind Freemotion By the River. I enjoy inspiring others with my quilt tutorials and patterns. You’ll also see my sweet adopted dogs from time to time.
Be sure and subscribe to my newsletter for more free tutorials and printables.
Thank you for such a clear and concise tutorial, Connie. I needed a quick gift and this was perfect….so perfect, I made both the apple mug rug, and the pumpkin! And, I might make a couple more before I tuck my scraps away! ❤️
Ooh! This is so pretty and looks so simple! I think I might try it today when I return from a few errands. I already have jelly roll strips in those colors. Might make a few apple mug rugs for a special friend for Christmas. Now is a good time to start. Thank you so much. You (and Rusty) are the best!
Thank you Connie. Lovely Apple Mug Rug (and great block design too). Sweet, sweet.
Cute MR with apple or pumpkin. Both are great fall projects. Connie, I’m impressed you walked 3.5 miles. You and Rusty should be in great shape.
I’m loving the fall weather- much better than 90 and 100 degree summer days.
This is one mug rug I really like. Thanks for the tutorial.
Hello Connie:
Just want to thank you for sharing your Apple Mug Rug tutorial in your latest e-mail publication. I love your tutorials & save most of them in my Drive file.
Best regards,
Margaret Burnett
I have to make this sweet apple. It’ll go well with the orange pumpkin one I use at this time of the year.
I love the mug rugs. They are easy to do and make a fabulous gift. Thanks for showing them Connie. We are getting rain today which we really need. Ellen in Memphis.❤️😎🐑🙏
Connie, that’s really cute and I should make one. I seem to be in one of those phases where I can’t make up my mind to do something. I’ve been flitting from one possible project to another without actually doing anything!
I’m envious that you walked so far. I used to do approximately 3 1/2 miles every day after work, but that was a long time ago. Ziva could do it, but I’d be lucky to get in half a mile. We walk twice a day, but it’s somewhere in the vicinity of a 1/4 to 1/2 mile each walk. Probably closer to the 1/4, ha ha. Do you remember when I had the buggy for Jack? He couldn’t walk far at all, but it was nice to be able to take him along. Rusty might like that, too.