
DIY Sliding Quilt Design Wall
This post may contain affiliate links which won’t change your price but will share a commission.
This weekend Builder Bob built my DIY sliding quilt design wall and I couldn’t wait to put quilt blocks on it! I sure love my new quilt studio.
Do It Yourself Sliding Quilt Design Wall
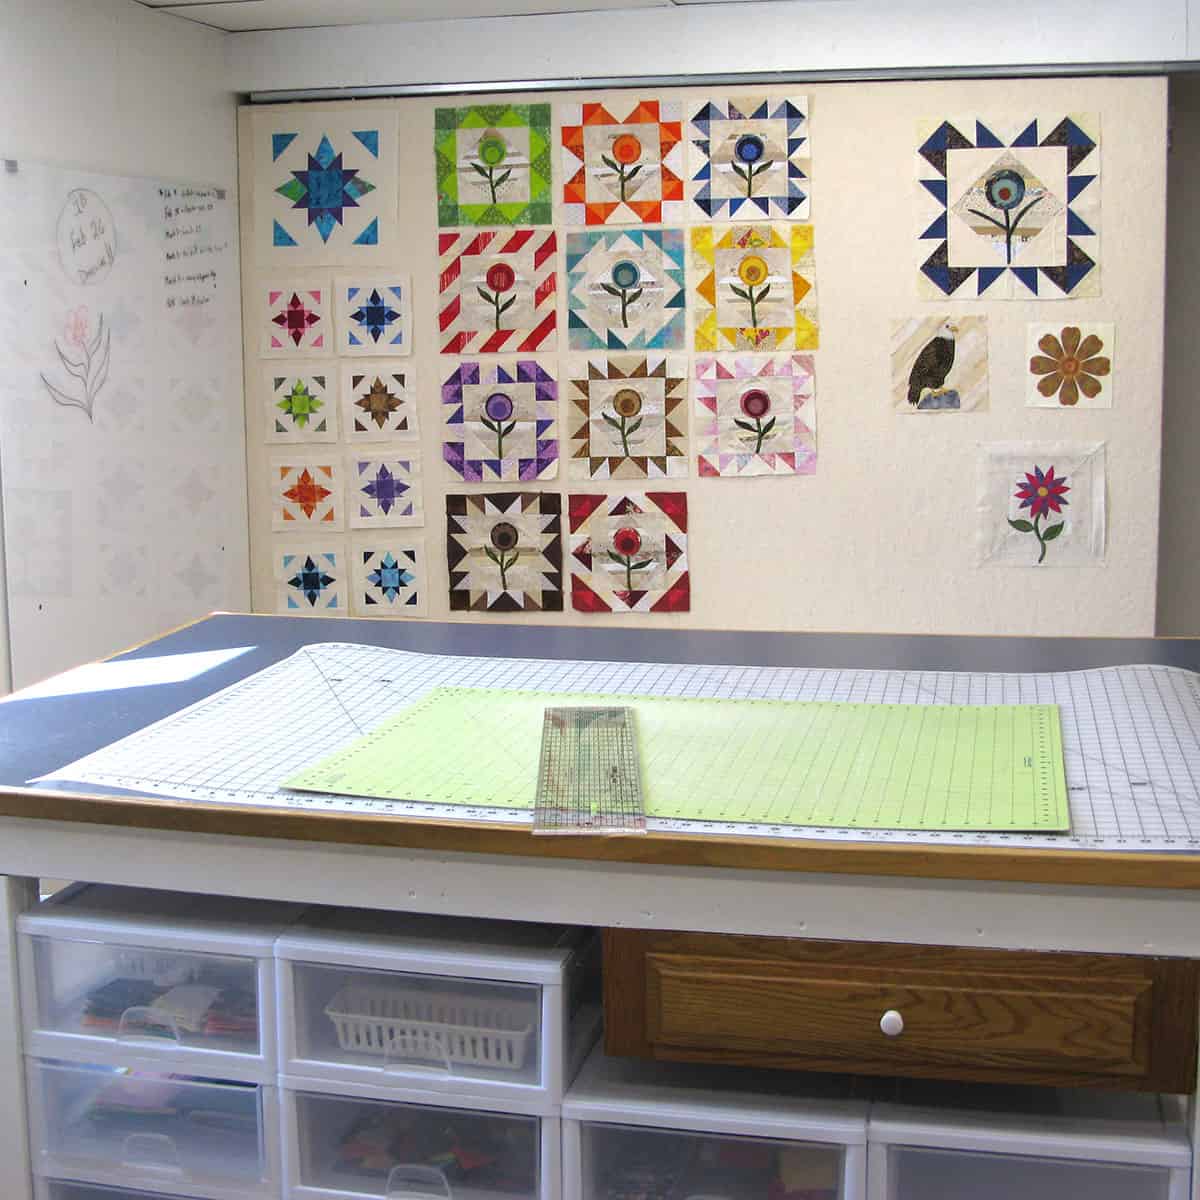
I had been using the office panels that we put up on the walls in January but you have to use pins to keep anything in place.
Last week I was working on a quilt and had to pin it on the wall so I could see how the design looked…….it only took 50 million pins! Okay…..time for a real design wall!

Builder Bob has been waiting patiently for me to make up my mind about what I wanted as I keep moving things. I am also out of wall space!
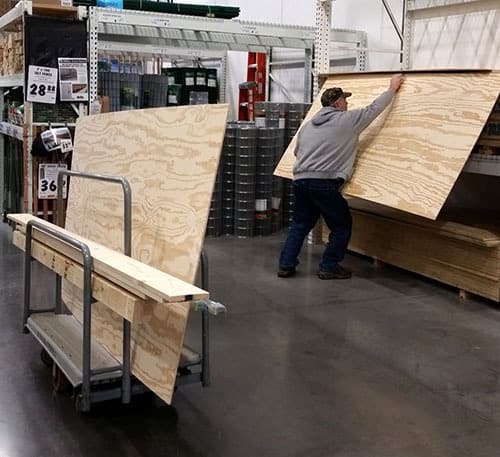
Friday night we did some brainstorming and Saturday we made a trip to Menards for supplies.
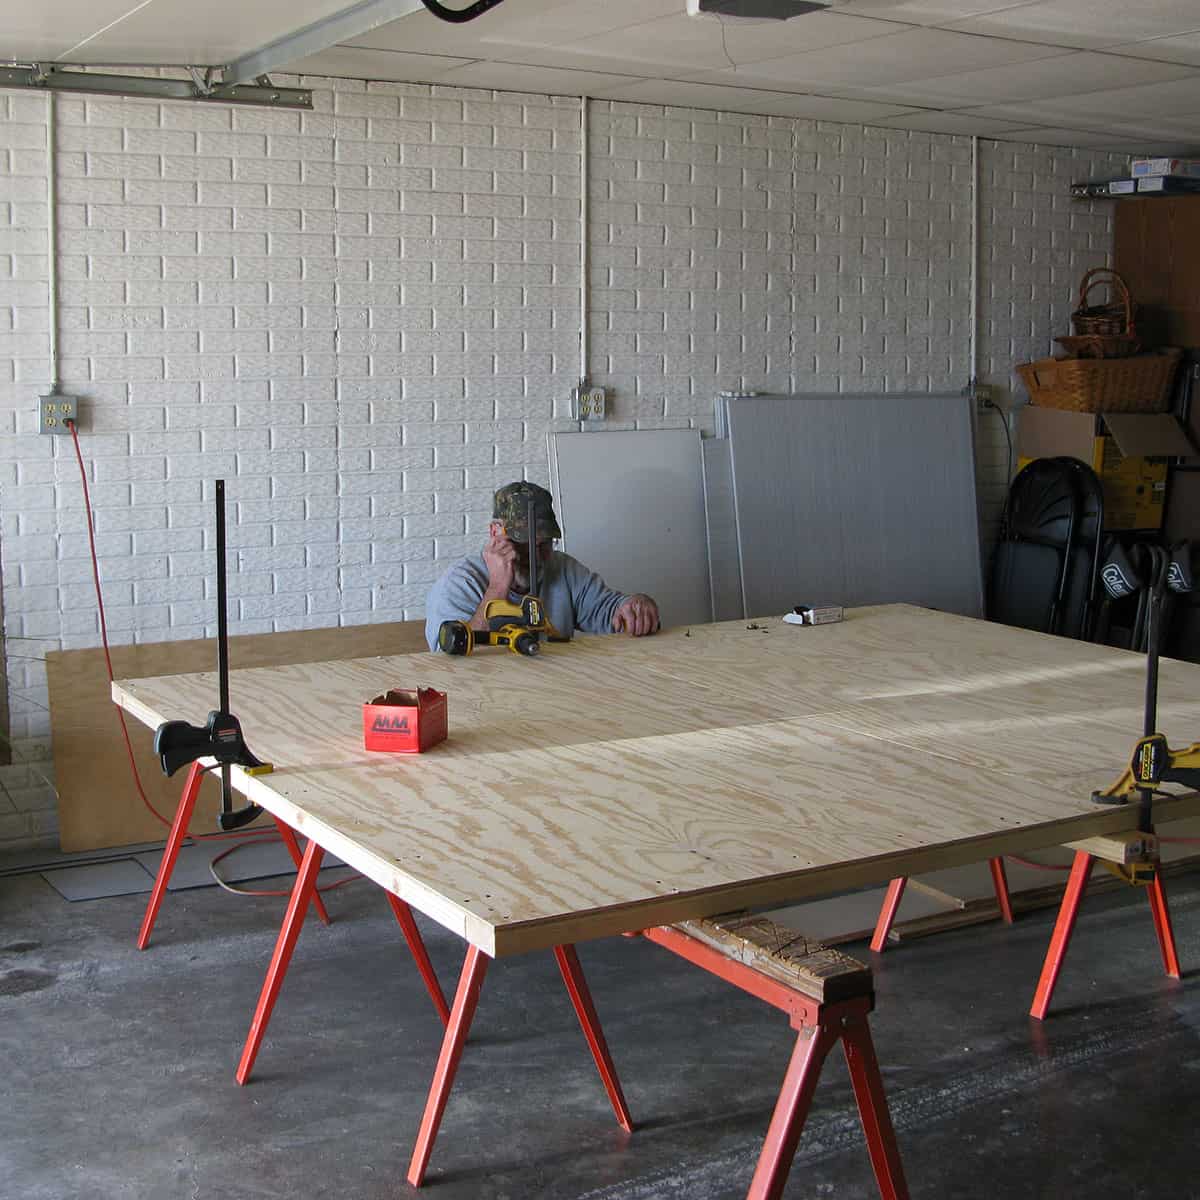
It was the perfect weekend to work on it as the weather was warm enough that we could have the garage door open. It is so much fun to watch Builder Bob work.
While he was doing that I moved my cutting table and other things out of the way. I also laid out the 16 feet of rails.
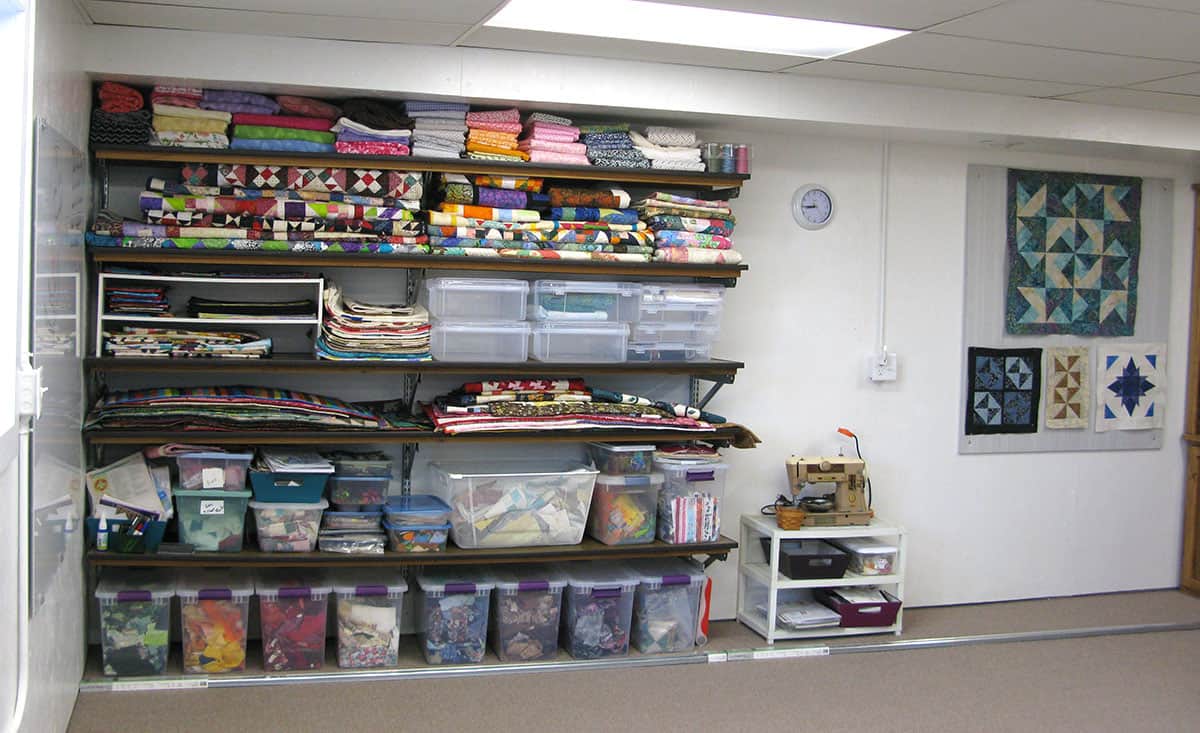
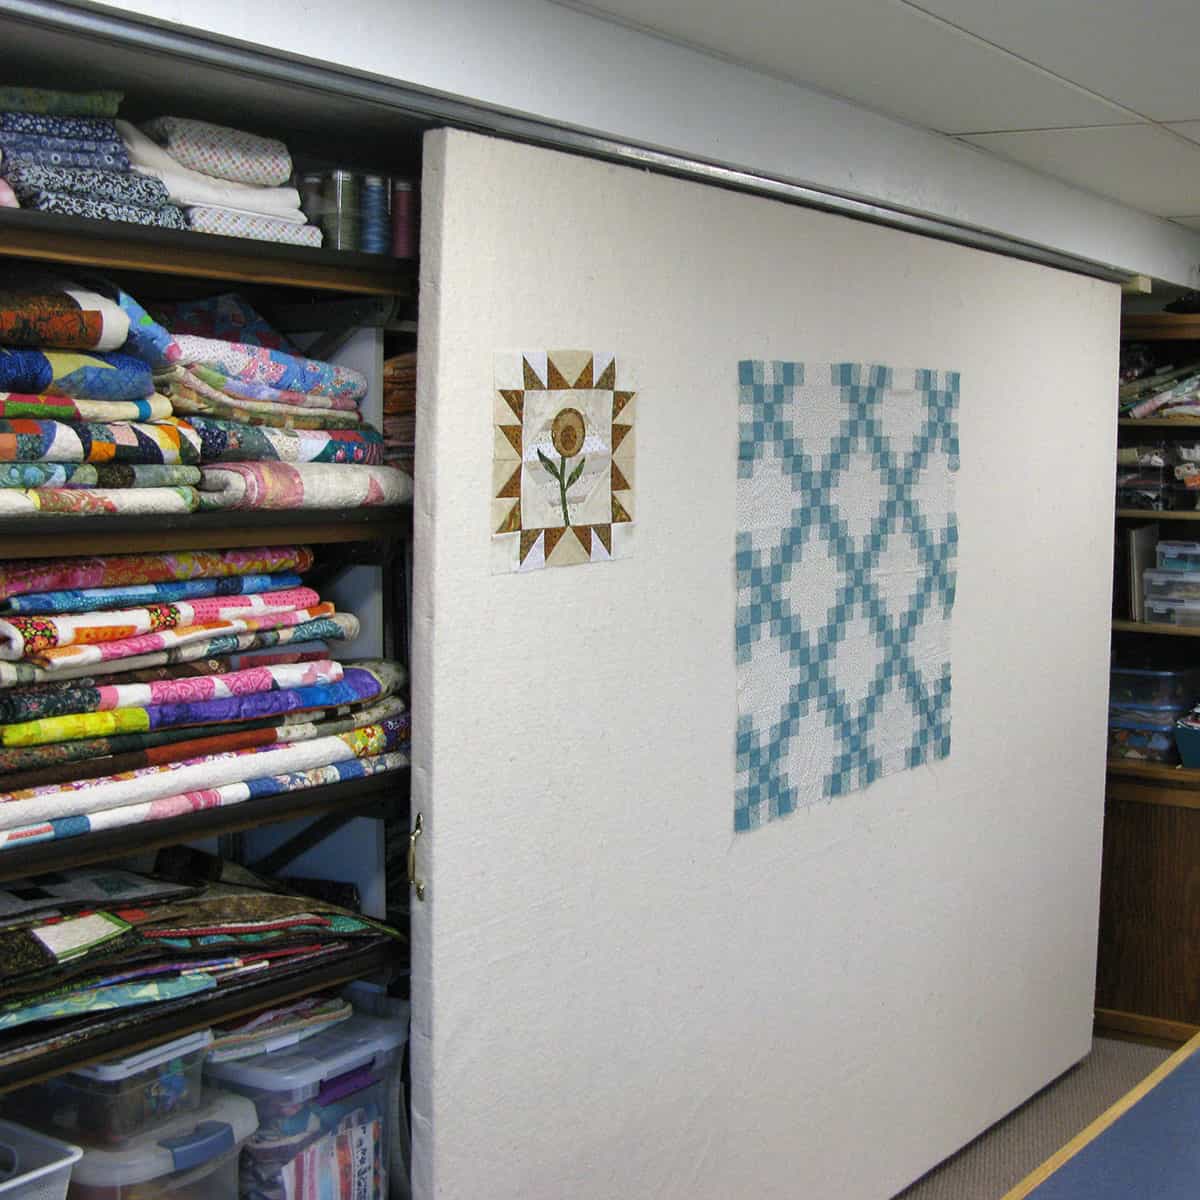
I want to be able to see everything on my shelves when the wall is moved to the right and my shelves are 8 foot wide.
This is a heavy design wall, I am so glad my brother came over and helped carry it into my quilt studio. I had put a sheet up to protect the quilts on my shelves while we were working.
You might be interested in how the design wall was built.
You need the following:
- 2 – Bi-pass 8-foot rails
- 1 – Extra package of door wheels
- 2 – sheets of 3/8 inch 4 foot by 8-foot plywood
- 1 – 1 x 6 eight foot board
- 2 – 2 x 4 eight foot boards
- 2 – 2 x 4 six foot boards (for sides)
- lots of screws
We have a dropped ceiling so my design wall is only 80 inches tall. Builder Bob had to cut 16 inches off the length of the plywood.
He built the frame to keep the wall from warping. The 1 x 6 was cut to 72 inches and used to join both pieces of plywood together. Then he added 6 wheels to the top of the design wall.

I have a bolt of 90 inch Warm and Natural batting and I cut off a 9-foot piece. I threw it in the dryer with a damp cloth to help remove the fold line and wrinkles. I think the guys were really enjoying the project……they smoothed the batting over the board and then stapled it to the back. Maybe they thought I would be too slow….I was happy to just watch!
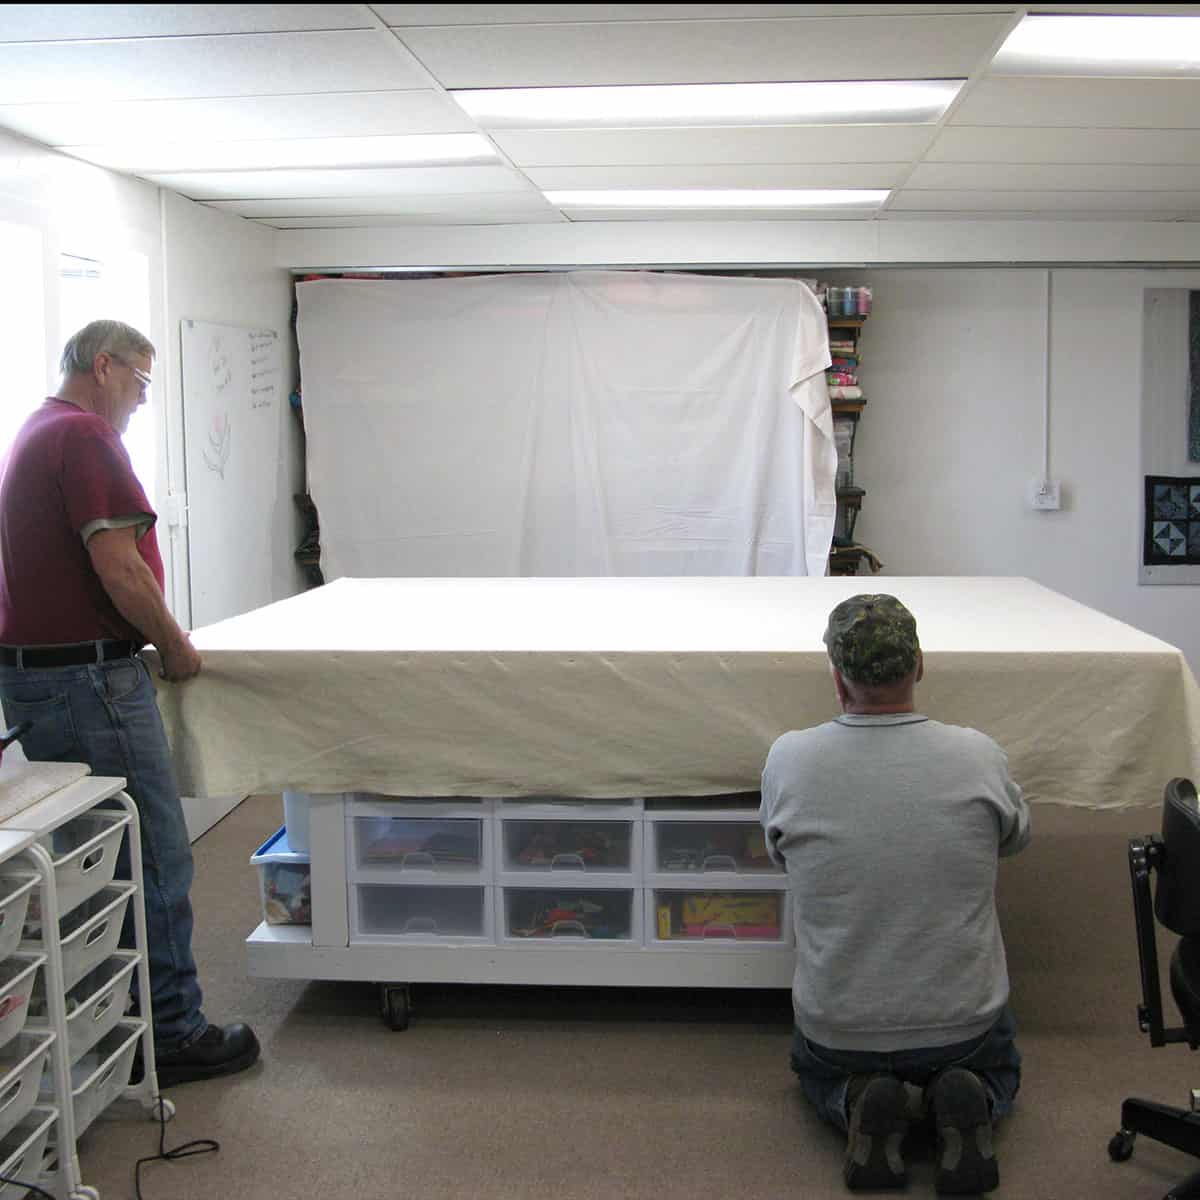
In no time at all they had it all covered and ready to hang.

I had to help hang the wall so I didn’t get a picture of that but as you can see…..it is up!

On the right side there is about 8 inches of space beyond the rail so Builder Bob used a piece of 2 x 4 to make a temporary stop.
Once it gets warm enough to paint he will cut a piece of wood and make a soffit to hide the frame.
Now that I have moved it back and forth a few times we have decided to put handles on both sides so it will be easier to push. Even with those additions the design wall cost less than $100 and is priceless!
Cost: under $100
I forgot to include the cost of the batting – I buy it by the bolt when it is on sale.

I can really store a lot of quilt supplies behind my sliding design wall! You can always do a SEARCH for Studio to find out more about where I quilt.

Please note that this post contains affiliate links, which means I’ll earn a small commission if you purchase through my link at no extra cost to you. Please see the full disclosure here. As an Amazon Associate, I earn from qualifying purchases.
Great deals for you!
Looking for great buys on fabric and things? Check out these links
- Connecting Threads
- AccuQuilt Deals
- Fat Quarter Shop Daily Deals
- Green Fairy Quilts – Daily Deals
- Missouri Star Quilt Co – Daily Deals
- Scrapbooking
- The Quilt Keeper
- SewingMachinesPlus
- Electric Quilt
- My Amazon Store for all the quilting things I use and more


About Connie
Hi, I’m Connie Kresin Campbell, the quilter, writer, and photographer behind Freemotion By the River. I enjoy inspiring others with my quilt tutorials and patterns. You’ll also see my sweet adopted dogs from time to time.
Be sure and subscribe to my newsletter for more free tutorials and printables.
So clever! Great way like you said tonhave your storage of quilt supplies behind the sliding wall! i need to find me a Builder Bob as my husband needs lesson! Lol
Can’t wait to read your blog post when your room is completely done. However it already looks great as it is.
Love you Sadie dog too hope she us well! She likes blankets just like my Maddie Girl who plays and snuggles at my feet while I have coffee in the morning!
I’m following this as I recently picked up one flannel back table cloth at my local variety store. Not as cheap as your pick (great price!), but helping a small business so I’m happy. I don’t have much tall space in my quilting room so I’m planning on hanging this over a two door closet and place some velcro straps on the back so I can roll it up when I need to access the closet. Haven’t tried to make something like this before. Hope it works.
I am interested in the pattern for your flowers blocks in #5 design wall.
Can you help me? You are extremely fortunate to have Builder Bob!
He is definately a keeper!
That is a design I was working on and never finished. Definitely hope to finish it this year.
Wow! I love this.
I keep leaving little hints (i.e. pictures) of this for my hubbie. Right now I have a 4 x 8 sheet of insulation board covered with flannel that I wedge up against the wall then can slide it back into the garage when not in use (which is never). But I have been looking at this and had a “tickle”. What did you do about the cold air return/heat/a. c.? Are they behind the shelving? Did you have to do anything to them?
Anyway, love this idea and I might just do it myself. Hint: If I start a project and ask for just a “moment of his time” he usually justs does it for me so I don’t staple myself to the wall. (Don’t ask!) But no one got hurt, just my sleeve.
Love your new studio, such a handy hubby. Do you have a link to the big cutting table, showing how it was made?
Hi Connie
Love it – Headed to Home Depot today.
Thank you for such a great idea.
LynnAnn from Connecticut
Thanks LynnAnn, I really love my design wall!
Did you also build the cutting/layout table? Do you have plans?
The table was originally built by my husband for his saw. He cut the legs off and made it shorter for me but sorry….no plans. It is 4 foot x 6 foot.
Oh you lucky lady! I also have a Bob the builder. Thank you for including pictures and measurements. Creative Blessings!
Showing this to my hubby! Great idea! Thank you for sharing information on how to!
Builder Bob is the best! What a lucky girl!
Really nice here and it is more complete and easy research. I thank you very much for those relaxing moments.
voyance gratuite
Bob and your brother are priceless too Connie! That is a quilter's dream of a design wall! The whole space looks so wonderful!
WOW! What a guy! What a design wall!
I'd love to win for my charity sewing.
Thanks,
Peggy
peggy_verdongibbs@att.net
Best sliding design wall ever.
QuiltShopGal
http://www.quiltshopgal.com
That is such a clever design wall.
What an amazing design wall! I am so happy for you… you can make enormous quilts to fit that size… or lots of smaller ones!
You are so blessed o have a handyman around . Neat way to design your design wall with duel purpose design wall had hides your fabric. Enjoy your new craft room . Happy Quilting 🙂
Such a great idea, good plan and workmanship.
What a great idea and so great to have Builder Bob make it for you. Happy Creating!
-Soma
That is one awesome design wall. Thanks for sharing.
Super, super, amazing, brilliant – Chris 😀
Super, super, amazing, brilliant – Chris 😀
This is a great idea! I'm going to do this in my new house!
That's a lot of awesomeness!
GREAT DESIGN WALL!!! Builder Bob, Brother and you Connnie have really built a wonderful wall for your quilt designing. It really is Priceless!!! Embracing Creative Bliss…
This was a fantastic idea! I wish I had all that space for a sewing room. I can't wait to see the final blog post on your room.
Fabulous idea! Now I need a new quilting space in which to use it.
That's an amazing looking design wall Connie. You made me laugh at your comment that it is "ONLY 80 inches". LOL That's almost the width of my entire sewing room.
It looks really great.
What a great idea and huge wall so you can see your plans. Can you rent Builder Bob out for work over at my home?!!!!!! Hugs, Susie x
That is the "slickest" thing ever! Covers and protects your shelving and provides design space a winner all around. Big thanks to Builder Bob and your brother!
You are one lucky lady!
A brilliant idea!!
What a great 'wall'!! Enjoy!!
Fantastic idea! I need to think on if I have room for such a project. I share with the dvd library and the musical instrument collection in my sewing area. . . .I married the music loving movie watcher! lol. . . ..
What a great design wall! You've got it all with location, design, construction, storage! Builder Bob is a keeper!
Brilliant idea! Now if I just had the rest of your space to go with it!
That design wall is fabulous. I quickly learned that the 48×84 inch one we built last fall is just a tad small, and I'm constantly taping edges of blocks to the wall beyond the design wall's width.
Envy!
FANTASTIC!!!!!!!!
That looks fabulous. You can never have too much design wall!!
Great wall of design!!! applause for Builder Bob and brother 🙂 Great job guys and I know you are going to really enjoy having this tool in the studio.
Like Michelle, I'm thinking of how I can incorporate this idea into our new house design. We're still in the drawing stages so now's the time to plan it in.
Super! It looks wonderful. Brilliant idea
What a great idea! You and Builder Bob sure make a great team!
That is fabulous! I love the movable idea.
great wall! now what are you hiding behind there? those shelves? and what's on the right side then?
What are you doing for lighting? I have high hats and the first one it was like a beam of white light and then dark around it, now it's a more yellow light, but that's not really "true" to color, so I am being picky. the best is really the curtains pulled away on a sunny day and with the lights off or maybe even with a flash.
Everything on my shelves keeps changing but……I'm getting close to permanence on some of it! I'll soon do a blog post on the entire room as it is pretty much complete for now. You noticed I pulled another book case out of another room LOL…..Bob just shook his head.
Lights, I have lots of cool white and bright white florescent as I get very little light from the windows and I NEVER use a flash.
I love that idea and am going to save it for my eventual space in our next house.