
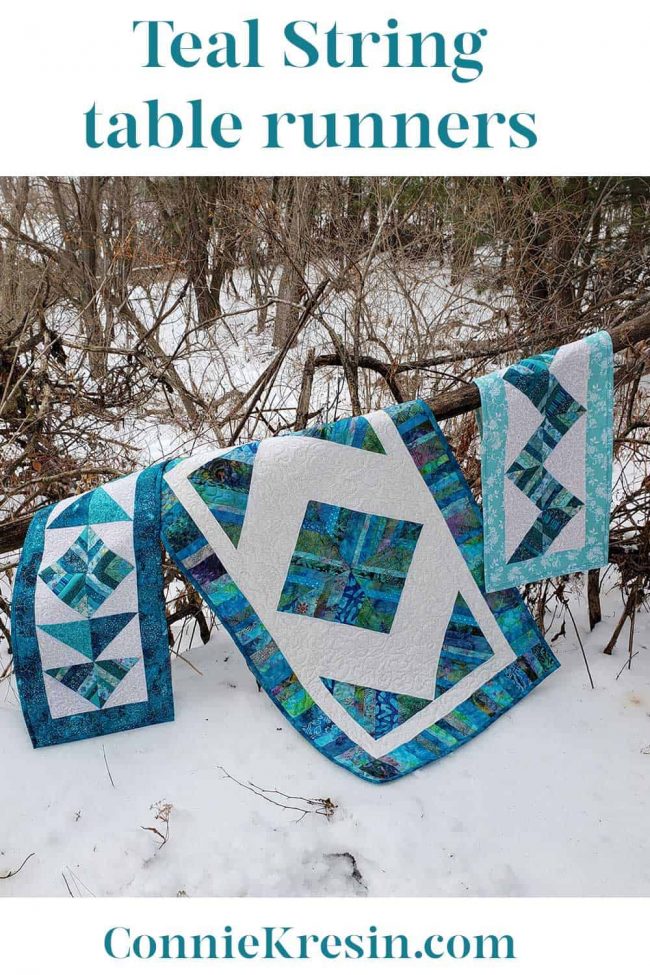
Easy Quilt String Block Table Runner
This post may contain affiliate links which won’t change your price but will share a commission.If you have thought about making a Quilt String Block Table Runner, you’ll enjoy this tutorial. Quilt string blocks are one of my favorite things to make, have you ever made them? They are really great to create table runners with.
This tutorial shows you how to make the string blocks and then add a piano keys border to the table runner.
I am really enjoying living in the country and being able to go down in the woods and take photos. This spring I hope to clear some of the dead branches and make mounds of brush and tree limbs for the wildlife.
It is very easy to make a table runner that fits your exact table. Just change the size of your borders or even your blocks.
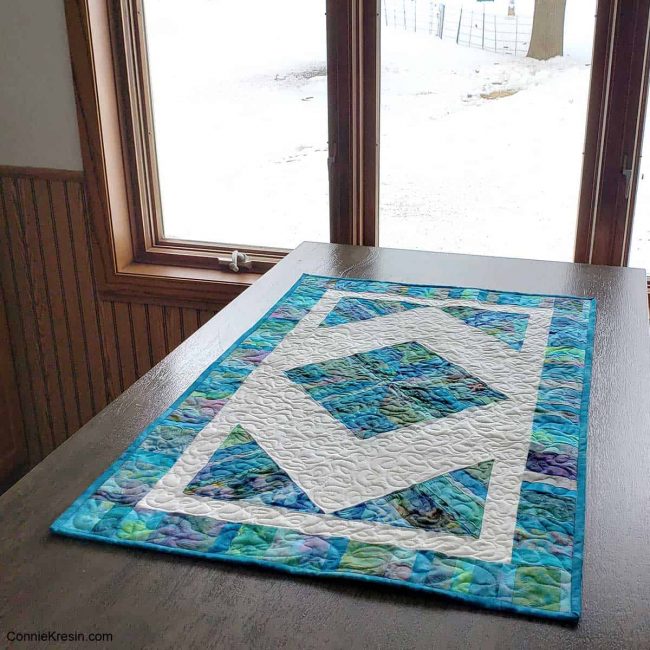
Quilt String Table Runner
23″ x 37″

I have noticed that I have a lot of teal fabrics and seem to pull them out every time I want to make something. Now that our new kitchen is blue, I’ll have to start using that color.
Make the string blocks
Supplies:
- An assortment of batik strips or a layer cake
- ½ yard white batik
- ¼ yard teal batik for the binding
- backing
- Tuscany Collect Cotton Wool batting
- Aurifil 50wt cotton thread
- Schmetz needles
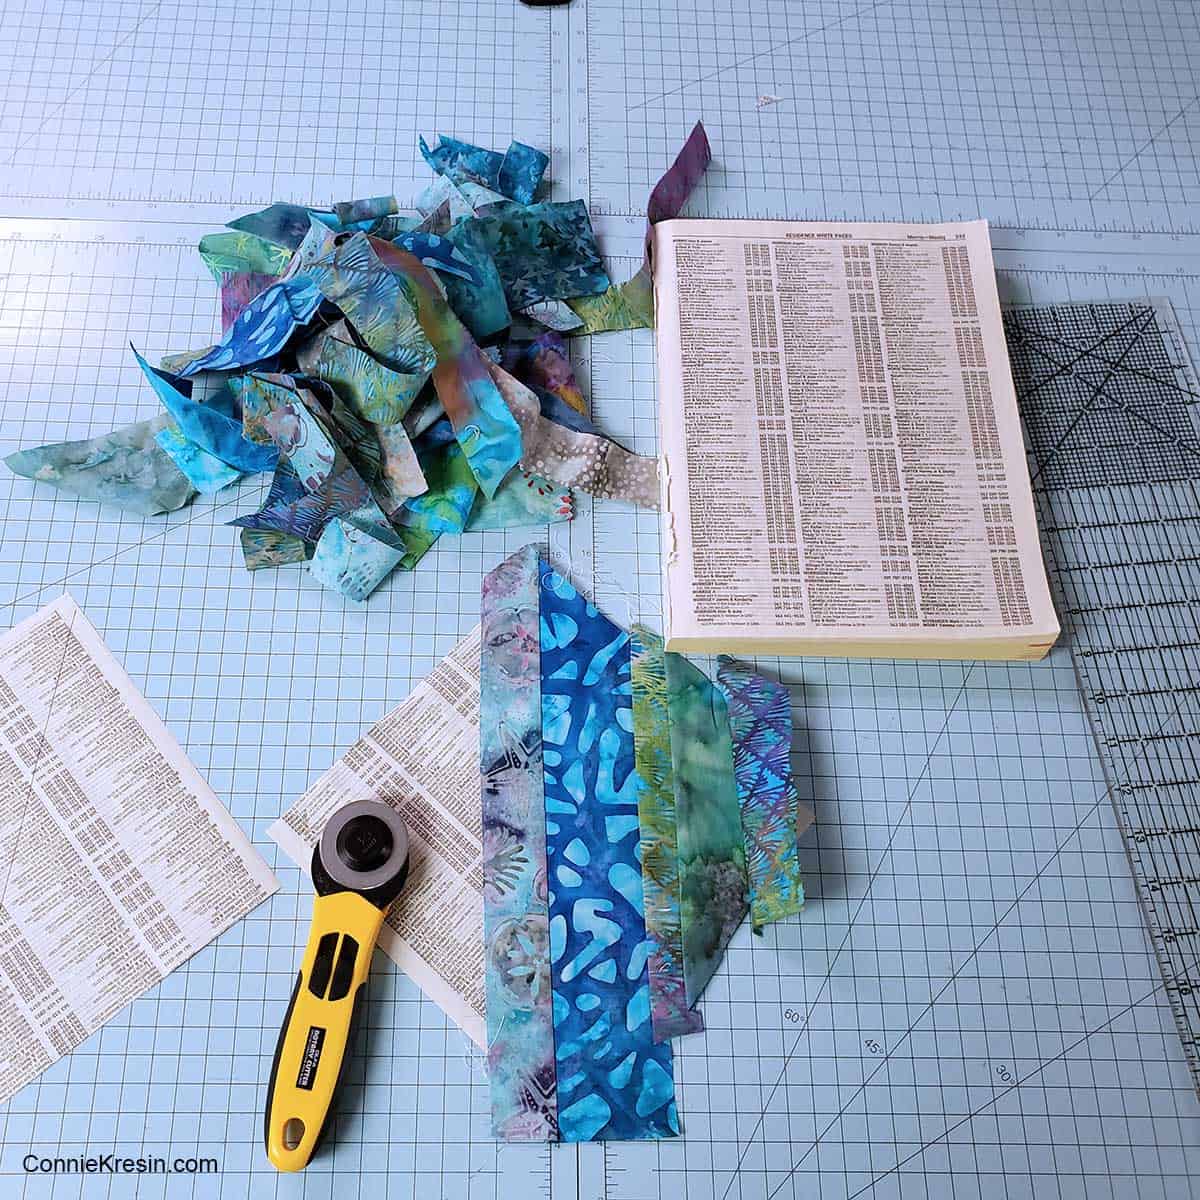
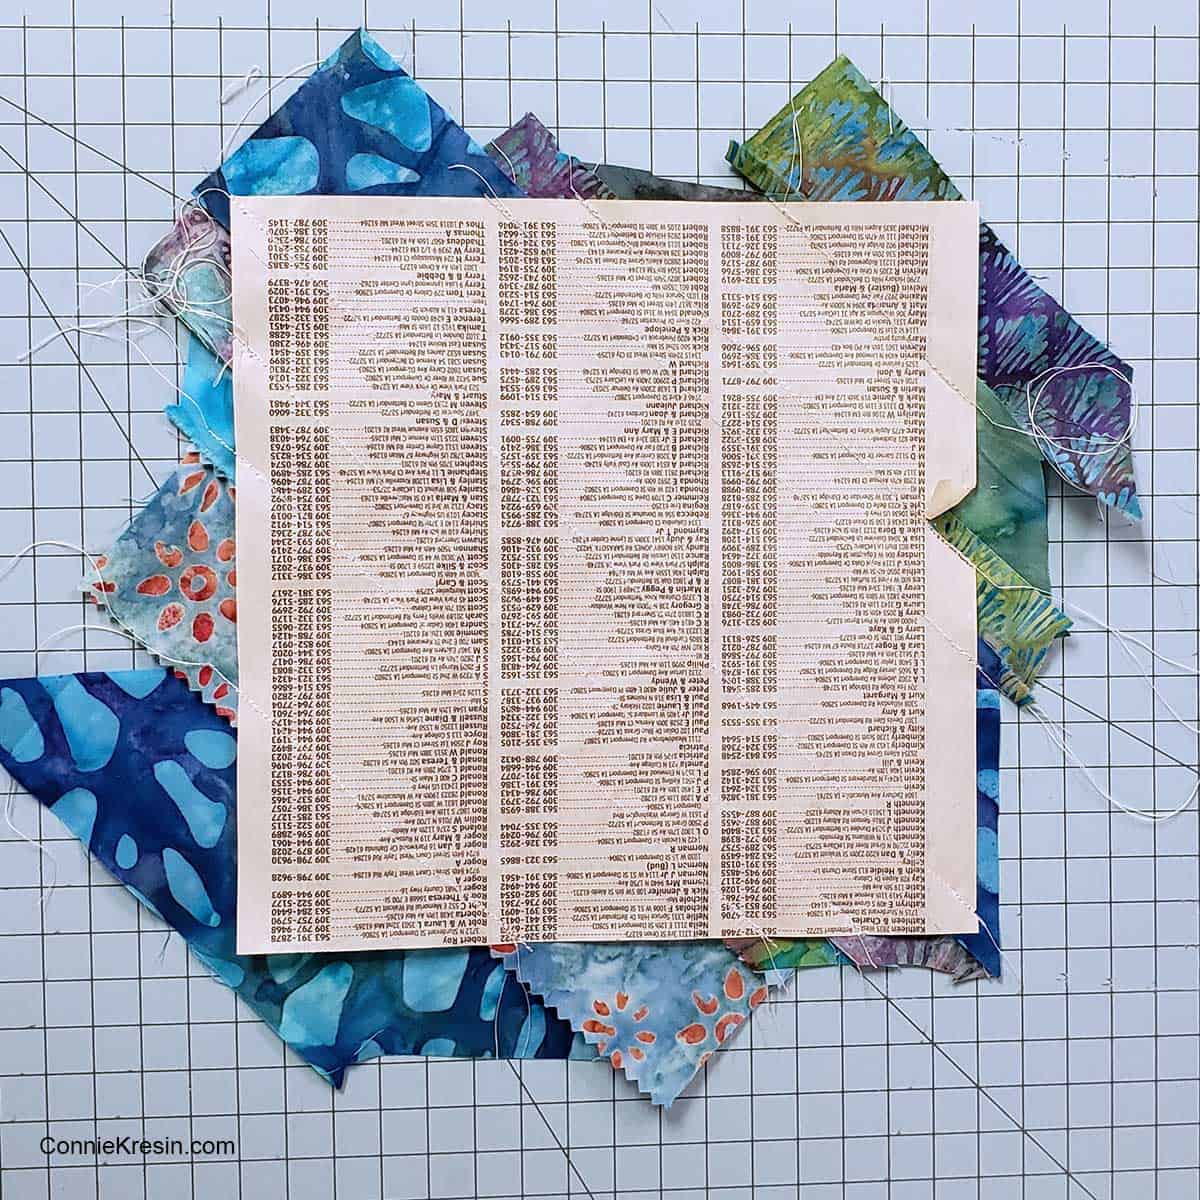
The easiest way to make string blocks is to use a paper backing. I have old phone books that I hold on to for just this reason. They are getting smaller and smaller all the time.
The paper is nice and thin which makes it easy to remove. Another paper I use is newsprint – it is about the same thickness and has no print on it so you don’t have to worry about a possible smear from the phone book paper.
The batiks are leftovers from other quilt projects. I trimmed each strip to make them straight but the width varies from less than an inch to 2½-inches. You can also use a layer cake and cut them into strips.
This is a great time to use an old needle in your sewing machine as going through the paper will dull a new needle fast. I like to use an 80/12 Schmetz needle.
I used 8-inch square paper, I drew a line ¼-inch from the center of the paper so I could lay my first two strips of fabric on the line and get a seam exactly in the center of the paper. This step isn’t necessary as the blocks will get cut in half later.
Use a ¼-inch seam allowance, if I have a strip that is less than one inch, I may use a narrower seam allowance. Use a shorter stitch length, you can also backstitch at the beginning and end if desired.
Fold the fabric back and either iron or finger fold before adding another strip.
Completely cover the paper with your fabric. Now trim your block even with the paper into 8-inch squares.
Make four of the string quilt blocks.
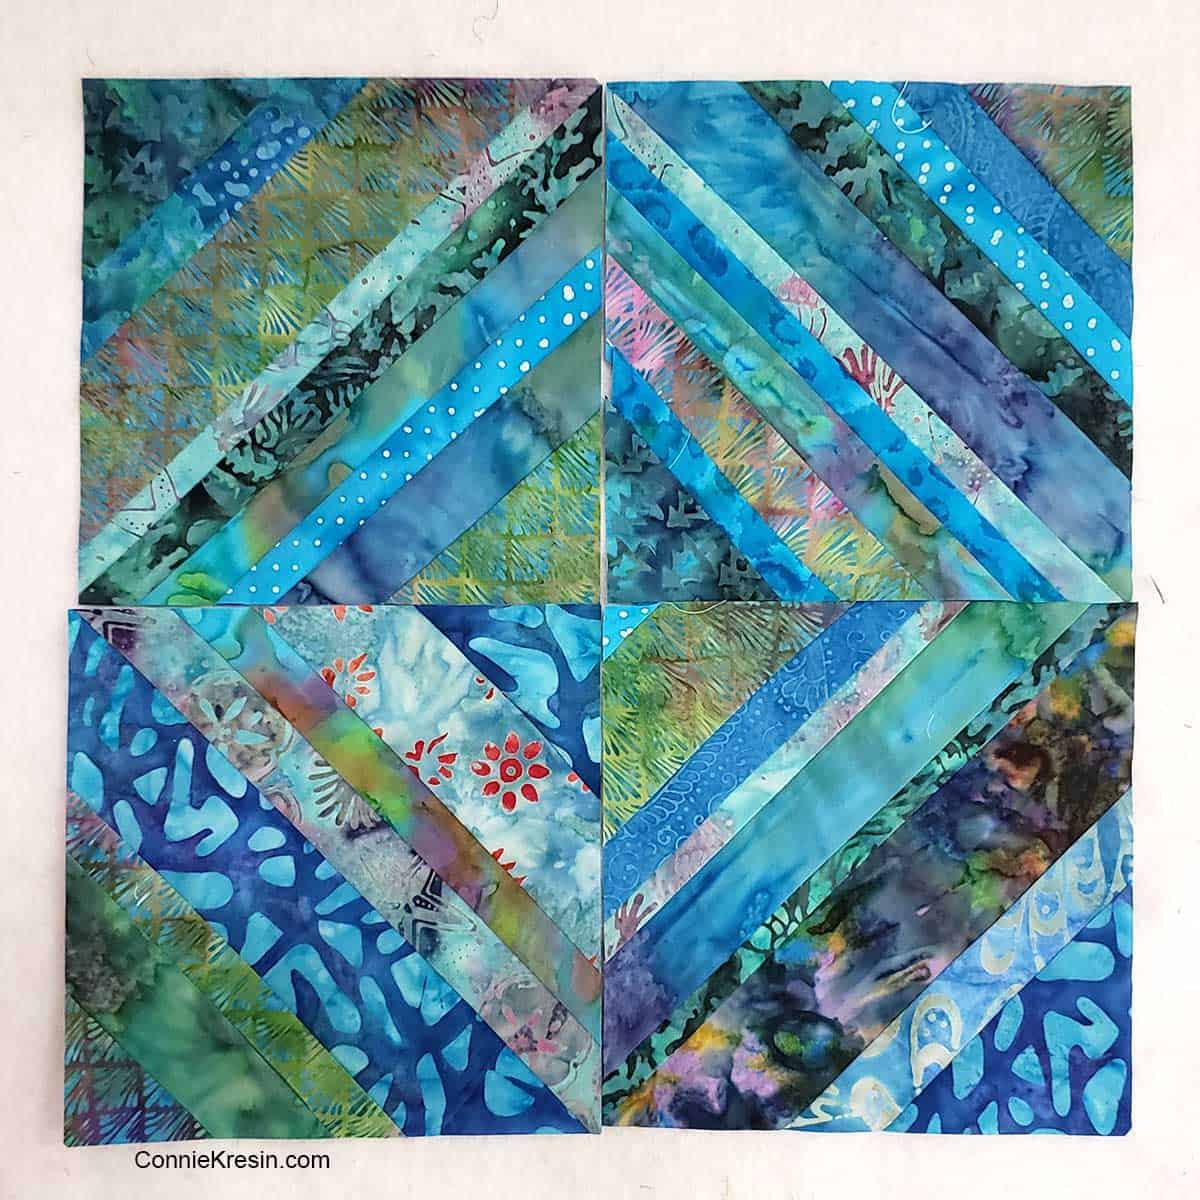
8-inch square blocks
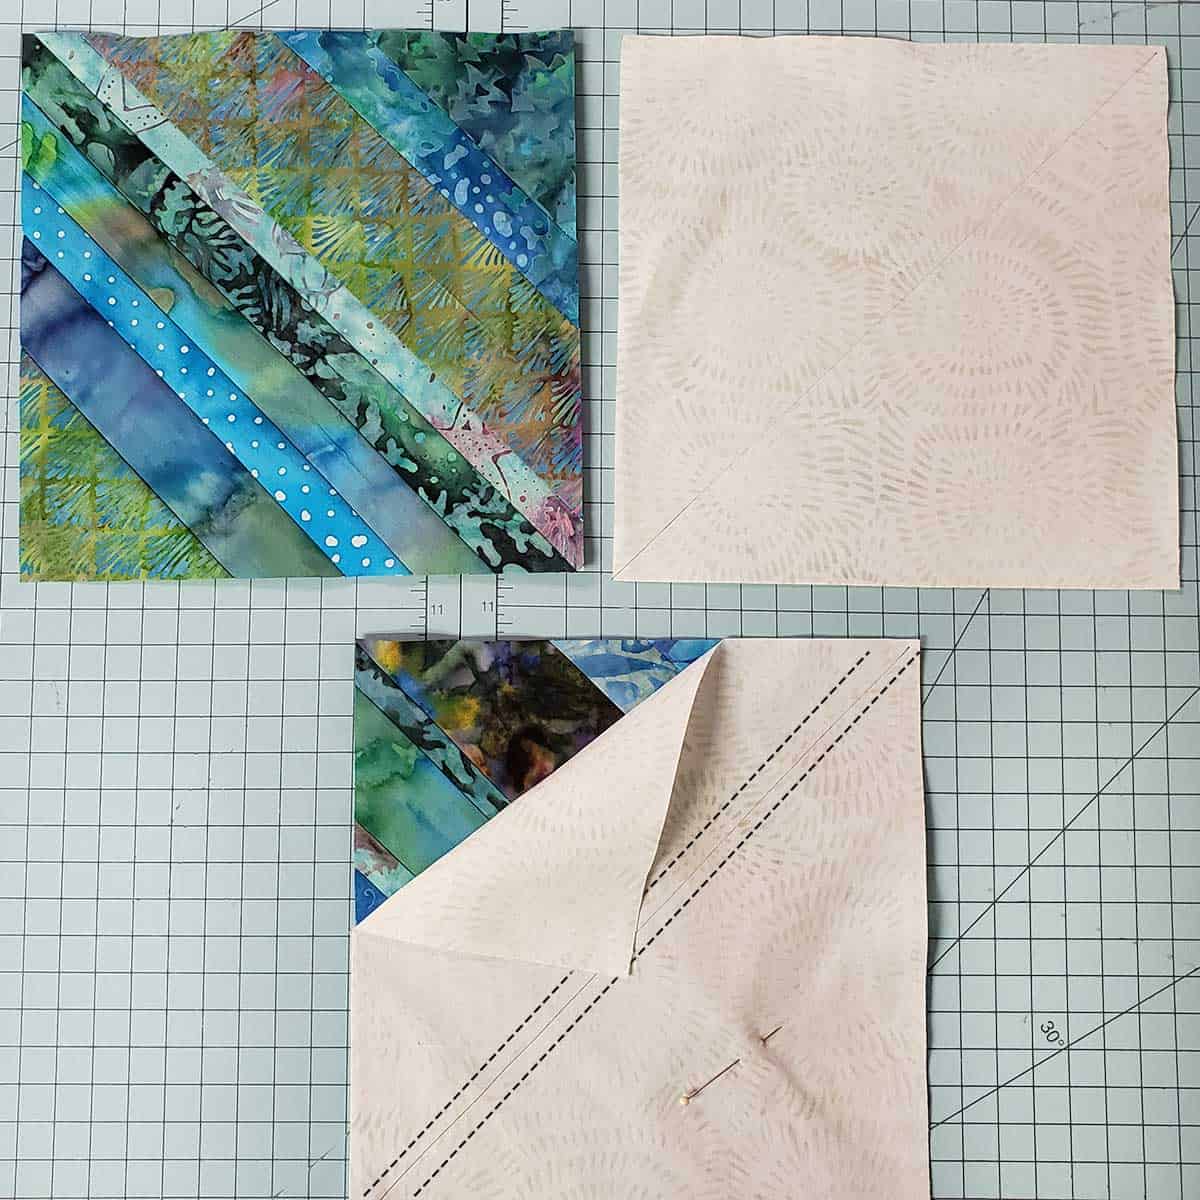
- Once you have your blocks trimmed to size, cut the white fabric into squares the same size
- Draw a line diagonally on the white square – you will sew a ¼-inch seam on both sides of this line and then cut on the line you drew
- Be sure and place the white square on top of your strip block exactly as shown below so each block will consist of all the strips in the block
- Now your blocks should be 7½-inches square
Here is what would happen if you drew the diagonal line and placed the white fabric on the strip block wrong. You get an entirely different look.
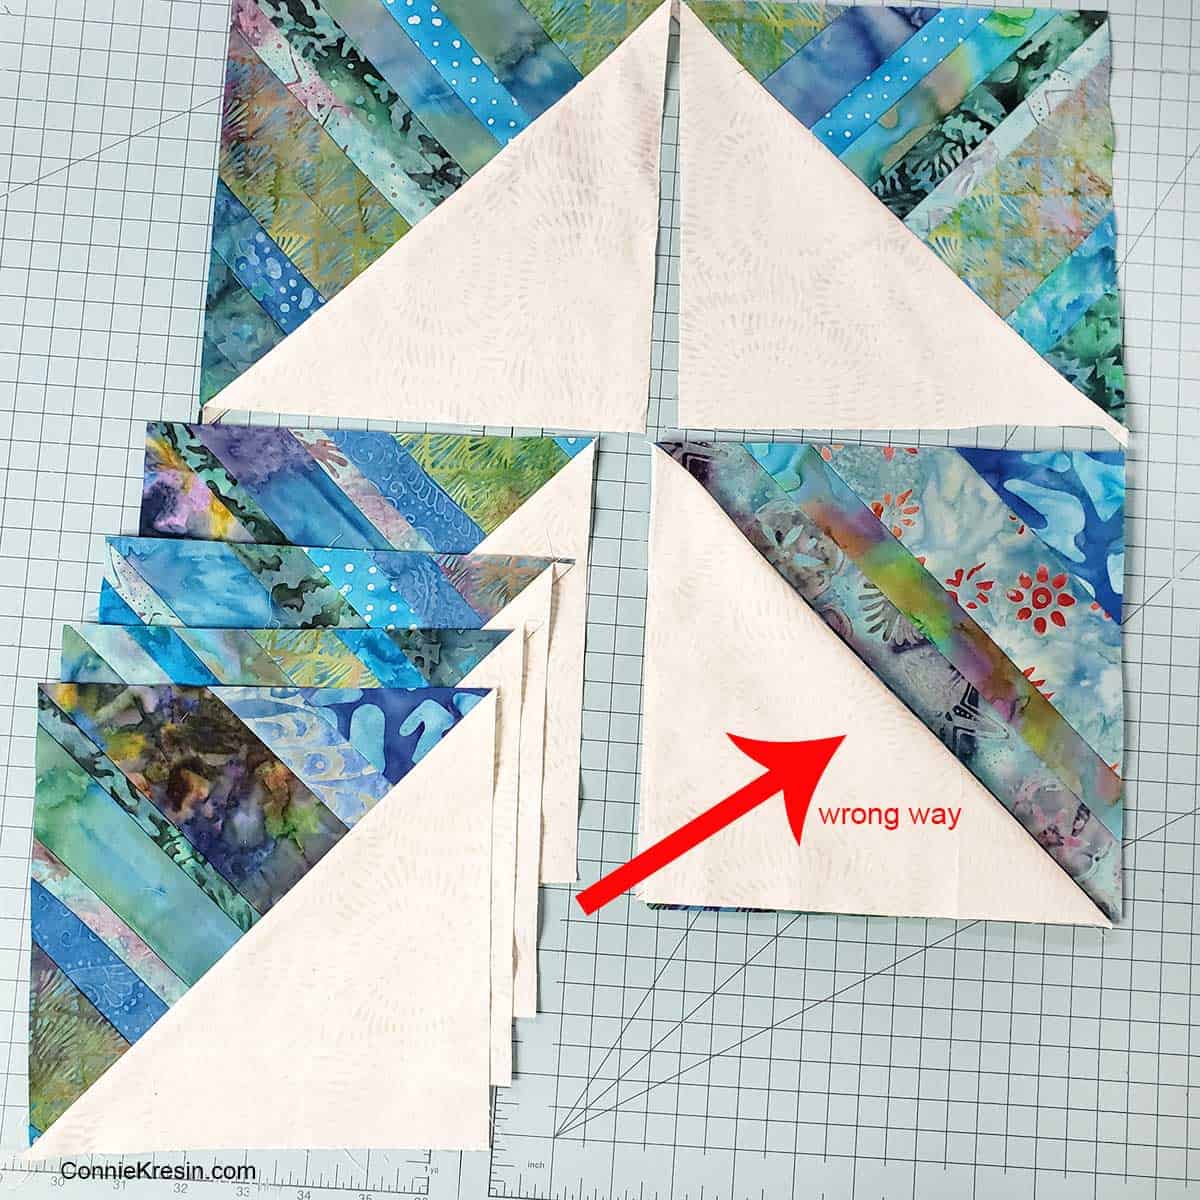
You will have eight of the blocks. Be care handling them as the edges are bias and will stretch.
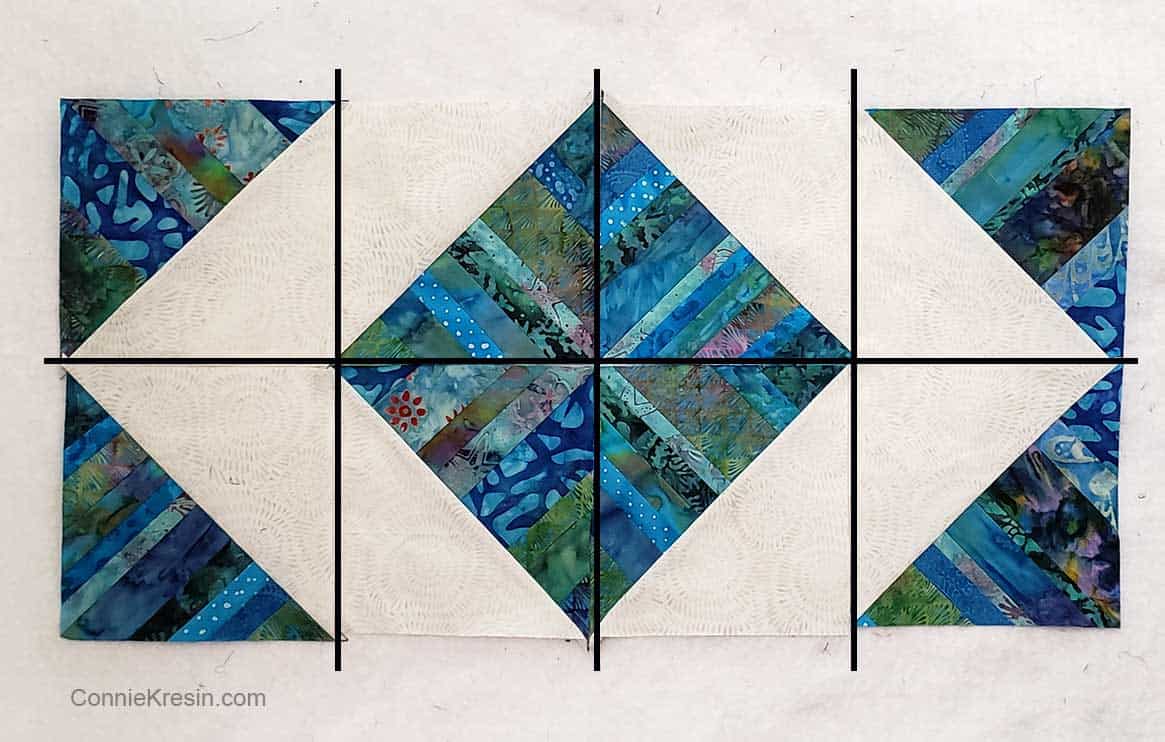
Piece the strip table runner
This diagram shows how to layout your blocks – sew them together with a ¼-inch seam allowance.
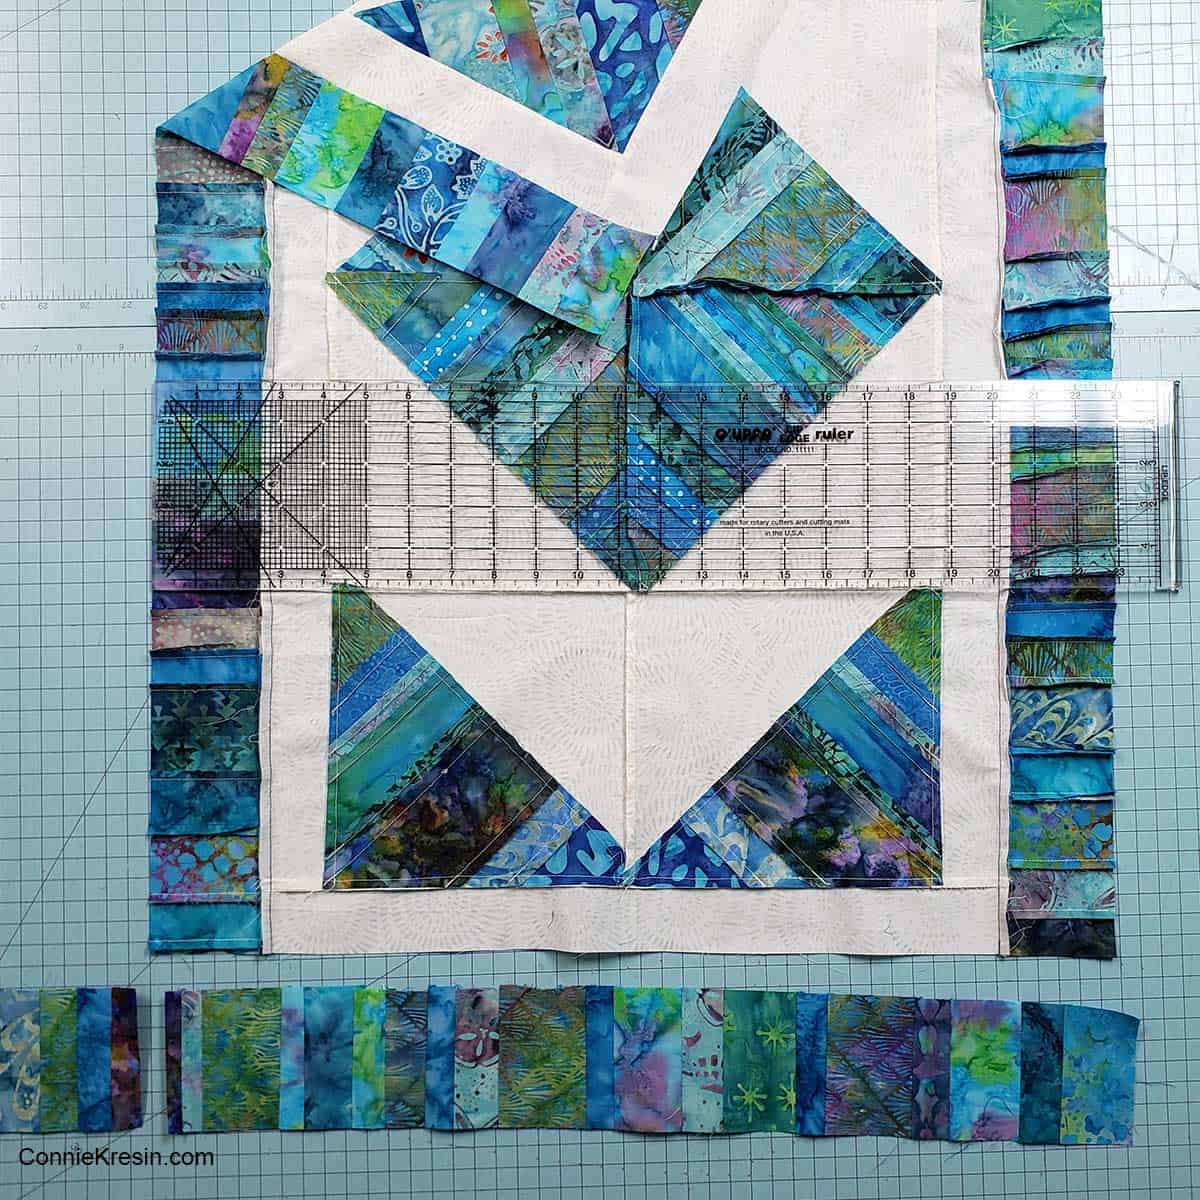
First Border
Now add the first border – measure to make sure the measurements are the same as mine otherwise adjust them.
- Cut two – 2-inch by 28½-inch strips of the white batik for the side borders
- Sew with a ¼-inch seam allowance
- Next cut two 2-inch by 32½-inch strips of the white batik for the top and bottom
- Sew with a ¼-inch seam allowance
Create the piano keys border
There are several different ways to make your piano keys border. Remember adding machine paper? That or newsprint will work if you would like to piece your borders on paper.
I still had lots of longer batik strips so I just sewed the strips together that was about 6½-inches long. Once I had two sections that looked about big enough to go around the table runner, I trimmed the sides and then cut them into 3-inch wide pieces.
Carefully measure your table runner before cutting the piano keys border in case yours is a little bigger or smaller.
I like to take my long O-Lipfa ruler and measure in the middle and at both ends to figure out how long to cut my border. The middle will be a more accurate measurement.
- Cut two 3-inch by 32½-inch borders for the sides
- Cut two 3-inch by 23-inch borders for the top and bottom
Quilt the table runner
I used Tuscany Collection Cotton Wool batting for my table runner. This has a beautiful loft. When I get to this point in a quilt project, I usually just want to get it finished so I just did a simple meander free-motion quilting. I used a teal Aurifil thread on the strings and also a cream Aurifil thread for the background.
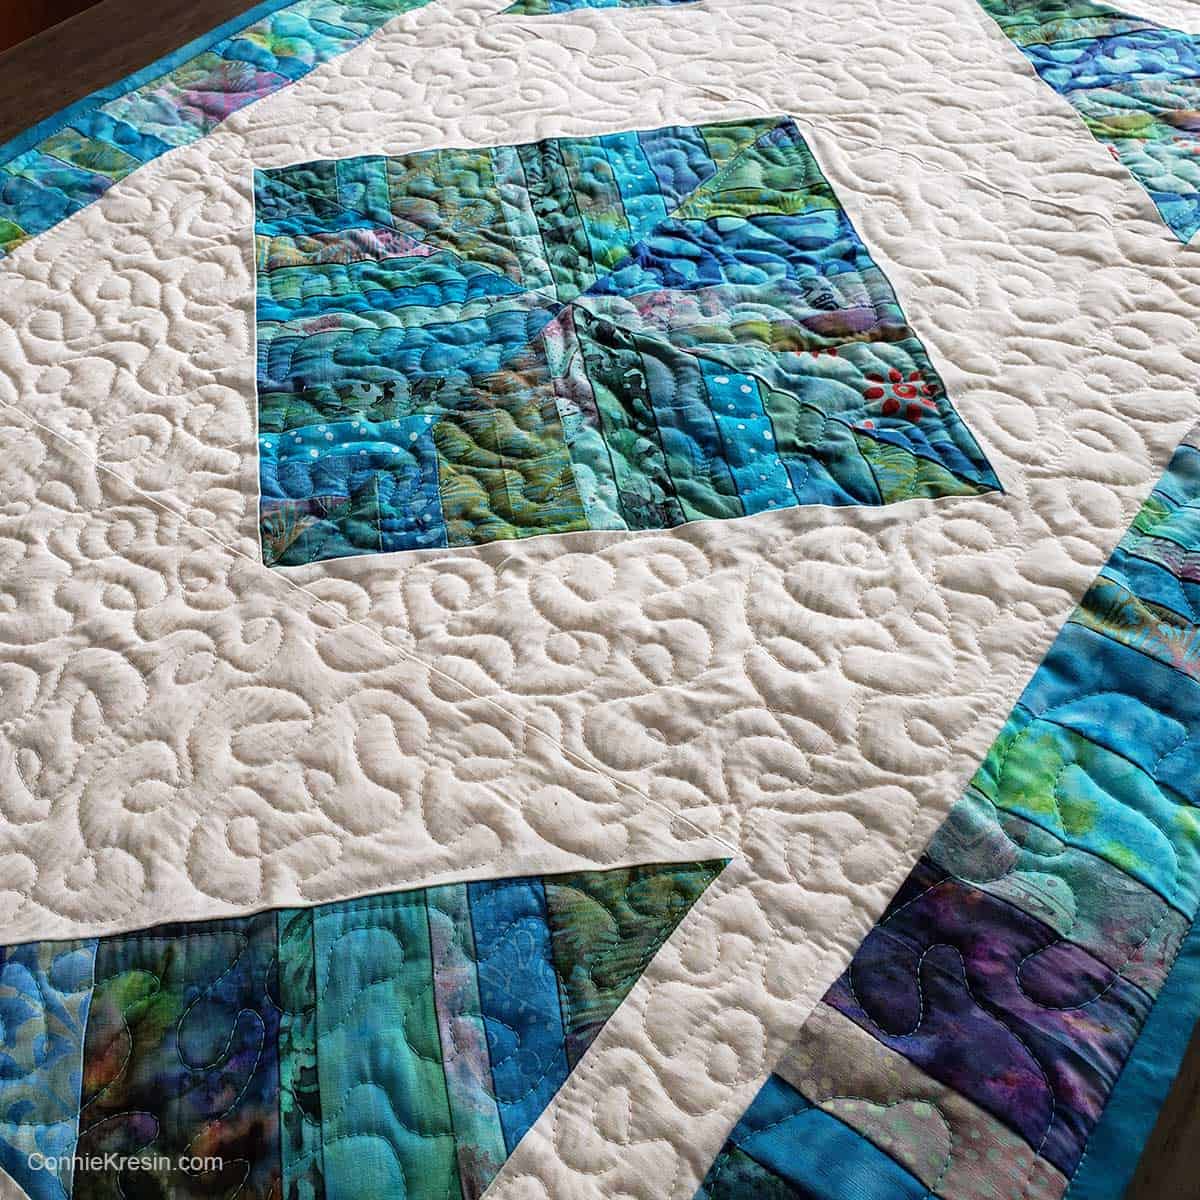
The binding was cut in 2½-inch strips and I used my machine binding tutorial to add it.
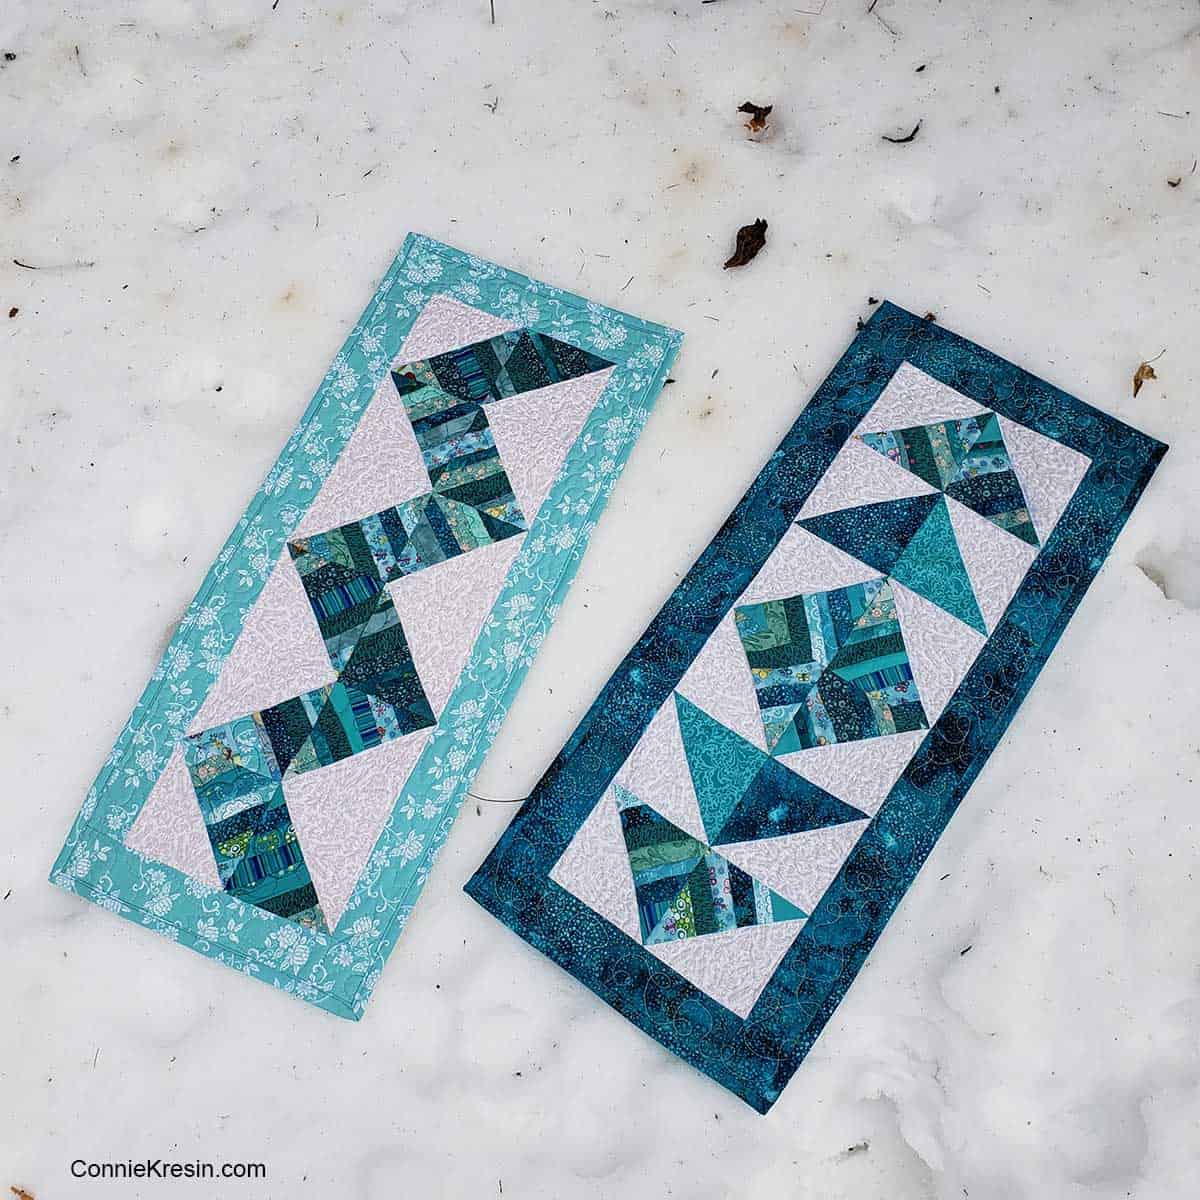
Various ways to layout your blocks
Look what I happened to find while sorting through my table runners! Obviously I really like teal string blocks. The two smaller table runners are made with regular quilt fabrics. I can’t find a post anywhere on my site about them.
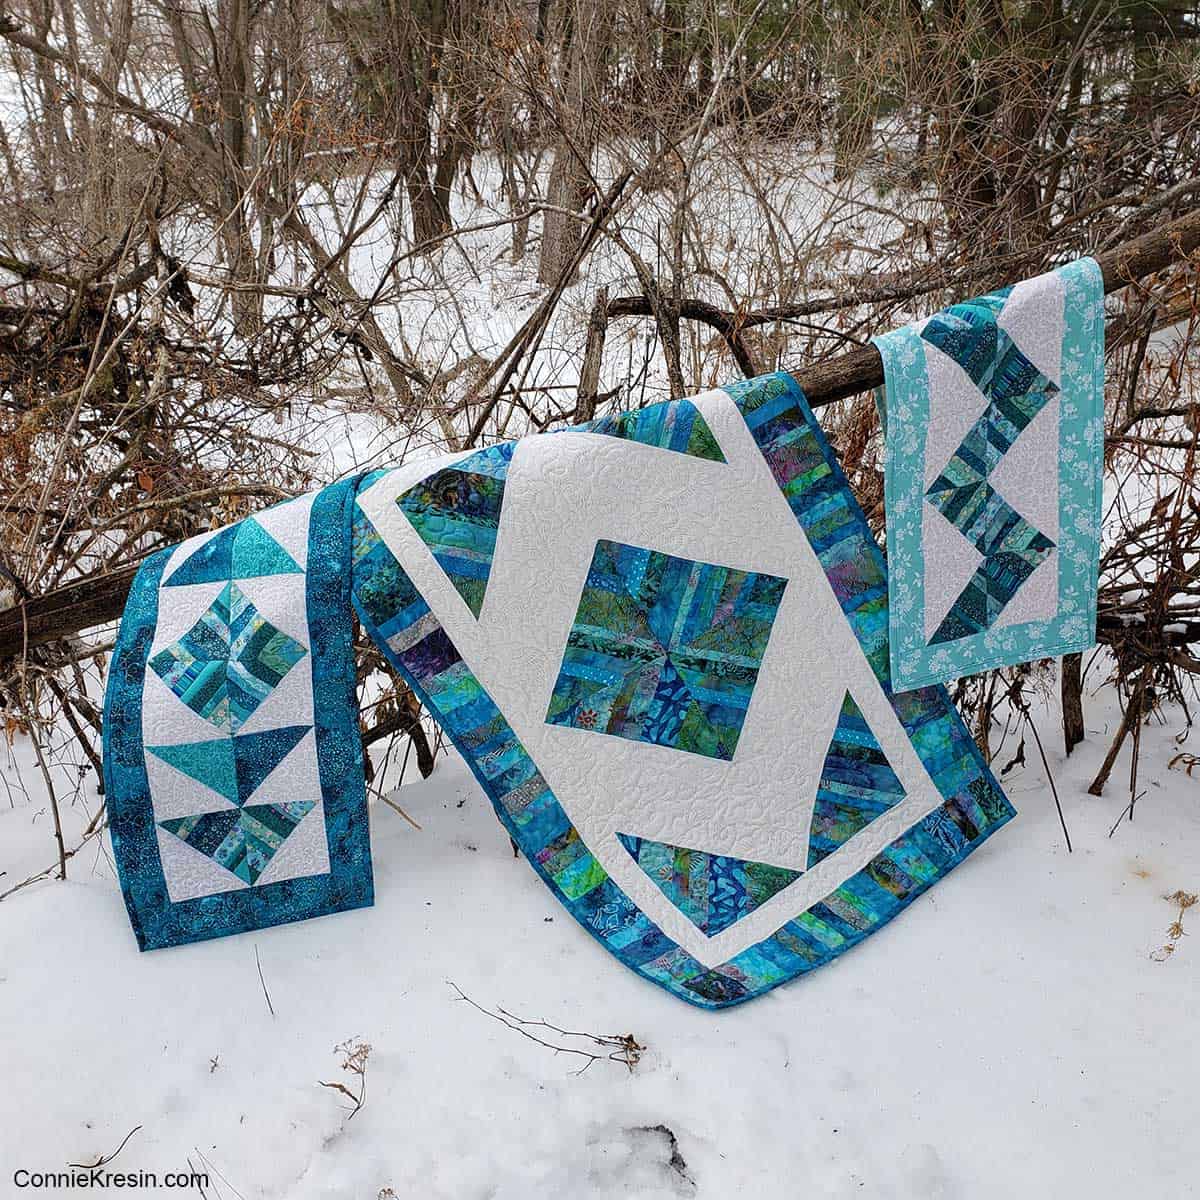
The finished size of the blocks is 4-inches and the size of each table runner is 12-inches by 27-inches. This photo lets you see how the blocks are arranged. Did you notice that on the dark teal table runner I used simple half-square triangles for some of the blocks.
I also made a Batik String Angles table runner using teals (no surprise) and several other colors that you might enjoy. I used a 10-inch layer cake to make the blocks and there is also a tutorial with it.
I hope you enjoyed this tutorial! This blog post has been converted to an optional PDF that’s optimized for printing.
Purchase an ad-free printable PDF version of the Easy String table runner tutorial in my shop. The photos have been reduced in size and the tutorial is 7 pages long.

Great deals for you!
Looking for great buys on fabric and things? Check out these links
- Connecting Threads
- AccuQuilt Deals
- Fat Quarter Shop Daily Deals
- Green Fairy Quilts – Daily Deals
- Scrapbooking
- The Quilt Keeper
- SewingMachinesPlus
- Electric Quilt
- My Amazon Store for all the quilting things I use and more

About Connie
Hi, I’m Connie Kresin Campbell, the quilter, writer, and photographer behind Freemotion By the River. I enjoy inspiring others with my quilt tutorials and patterns. You’ll also see my sweet adopted dogs from time to time.
Be sure and subscribe to my newsletter for more free tutorials and printables.
Hello from Alaska where we have had little snow. Compared to last year’s dumping of the white stuff, I consider it a blessing. Of course, the ski resorts are crying, but I know we will get more snow.
I am writing to let you know how much I love the teal table runners. It happens to be my favorite color. I too, often reach for that color in my stash to make something I like, rather than gifting it to someone deserving. Thanks for sharing. My Vizsla says hi to Rusty.
Beautiful! I hope to make some of these blocks.
These are lovely! I surely have enough scraps so I really should make some of these.
Connie if you ask your Dr.’s office for the remenants of the paper roll they use on the exam table, they will give it to you.It is thin and can be used forr paper backing.
Those look really pretty. I love that color too. I keep worrying that they will quit printing phone books. 😢. We used to get such big ones and now they are so small, but the old ones make such great papers for strings. Great tutorial for them!
When do you remove the paper backing? Before or after you sew the white to the teal, or when you sew the blocks together?
The snow for a background is perfect for these beautiful projects. Thanks Connie.
These are all such pretty runners. Heaven knows, I have plenty of strings. I really should do this.