
String Bean Table Runner Tutorial
This post may contain affiliate links which won’t change your price but will share a commission.
Are you looking for a fun string pieced quilt block tutorial? You’ll have fun making this String Bean (because it is green) table runner using this easy tutorial!
String Bean Table Runner Tutorial
14″ x 28″

The size is 14″ x 28″ but you could make this string block table runner any size.
This tutorial is also a great way to use up old telephone books if you can find them, remember how big they used to be! I wonder if this is one of those things that our grandchildren won’t even know about.
String piecing is also known as strip piecing
These are always fun to make and a great way to use up your fabric scrap stash. No scraps? You can find some great deals on fabric here.
Making the String blocks
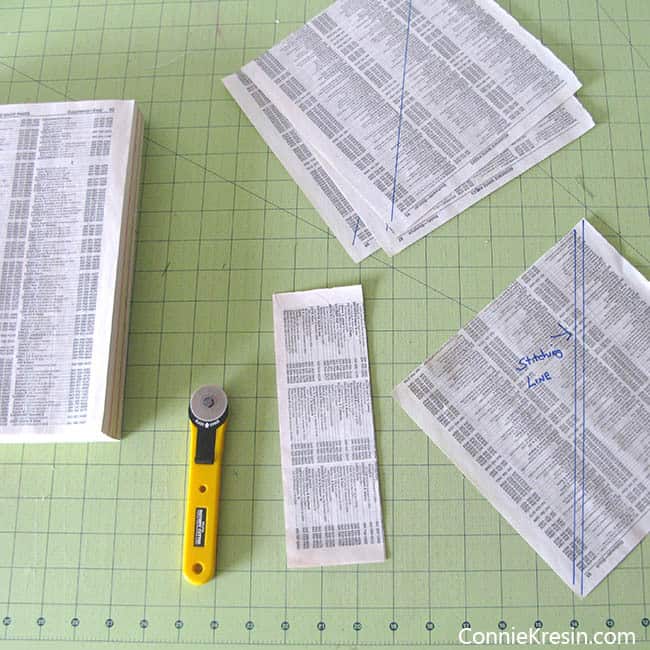
- Cut the telephone book pages into 8-inch blocks.
- You’ll need 8 of them.
- Make a diagonal line down the center of the telephone book page and another line ¼ inch from one side.
- The ¼ inch line will be the stitching line.
- Use a smaller than normal stitch so it is easy to rip off the paper when you are done.
I cut my strings anywhere from 3/4 inch to 2½ inches.
Normally I only use the 2½ inch strings as the last strip to cover the corners. This is also a great place to use squares if you have them.
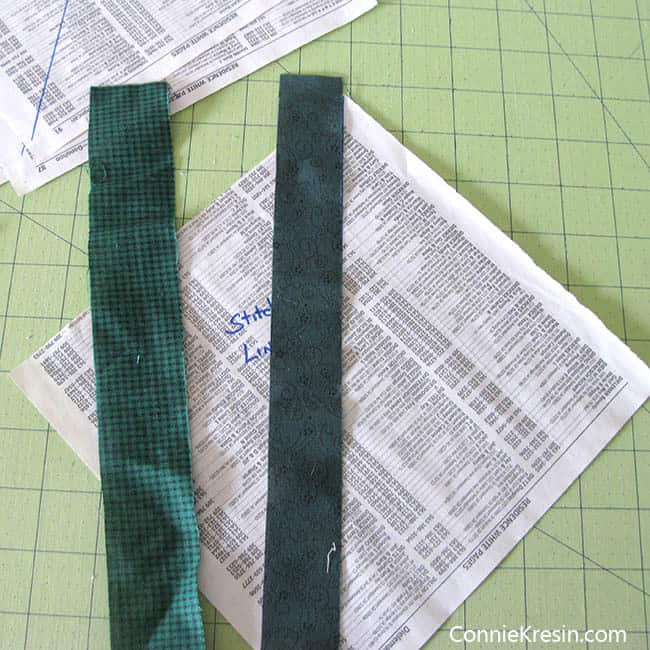
Place the first fabric strip RIGHT side UP.
Next place your second fabric string on the top right side DOWN.

I usually press after I have added a string to each side.
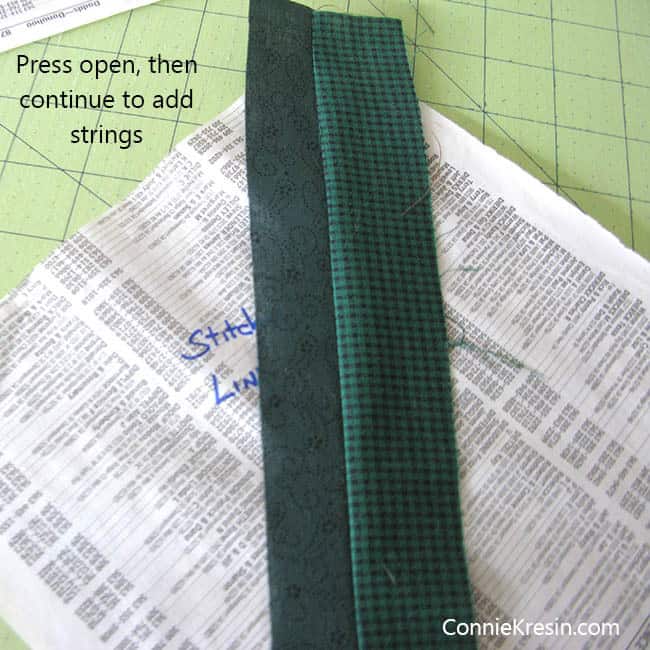

Continue adding strings until the entire paper is covered.

Turn the block over, press, and then trim evenly with the paper. Sometimes I like to use a little starch on my blocks.
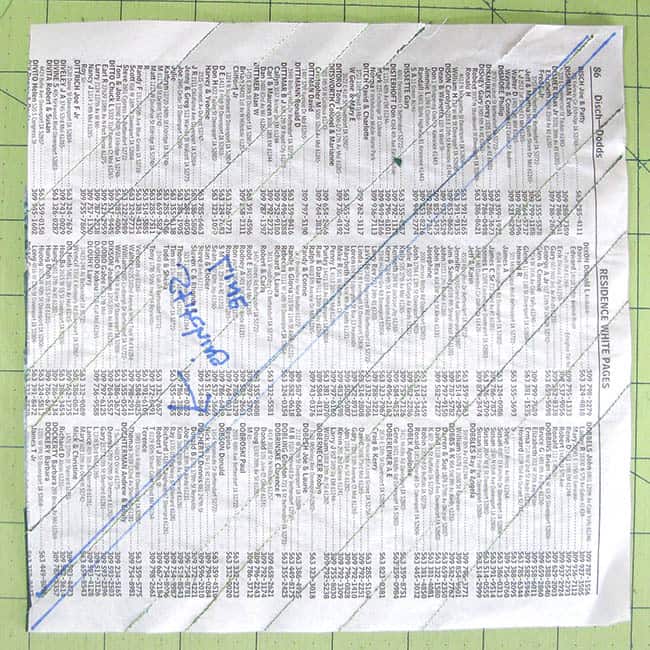
I usually remove the paper now.

If you stitched with a small stitch the paper comes off very easily. As you can see, it barely made a dent in my green string scrap box.
Now cut each block as shown below. You could make 4-inch blocks, to begin with, but I find this faster.

We now have 32 – 4-inch blocks

Arrange your blocks like this – 4 rows of 8 blocks.

- Sew groups of 4 blocks together.
- Continue sewing all blocks together.
- I like to sew groups of 4 blocks together, then 4 larger blocks and then the 2 big blocks.

I like to sew groups of 4 blocks together, then 4 larger blocks, and then the 2 big I decided to use Bottom Line thread from Superior Threads because it is very fine and wouldn’t overpower the design.
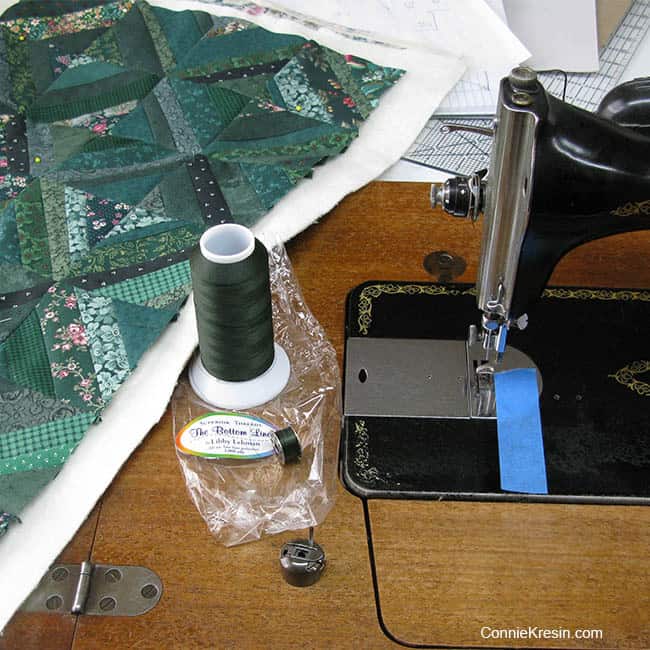
I used Warm & Natural batting and when I free motion quilt I put a couple of drops of Neutrogena Hand Cream on my fingertips.
I have tried gloves and the little finger things that are used to count money and I still go back to using the hand creme. It just works better for me.

I just did a loopy swirl free motion quilting on it.

My binding was cut from 2½ inch strips, sewn to the right side, folded over and then I stitched in the ditch.
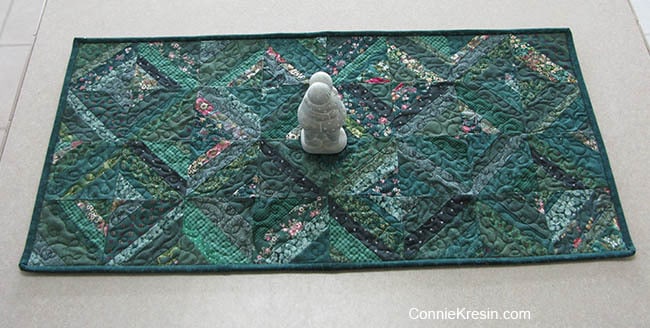
I now have a new little runner to put on my Great Grandmother’s hope chest.

String Bean Table Runner Tutorial
Finished size – 14″ x 28″
I hope you enjoyed this tutorial, you can find many more on my tutorials page or in my resource library.
Would you like a printable PDF of this tutorial?
If you liked this post, you’ll want to take a look at my other tutorials for string table runners:
Great deals for you!
Looking for great buys on fabric and things? Check out these links
- Connecting Threads
- AccuQuilt Deals
- Fat Quarter Shop Daily Deals
- Green Fairy Quilts – Daily Deals
- Missouri Star Quilt Co – Daily Deals
- Scrapbooking
- The Quilt Keeper
- SewingMachinesPlus
- Electric Quilt
- My Amazon Store for all the quilting things I use and more


About Connie
Hi, I’m Connie Kresin Campbell, the quilter, writer, and photographer behind Freemotion By the River. I enjoy inspiring others with my quilt tutorials and patterns. You’ll also see my sweet adopted dogs from time to time.
Be sure and subscribe to my newsletter for more free tutorials and printables.
Very nice and pretty. Love the colors. I found an ITH diagonal embroidery design, only all strips are the same size. I rather like the varied strips better. This would be fast and easy. Thanks.
Lately I have made close to 40 pot holders with scraps using the strip design. It never occurred to me till seeing this tutorial to use them as you have to reconstruct as a table runner!! Thanks for the pattern information and your piece is beautiful.
Do you free motion with your featherweight? I see the strip blocks made with featherweight. I would love to be able to do that, what about binding or other quilting? I take my featherweight to weekly sew, but have steered away from quilting and doing anything that needs a walking boot.
Very pretty…I love the color! Nice tutorial too! Thanks for sharing at the Rock 'N Share!
This looks like something I'd really like to try! Thanks for the great tutorial.
I've never done a string quilt. I love how your's looks on the hope chest!
Love it!!!! I normally don't love the idea of paper piecing/string piecing, but you make it look so simple!
I posted a link to this tutorial on the tutorial page of quiltbom.blogspot.com I thought it was a great explanation of how to do string blocks.
Very pretty runner Connie. And fabulous tutorial too. Thank you. I recently found two phone books and remembered seeing somewhere they could be used just like this and now I have the instructions so thank you.
Excellent tutorial….love the Spring look!
Connie,
I loved your tutorial. The finished quilt is beautiful. I think I'll give this one a try. Thanks for joining my blog.
Barb@witsend
That's beautiful. I grabbed your button:)
Wow, a completed project and instructions too. You inspire me.
Great Green table runner. You have worked hard at giving us good instructions too.
Great tutorial Connie! Love it!! I've added your link to my side bar into a new list… your link is the first ;)) You've certainly done a lot with your greens this month 🙂
Elly
Great tutorial. I've always thought about cutting smaller blocks out of strings, but never tried it. What a fun project.
Great tutorial! And of course 'Hugs' looks great on it! I think everyone need a Bloom Hugs!
Love that little runner and a great tutorial. Thanks for sharing… I may have to do one of these sometime this year.
Connie, thank you for taking the mystery out of string quilting. Your step by step instructions have encouraged this new quilter to try string quilting!
Love the runner!
Thanks, Lynda
That is beautiful done all in greens. I really love that hope chest. What a treasure!
Connie, I just love your table runners. You introduced me to using phone books and I've passed that tip on to many other quilters. Looks like I'm making a St. Patrick' Day runner 😉
Marilyn
Your idea to make a larger string block and then sub-cut is nothing short of brilliant! I love to sew strings and will try this the next time i make some. Thank you for another wonderful tute!
It's GREEN this month??? Yipes… I wrote down and made Blue… Shhhhh, don't tell anyone. lol
This is beautiful-love it!
Another cute runner Connie and fun tutorial!! TFS
~Terry~
Hi, Connie:
I really enjoyed this tutorial. I love the way the tut turned out.
I posted the BB link on my Facebook page to share with other quilt lovers.
Hugs,
Susan
This is really pretty. I like how you staged it with the plant on the table. Thanks for the tutorial!
That is so pretty and perfect for March!
Very cute and a great, easy to follow tutorial! Thanks for sharing!
it looks great and how fabulous is that great grandmother's hope chest – what a treasure!
great tutorial Connie! I'm definitely going to try it!
This is a great TUTORIAL! Thanks.
Love the green topper!
Connie, That is just beautiful! Thanks for the tip about the phone book I never know what to do with those when I get a new one. I love green as well!
Great tute. This is the second time today I saw mention of telephone pages for paper piecing. Have I been living in a hole?
very pretty!
Beautiful runner, I will try this soon. Thanks for the phone book tip! Don't know how I've missed that one. Thanks for visiting me, too!
i so love this,thankyou for the tutorial Connie i am definatly going to try this you made it look so simple,thankyou.xx
I just discovered your blog! It is great…I love your tutorial for this string runner. I am going to check out your other posts. Hopefully I will find guides to applique. Just getting over my reluctance to try it may be my biggest problem.
Oooh, love this. I like your tutorial. I will feature it today in my blog post 🙂
I forgot to include your Email
Connie, good evening! Thanks for the lesson! All is clear. I really like how you pick colors for the quilt. Embroidery on paper is very easy process. I invite you to my diary. I'd be happy. Leka.
Great tutorial , I love string blocks !
Thanks for the call out – I love your new table runner, it looks stunning against the wood on your Great Grandmother's hope chest! Another beautiful finish!
You are the queen of tutorials! Wonderful pictures and explanations!
Great job! I love string blocks!
Thanks for this tutorial. I love these string blocks. I'm strangely reluctant to stitch paper but you've persuaded me to give it a try 🙂
It is beautiful, Connie. Thanks for the tutorial.
I love me a good string quilt : )
WHat a fabulous post to read…LOVED the photos, especially the ones with the Singer machine. Great job!
Vry nice runner Connie…you do a great tutorial too.
This is really beautiful. Thanks for the tutorial!