
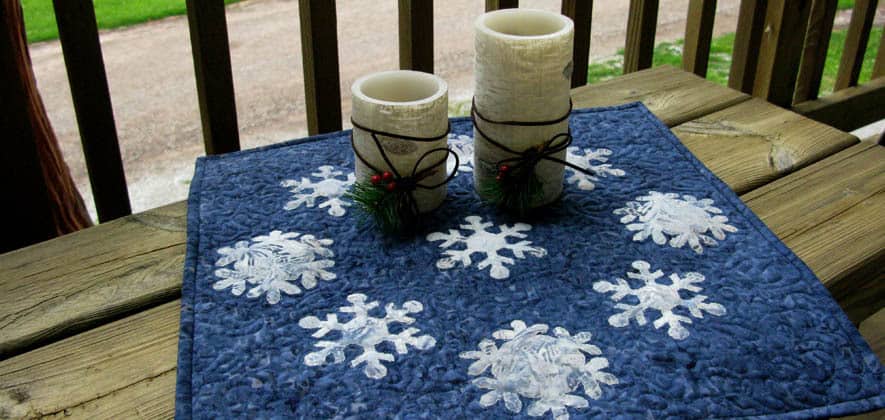
Snowflake Table Topper
This post may contain affiliate links which won’t change your price but will share a commission.This is a super fast and easy table topper that would make a perfect gift or accessory as it takes no time at all to make when you use the AccuQuilt Sleigh & Snowflakes die.
I have also included templates for two snowflakes in case you would like to make this but don’t have an AccuQuilt cutter.
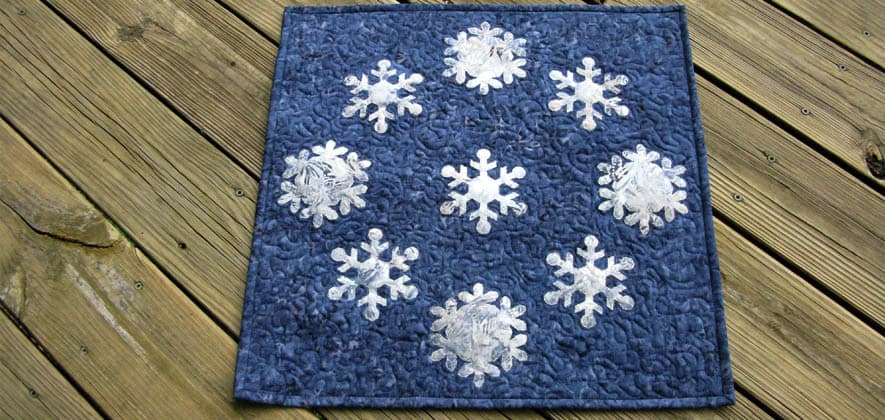
Snowflake Blues Table Topper
Finished size is 19″ x 19″
GO! Fabric Cutter:
GO! Cutting Dies:
- Sleigh & Snowflakes #55322
- GO! #55017 2 1/2″ Strip Cutter
Fabric:
- 1 fat quarter light blue for the Snowflake applique
- 1 yard dark blue batik for the background, backing and binding
- 19″ x 19″ batting
- Heat n Bond Lite
- Snowflake templates

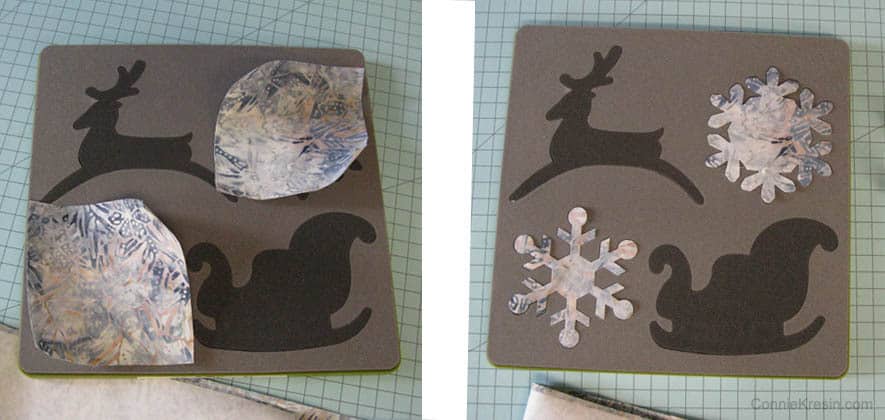
The Sleigh & Snowflakes die has 2 different snowflakes on it and both are used to make the Snowflake Blues fast and easy table topper.
Cutting:
Light Blue Batik – Cut a strip 4 ½” wide and apply Heat n Bond Lite to the back following directions on the package.
Cut the strip into 4 ½” squares. Do this before running the fabric through the GO! die cutter.
Carefully lay the fused fabric over the snowflake dies and cut them out.
Cut the background dark blue batik into a 20-inch square.
Fold in half and then fold again to create fold lines to help with placing the die-cut applique snowflakes on the background.
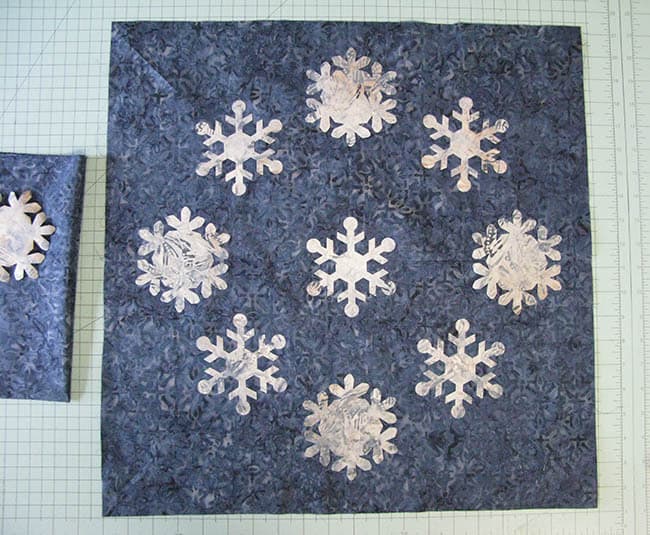
I placed one of the snowflakes in the center of the table topper and had one snowflake that I didn’t use.
Choose your favorite way to applique the die cut snowflakes.

I use a vintage 15-91 Singer sewing machine that only does straight stitch so I did a free motion applique and used an Aurifil thread that matched perfectly.

I used a dark blue Aurifil thread for the background quilting, the color match perfectly.
Once it was all quilted I trimmed it to 19″ x 19″ and added the binding.
I used the GO! #55017 2 1/2″ Strip Cutter to cut the binding.
Machine or hand stitch your binding.

I hope you have enjoyed this fast and easy Snowflake Blues table topper tutorial and remember, you can download the free snowflake templates to make this.
If you are looking for more ideas for table toppers, you might enjoy some of my previous quilt tutorials.
- Churn Dash Topper
- Cherry Berry Orange Peel Topper
- Coastal Mist Table Runner
- Winter Blues Table Runner
- Drunkards Path Pillow
- Purple Shadows Pillow
- Wonky Heart table topper

Great deals for you!
Looking for great buys on fabric and things? Check out these links
- Connecting Threads
- AccuQuilt Deals
- Fat Quarter Shop Daily Deals
- Green Fairy Quilts – Daily Deals
- Missouri Star Quilt Co – Daily Deals
- Scrapbooking
- The Quilt Keeper
- SewingMachinesPlus
- Electric Quilt
- My Amazon Store for all the quilting things I use and more
Thank you for the pattern for the snowflakes! I don’t have the space for a GO or Cricut! Still doing things old school! 😊👍🏻
Great bird photos, Connie. No wonder they come to your place. You spoil them with special food.
I love the snowflake table topper. I’d make it even though our climate is not cold.
I now have so many of your patterns and tutorials I’m going to have to put the names in a hat and draw one at a time to make. They are all so lovely I don’t know where to start.
Reviewing this pattern but puzzled. The needed items were two fat quarters which measure 18×20. But the fabric for the background fabric is 19×19” square. Please clarify.
Thanks for catching that error Vicki, it should be 1 yard of dark blue that will be used for the background, backing and binding.
Love anything snowflake. Just finished my autumn quilt and got it hung, I did I LOT of reverse sewing on that one – and this snowflake is the perfect next step. My very first ever quilt was a snowflake (dove in the deep end!) Thanks!
Hope the move goes smoothly, one box at a time.
That is really pretty. Love those snowflakes!