
Scrappy Christmas Mug Rug Tutorial
This post may contain affiliate links which won’t change your price but will share a commission.
Mug rugs, do you like making them as much as I do? If you have never made one, they can be simple or very intricate, it is up to you!
If you are a beginner quilter, making a mug rug is a great way to try out different techniques and quilt blocks.
You can make your mug rugs small or as big as you want. Too big and you’ll probably have a placemat!
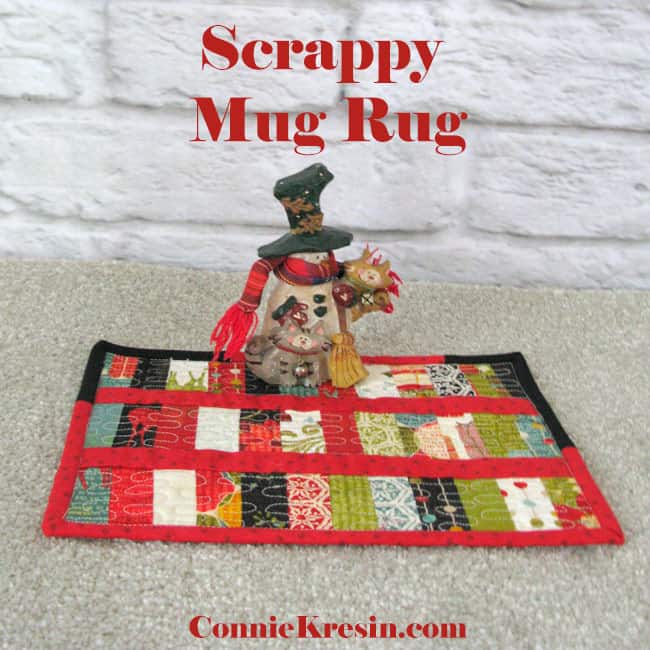
Scrappy Christmas Mug Rug Tutorial
Follow this scrappy mug rug tutorial and you’ll make one in no time at all.
Mug rugs are a great way to use up left over scraps from another project and make great gifts. I like to make some to keep on hand when you need a gift in a hurry.
This is an updated and revised post from 2011.

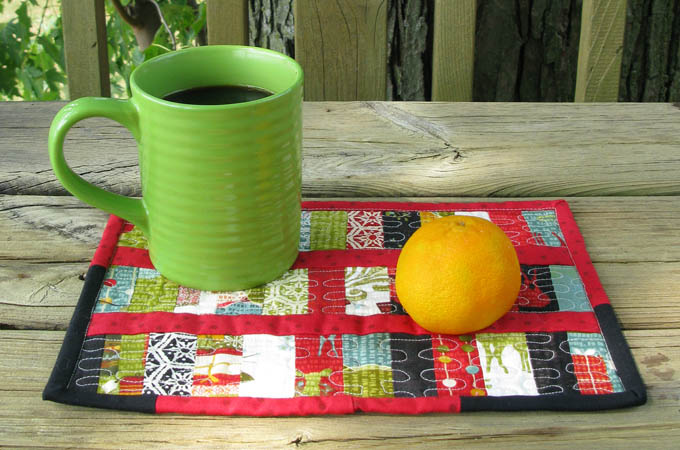
This red coffee cup was bought at the Dollar Store. The colors the store has available changes all the time so I tend to pick up several when I see a new color.
What size should a mug rug be? That is up to you! We have them all over the house and use them to protect our tables. I make mine in various sizes and this one is about 7½ inches by 9 inches.
The was made using the leftovers of a 5 inch charm pack of Christmas quilt fabric that I bought a long time ago. I really like the colors and prints in this collection and have made several other quilt projects with it.
I even have some still in my stash! It was called Jovial by BasicGrey for Moda.
You may not be able to find this charm pack but many times a designer’s collections coordinate with their past collection.
I am using my new quilt photography setup that I recently showed you. I really makes it nice to take photos of my quilt projects!

This is a simple tutorial that can be made from any of your quilt scraps not just from leftovers of a 5-inch charm pack.
Fabric:
- Assorted scraps
- 1 Red fat quarter(18″ x 22″) or 1/4 yard for sashing and binding
- Batting and backing
Cutting & Sewing:
- Cut 36 – 1″ by 2½” pieces of assorted colors
- Cut 2 – 1-1/4″ x 18″ strips of red for the sashing
- Use a 1/4″ seam allowance
- Sew 12 of the pieces together for each row (my top row has 13 instead of 12 because 2 were narrower)
- Add the red sashing between the rows


Press your seams as you go.
- Trim your scrappy mug rug (mine was 7½” x 9″).
- Cut your batting.
- Cut a piece of backing a little bit bigger.
- Layer it with the backing wrong side up, put the batting on top and then add the scrappy mug rug right side up.
- Quilt as desired.

The quilting is just a simple free motion wiggle stitch done on the rows with my vintage 15-91 Singer sewing machine. I left the red sashing unquilted.

The beautiful red fat quarter was one that I had already used quite a bit of so I was short for the binding and just added some black. I know I should have cut it into strips of equal size but this is just for me and I can definitely say it is an “original pattern” 🙂

I like to cut my binding 2¼” wide for mug rugs, you can also cut the binding 2½”. Piece your strips together for the binding.
I like to sew my binding to the front side of my mug rug, fold it over and then stitch from the front by machine instead of hand stitching.
I stitched this with a cream thread and you can see how I stitched along the edge. I could have used a thread color that blended better and you really wouldn’t have noticed it.

There is nothing better than grabbing a cup of coffee, some fruit and sitting out on my deck looking at the river. Now if this were December, the deck would be covered with snow!

If you like this post:

Great deals for you!
Looking for great buys on fabric and things? Check out these links
- Connecting Threads
- AccuQuilt Deals
- Fat Quarter Shop Daily Deals
- Green Fairy Quilts – Daily Deals
- Missouri Star Quilt Co – Daily Deals
- Scrapbooking
- The Quilt Keeper
- SewingMachinesPlus
- Electric Quilt
- My Amazon Store for all the quilting things I use and more

About Connie
Hi, I’m Connie Kresin Campbell, the quilter, writer, and photographer behind Freemotion By the River. I enjoy inspiring others with my quilt tutorials and patterns. You’ll also see my sweet adopted dogs from time to time.
Be sure and subscribe to my newsletter for more free tutorials and printables.
