
Quilted Morning Glory Pillow tutorial
This post may contain affiliate links which won’t change your price but will share a commission.Do you like to make pillows? I resized the Morning Glory quilt block to make it bigger than the quilt block I showed you the other day. Here is the quilted Morning Glory pillow all finished.
I mentioned the other day that I didn’t have a pillow form the right size for the pillow. I made a muslin liner and stuffed it with leftover scraps of batting.

Morning Glory Pillow
18″ finished size
Flower block
The pillow is made up of four flower blocks that are 9½” unfinished. Below you can find cutting directions for all four blocks that are needed for the pillow.
18½-inch unfinished block size
Block directions
I happened to have a 10″ layer cake of batiks that worked perfectly for the quilted pillow. You could also use yardage or scraps from your stash as it takes very little fabric.
Pick four fabrics that coordinate and also a neutral fabric, I used a premium muslin.
Cutting for the Morning Glory pillow
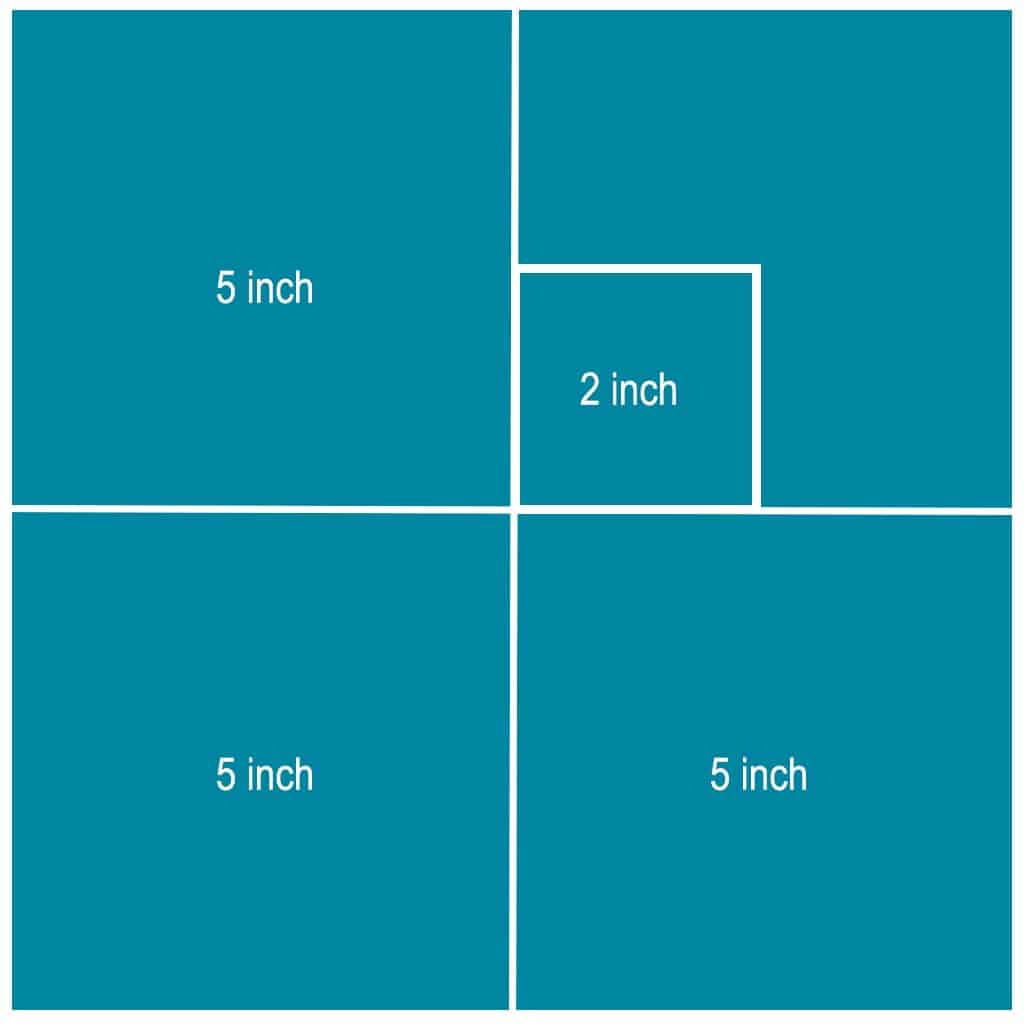
- Cut four – 5-inch squares of cream
- Cut three – 5-inch squares of four different prints for a total of 12 squares
- Cut eight – 2-inch squares of cream
- Cut one – 2-inch square of the four different prints for a total of 4 squares
Below is a diagram showing how I cut the pieces from a 10-inch batik square.
I forgot to take photos of the steps to make the blocks. You can follow the steps shown in my Morning Glory block tutorial which is the same other than these blocks are bigger.
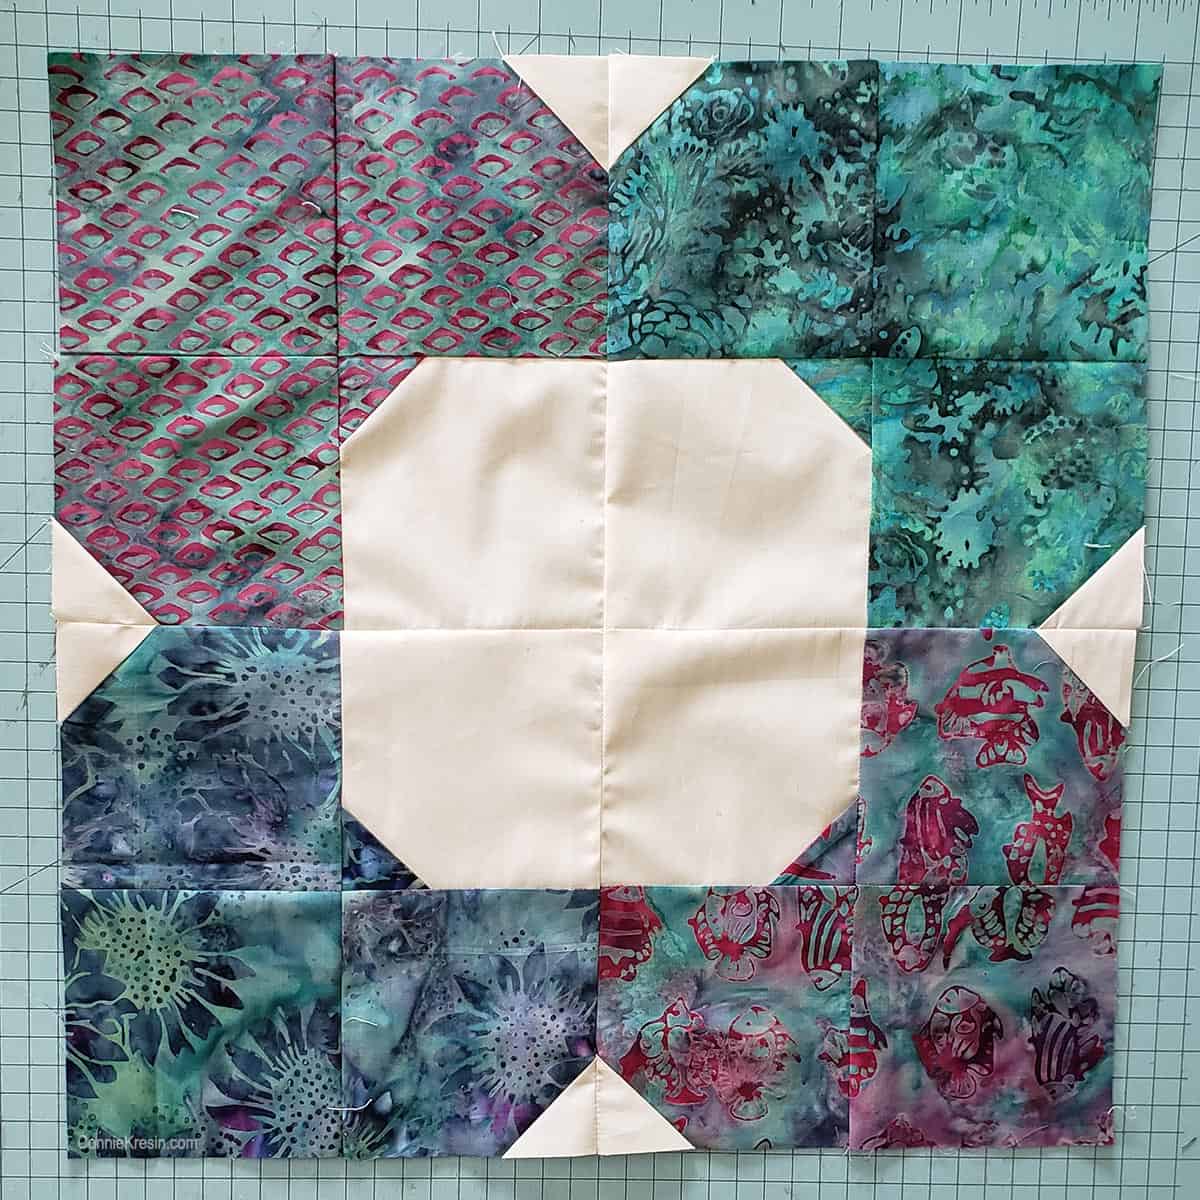
Here are the four blocks I originally picked. Once I sewed them together, I decided the bottom right block had too much of the wine color so I removed it and picked another 10″ square that was a teal print.

I think this looks much better as there is now just a touch of the wine color in the pillow.
Add batting before quilting
When I quilt a pillow I like to add batting and usually a muslin backing before I do the quilting.
Last year I bought a bunch of fleece that I planned on using for backdrops when taking photos but it didn’t work out as planned. Guess what I’ve been doing with all of that fleece? Yep, I’m using it as batting!
I have used it for several lap quilts. Fleece quilts are so warm and I am having fun using the fleece this way.

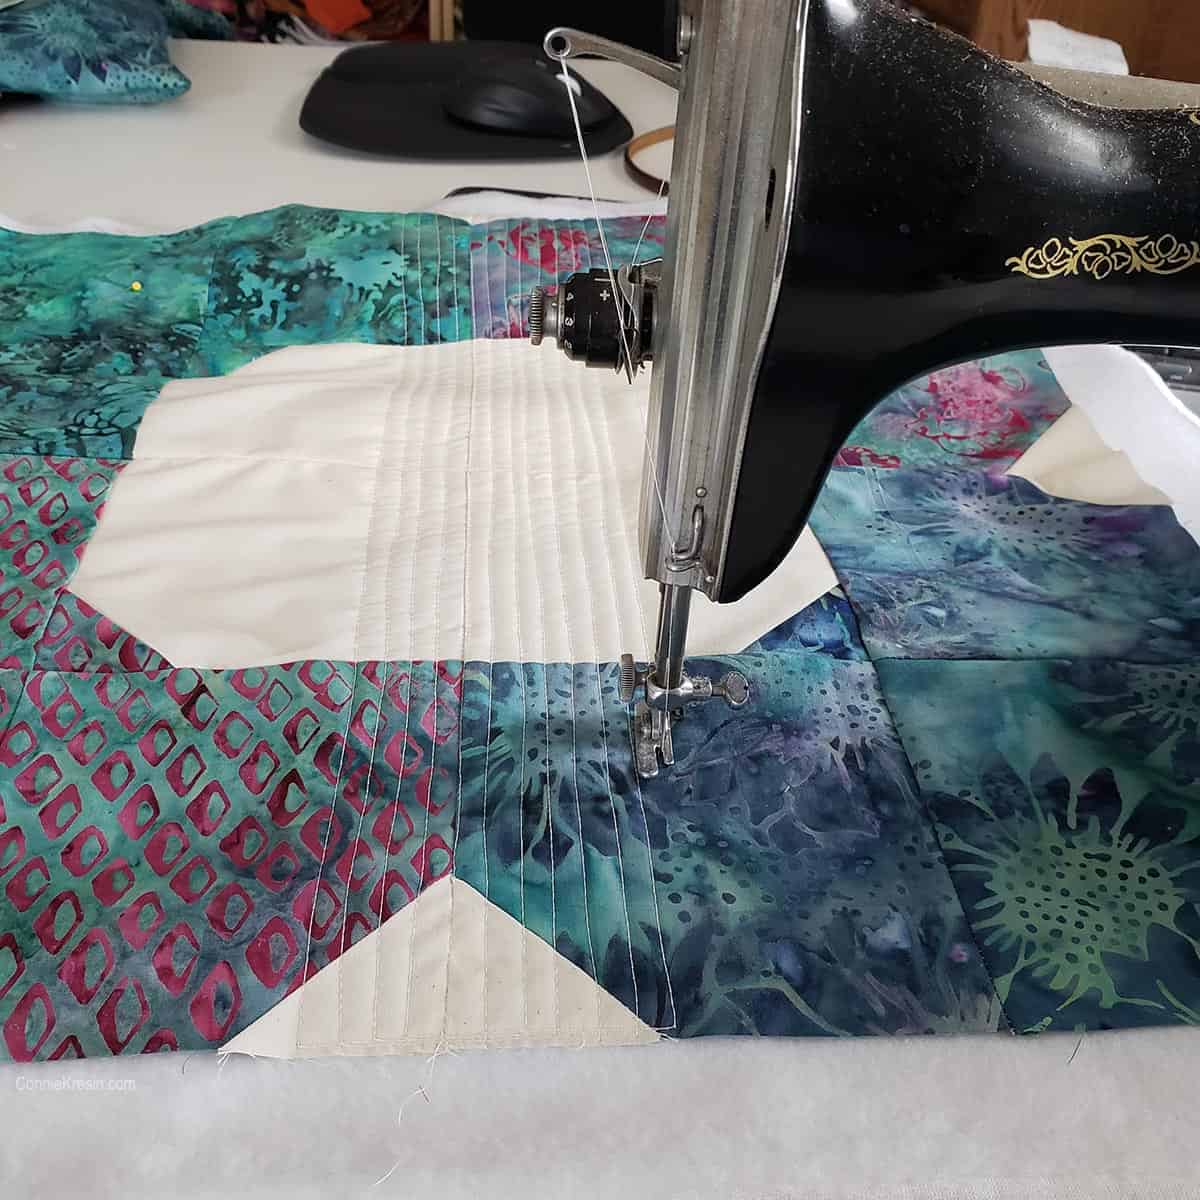
Simple quilting
Here is a simple way to quilt a pillow. I am using my vintage 15-91 Singer sewing machine with an 80/12 Schmetz needle and a regular foot. This would be a good time to use a walking foot if you have one.
I didn’t draw any lines instead, I used my foot to kind of keep the lines the same distance apart. If they get a little wobbly or close I don’t worry. Once the quilting is all done no one will notice.
It takes longer to do this type of quilting than if I had just done a simple free-motion meandering but it looks so neat! I used almost two bobbins of thread.
Here is the quilted pillow top, I think next time I will add some applique to the center, what do you think?

Finishing the pillow
I had enough of one of the fabrics to use for the back of the pillow.
Envelope style pillow back:
For this pillow, I decided to do an envelope style pillow back instead of a zipper.
Each backside piece will be the same width as the front side and ½ of the length plus 4 inches.
This will account for seams and create an overlap which is the envelope part. If you make the pieces too short, you will have a gap when you insert the pillow form.
For example, my pillow is 18 inches so 1/2 of that is 9 inches + 4= 13 inches.
Cut two pieces of the print 18″ x 13″ for the pillow back. On each piece fold the one side under ¼” and press.
On one piece fold under another 1” and topstitch it. On the other piece fold under ¼″ and topstitch.
Place the 1″ top stitched piece face down on the pillow top, then place the ¼” top stitched piece face down on top of it. Pin the pieces to the front of the pillow.
Stitch around the pillow with a ¼” seam allowance. Double stitch over the area where the back pieces overlap. This will make the stitches stronger.
Turn the pillow right side out and press. Then top-stitch around the pillow top. Now all you have to do is add a pillow insert.

Morning Glory quilted pillow
Here is the finished Morning Glory pillow on our bed. This photo really lets you see the cream color in the premium muslin I used. Everything else is white.
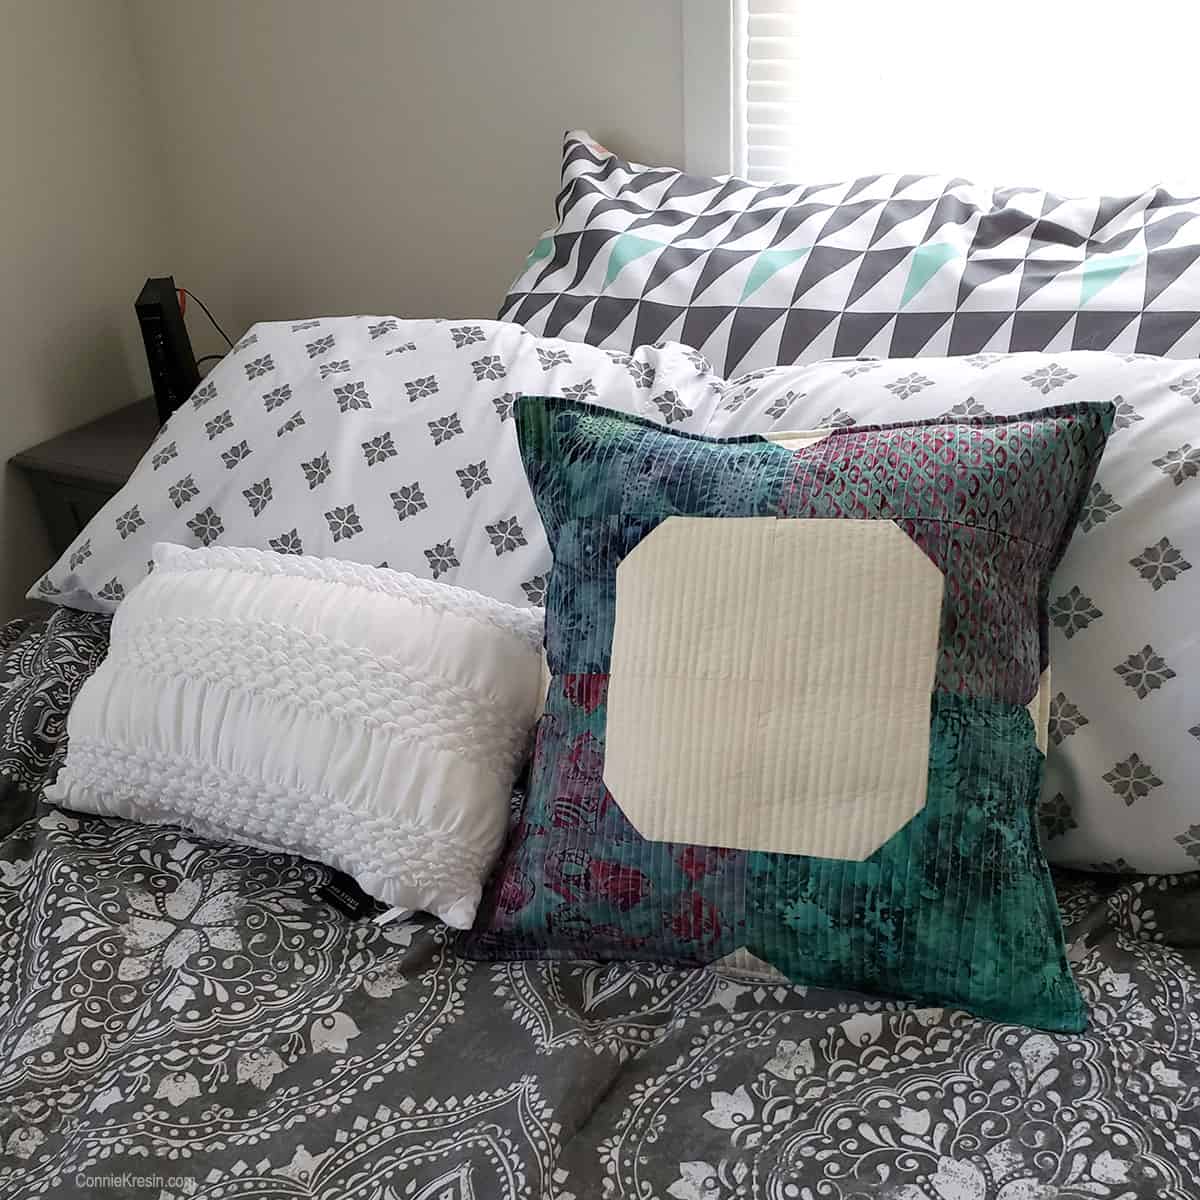
I’m not really crazy about the pillow. I think it needs something in the center and also a muslin border as you really can’t see the flower blocks.
It is always fun to experiment. I guess I’ll add another Morning Glory pillow to my large bucket list of quilt projects!
If you are looking for coordinated fabrics for a pillow, take a look at this batik layer cake which has 24 ten inch batik pieces.

Time to put the pillow away, Mr. Mickey loves his Musical Notes pillow so I keep it on the couch with his blanket all the time. He always has his head on the pillow!

I took the photos of Mr. Mickey last week before he got groomed, his hair is a little shorter now. He is a miniature poodle and is 9 years old. We adopted him a little over a year ago and he is the sweetest dog!

If you make this pillow I would love to see a photo of it. It is always so much fun when I see quilt projects made from my tutorials!
Great deals for you!
Looking for great buys on fabric and things? Check out these links
- Connecting Threads
- AccuQuilt Deals
- Fat Quarter Shop Daily Deals
- Green Fairy Quilts – Daily Deals
- Missouri Star Quilt Co – Daily Deals
- Scrapbooking
- The Quilt Keeper
- SewingMachinesPlus
- Electric Quilt
- My Amazon Store for all the quilting things I use and more
I love the pictures of Mr. Mickey on your recliner with his pillow and blanket. Too sweet.
This is a great pillow, Connie. I will be able to manage the straight line quilting. The design will look very nice in many colour combinations.
I also like the Drunkard’s Path design in your suggestions. I have the templates, so it is also on my “to do list”.
Thank you for all your Great ideas! I have made so many of your projects. I made 13 of your baskets for Valentine’s presents, and many of your table runners. Thank you for all instructions and easy pictures. I always get excited when I see your emails. Have a Great day! I love Mr. Micky’s pictures.
I really like your pillow. Mickey is just so cute. At one time we had a part poodle and terrier sort of the color of yours. She lived to be 17 years old. She was so lovable and playful. She was a rescue also. I have a vintage Singer machine to. What kind of a quilting foot do you use? Thanks! Stay safe!
The applique in the middle is a great idea! I do the same process for pillows – adding the batting and muslin before quilting those fronts. Mr Mickey is sure a cutie. He looks like a snuggler. Hope you are surviving this quarantine well.
Cute , easy pillow , thank you , I agree something in the middle would be cute , maybe a saying 😄