
Periwinkle Table Runner Tutorial
This post may contain affiliate links which won’t change your price but will share a commission.
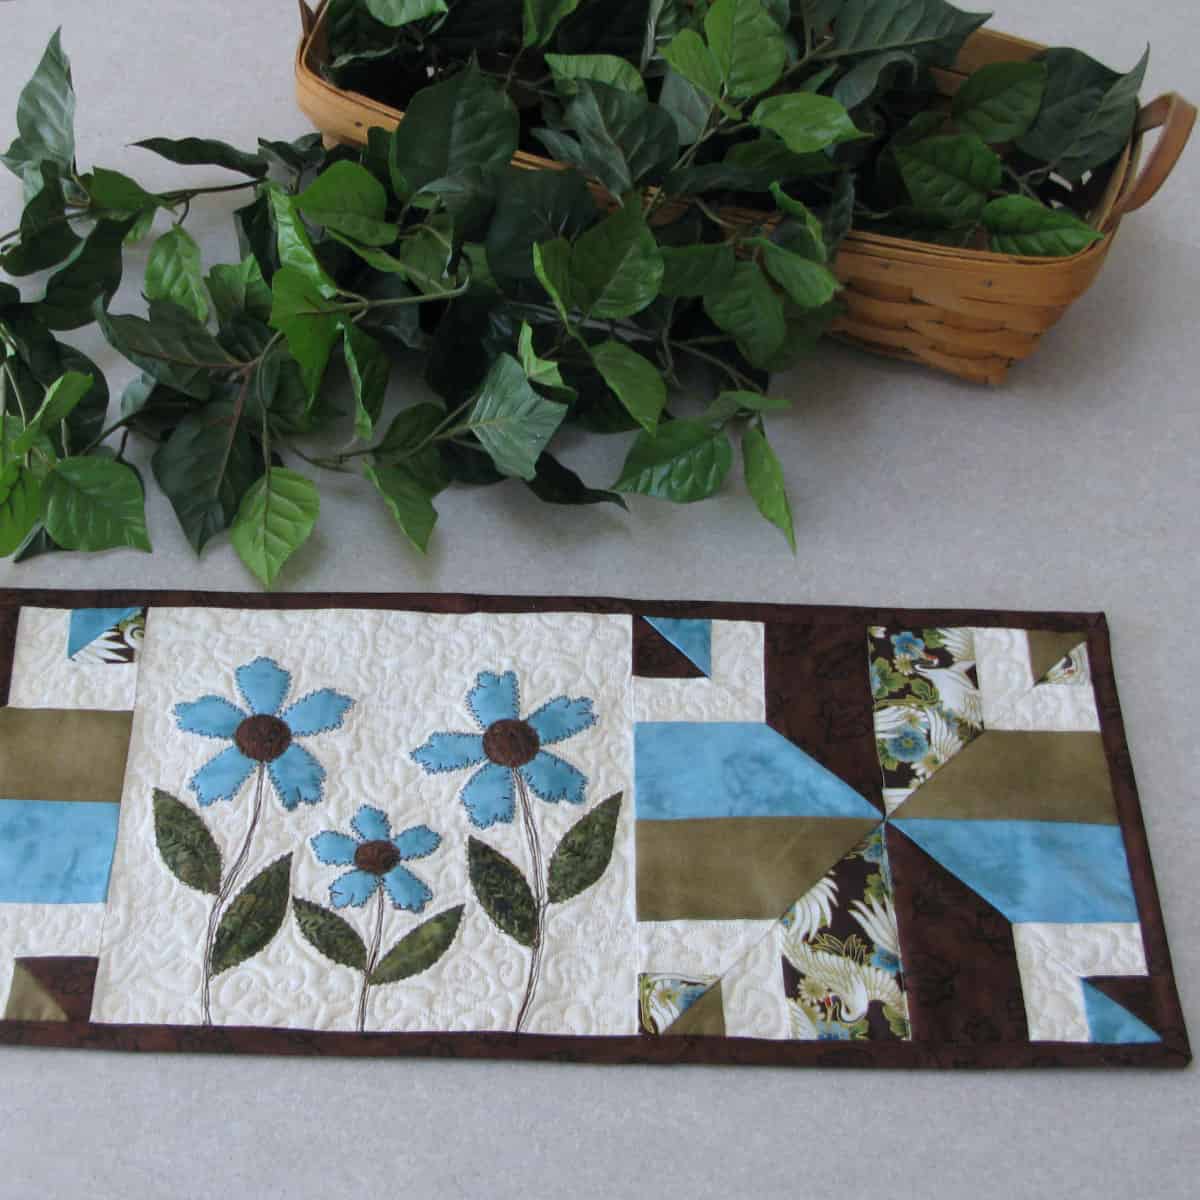
I have been having fun with the Strip Tube Ruler and this is a little runner I made that measures 9 inches x 24 inches using it.

I cut 4 strips of the width of my fabric that were 2.5 inches and 2 strips of creme the width of my fabric that were 1.5 inches and sewed them together as shown above. Now fold so the brown and blue edges are together and sew another seam to make a tube.


I forgot to show a photo of the tube, but you can see it in the photo below.
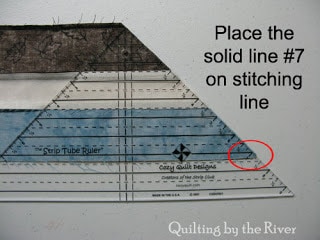
Place your ruler with the #7 line on your stitching line as shown and then cut.

You will end up with squares like this.

Now we are going to cut the square in half as shown above.

Arrange them like this.

Sew together as shown.

Finished block.

You will have 2 blocks that are approximately 9.5 inches.

I then added a 9.5-inch square of cream for the center.

I cut some flowers and leaves with my Sizzix Big Shot after I had applied some Heat & Bond Lite to the fabrics.

I just did a little free-motion quilting around the petals and leaves in dark brown and also added some stems. I put some scraps of Warm & Natural behind them first and then trimmed away the excess after I was done.

Then I added my backing, and batting and did some free-motion quilting on all of the creme areas.


Below are some examples of other ways you could arrange the blocks. I ended up getting 7 blocks out of the tube.


I am catching up on blogs today…starting here with you. I won't comment on all and you don't have to reply to them, but when I see a pretty I'll stop and say something and this is so so pretty. DO I need one of those rulers? You are making me think that maybe I do.
Really cute, Connie!
very nice! I love the stitching around the flower petals.
What a gorgeous colour combination. That looks like a handy ruler to have! I have a similar one from olfa – will be comparing the two to see if the tutorial will work for me. Many thanks.
Hi Connie, I think I have already commentedon this but I'll tell you again how much I love it. Is that raw edge applique ? Do you stabalise the fabric with anything first to stop it fraying ?
Thanks a lot for linking uip with TGIFF
Love the table runner, Connie! Great job! :o)
Beautiful table runner, Connie! Thanks for the tutorial — I'll have to give it a try sometime. Thanks for linking up to TGIFF!
I think this is my favorite of your projects–thanks for sharing all your great ideas!
That is so pretty. I love the colors and the flowers. I think quilting is a beautiful form of art! Thanks for sharing at the Rock 'N Share!
Wow, like this one even better than Garden Strings – your designs are great. Thanks for sharing!
Very nice tutorial and project. Thanks
Thank you Connie 🙂 This is a gorgeous little table runner!
This was my first visit. I love your site. Great tutorial. Do you have a tutorial on the fmq on the flower edges? I just love how you did that. Beautiful! Lyn
Great tutorial. Thanks and I love how you did the flowers.
It's beautiful! I love the flowers in the middle!
Wonderful instructions for making this pretty table runner. andi
Connie – this is not fair! Now I really want to win that ruler, and to have a die-cutter, too. Having Quilt Tool Envy here!
It is perfect. It is balanced and tells a story. I especially love the flowers and the little zigzags. It just makes the whole project.
Great techniques, but I think it's the color combinations that make this really sing. Thanks for the tutorial.
Somehow I missed this yesterday! I love the colors. Thanks for show us so many options for using the Strip Tube Ruler!
Somehow I missed this yesterday! I love the colors. Thanks for show us so many options for using the Strip Tube Ruler!
Gorgeous runner, and love how you made those blocks. Thanks for the tutorial.
Love that table runner; very nice
Connie, this is just darling. Very, very sweet. And as always, your tutorial is very well done, too! 🙂
Very cute runner and a great tutorial!
It really does start with a tube, how cleaver. Very nice runner.
wow Connie this runner is gorgeous,well done.xx
Love the runner! You are so talented! Can't wait to see who wins the ruler!
Vicki @ Quilting Lodge
Thanks!!!It 's very very pretty!!!
Very cute and I love the zig zag stitches on the flowers.
I love your table runner with the wonderful applique blocks! I have the same oriental fabric with the birds in it. I used it in a teal and turquoise 3 seam 10 minute quilt for my son's Christmas present. I love the blues and chocolates together! Great job!
This is so cute. I particularly like the flowers in the center and how you finished them.
So cute, I love this runner. The colors are great and the flowers look so fun! Thanks for the great tutorial!
Wonderful runner and instructions! Spring must be here!
Those flowers Look amazing with the fmq. I've never seen that before.
That is very cool. I like it. Thanks for the tute.
Your runner is lovely what a great ruler and how you FMQuilted around the flowers and sewed the stems. a really lovely centre peice.
I love how you sewed on the flowers.
What a fun runner Connie…love your Sizzix flowers and how you quilted them!!!
~Terry~
That is an awesome tute….AND I love the runner…so cute!!
such a cute runner! love it and i bet some "ugly" fabrics would look good in it too.
It`s fantastic.Thanks for the tuto!
That is so pretty Connie!
Thanks for the wonderful tutorial. Your table runner is beautiful 🙂
very pretty
Lovely runner , really love those colors together .
Great tutorial Connie….a question. How did you get the 4leaf clover added to your signature without the paint.net?? If you don't mind.