
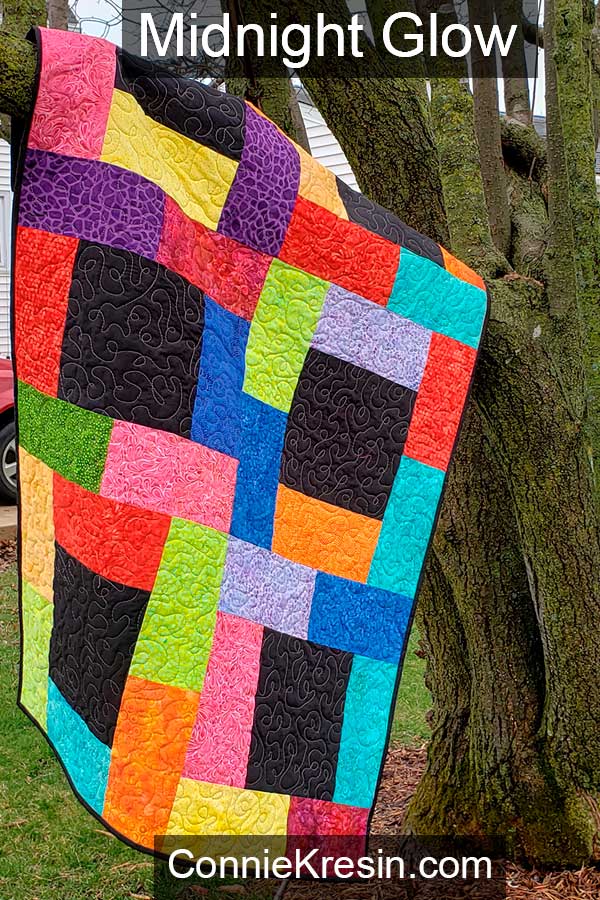
Midnight Glow Lap Quilt tutorial
This post may contain affiliate links which won’t change your price but will share a commission.Once again I am showing you a quilt made with the Midnight Glow quilt block. Sometimes it is fun to oversize a quilt block which means you can really make a quilt fast!

I just happened to have a batik layer cake with colors very similar to my original Midnight Glow quilt and thought it would be fun to see what a larger quilt block would look like.
I have to say that it takes no time at all to make a quilt when you use a block this size! Keep reading and I’ll share the tutorial.
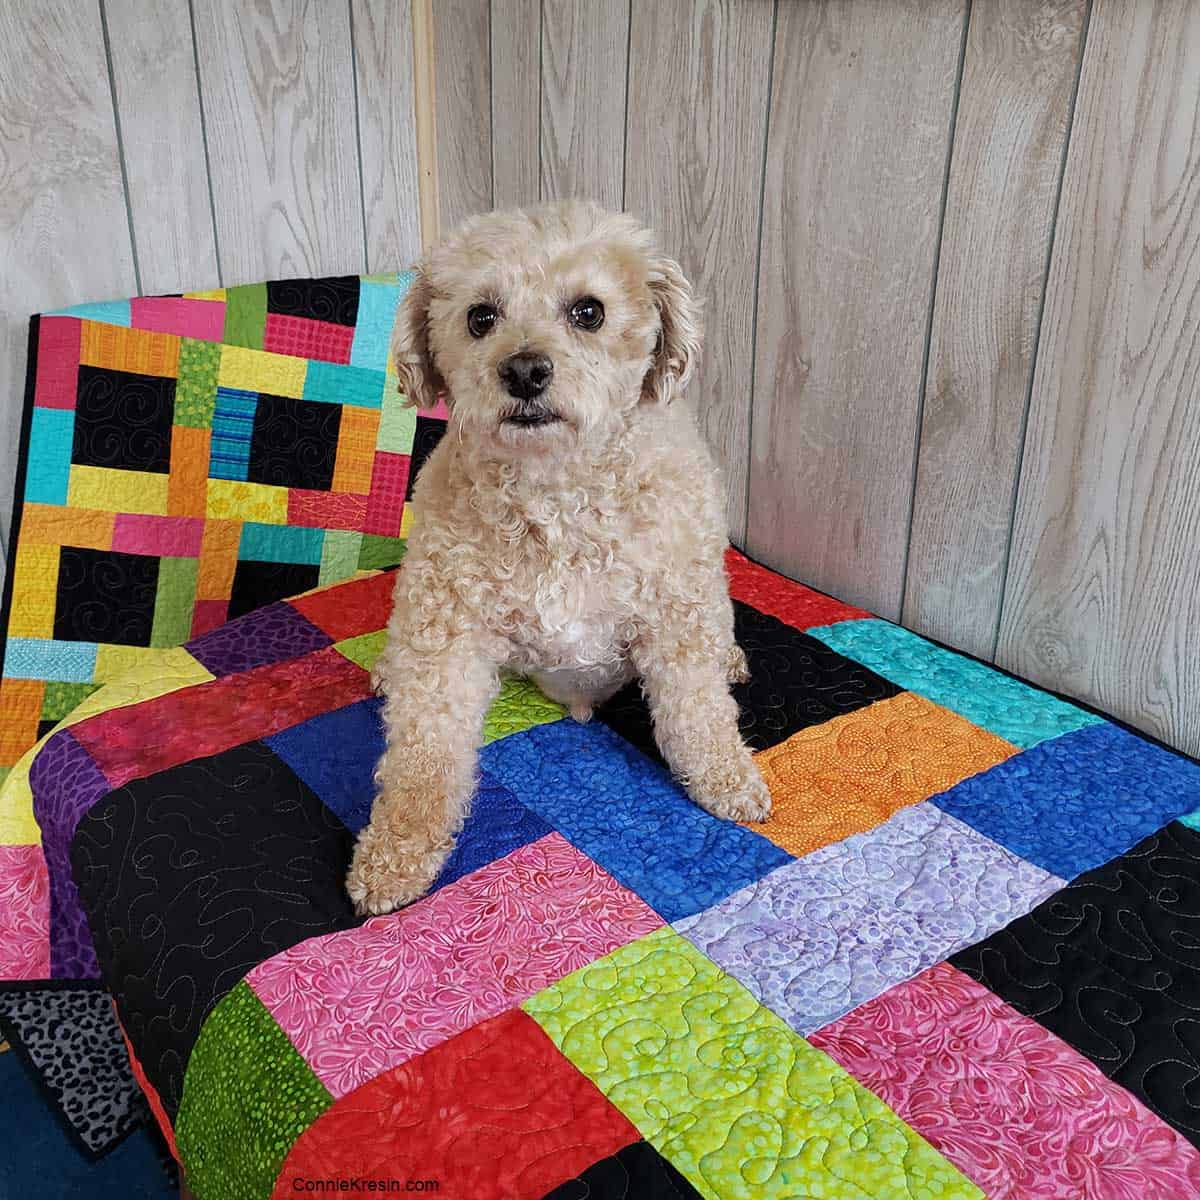
I got Mr. Mickey to sit on the quilt and was able to snap a few photos. I have him up on a table out on the porch…he wasn’t too happy but once I was done he got to go for a walk so that made up for it.
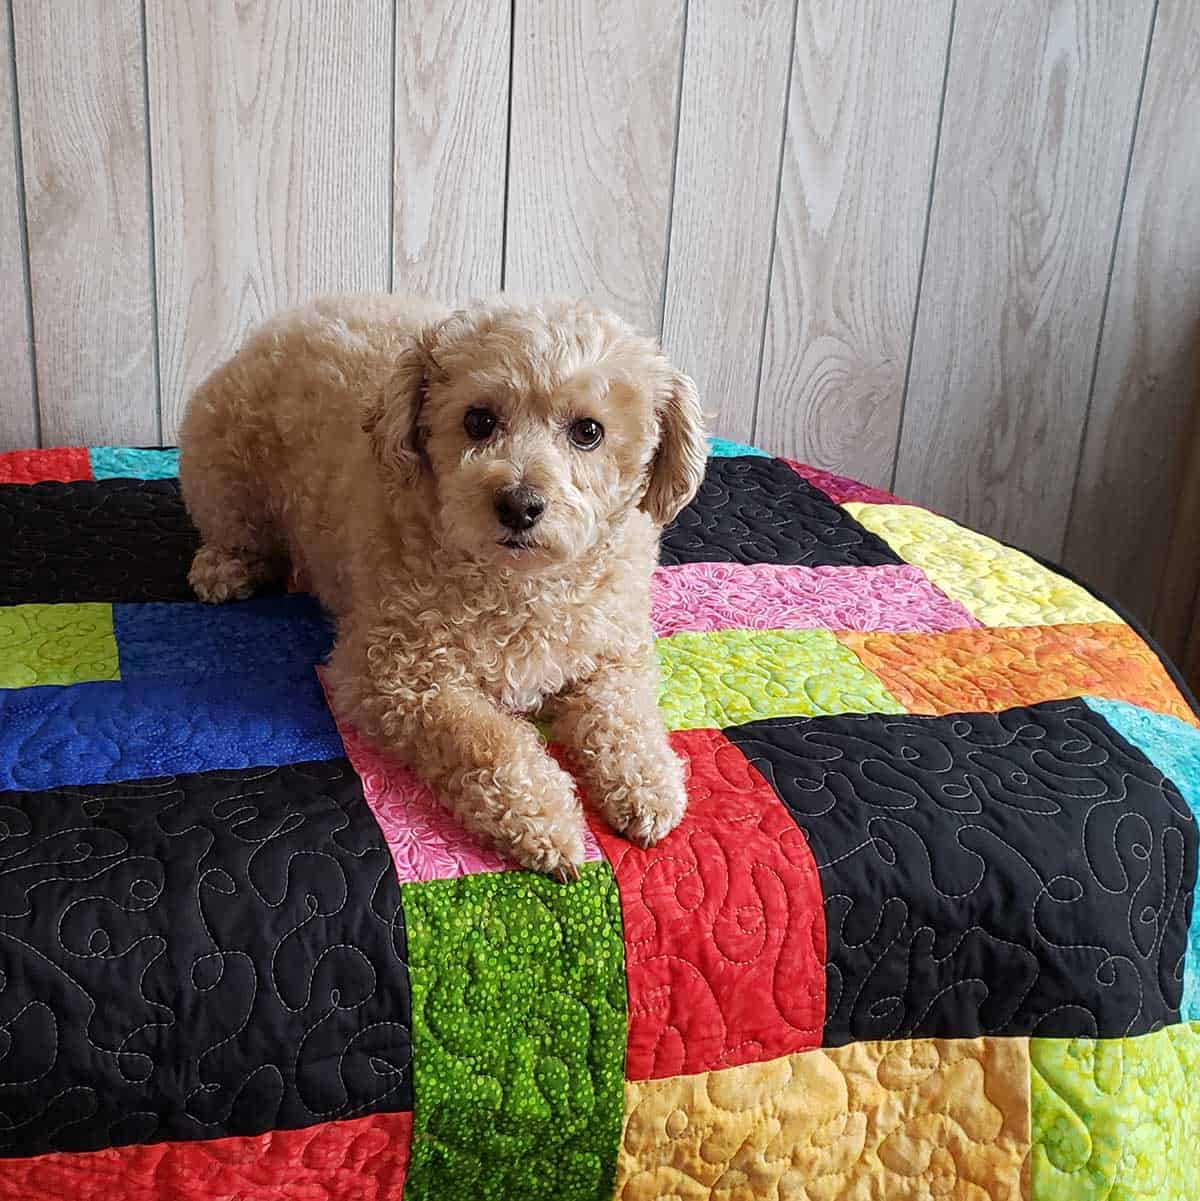
I made the lap quilt with six quilt blocks which is the same amount I used in the baby quilt. See the difference in size?
Midnight Glow Lap Quilt
37½” x 56″
19″ unfinished blocks
Fabrics:
- 1-yard black fabric for blocks and binding
- Rainbow color layer cake or scraps of fabrics that are at least 5″ x 10″
- 1½-yard backing
- batting

Cutting:
- Cut 6 – 10″ squares – from the black fabric
- Cut 36 – 5″ x 10″ rectangles of assorted colors
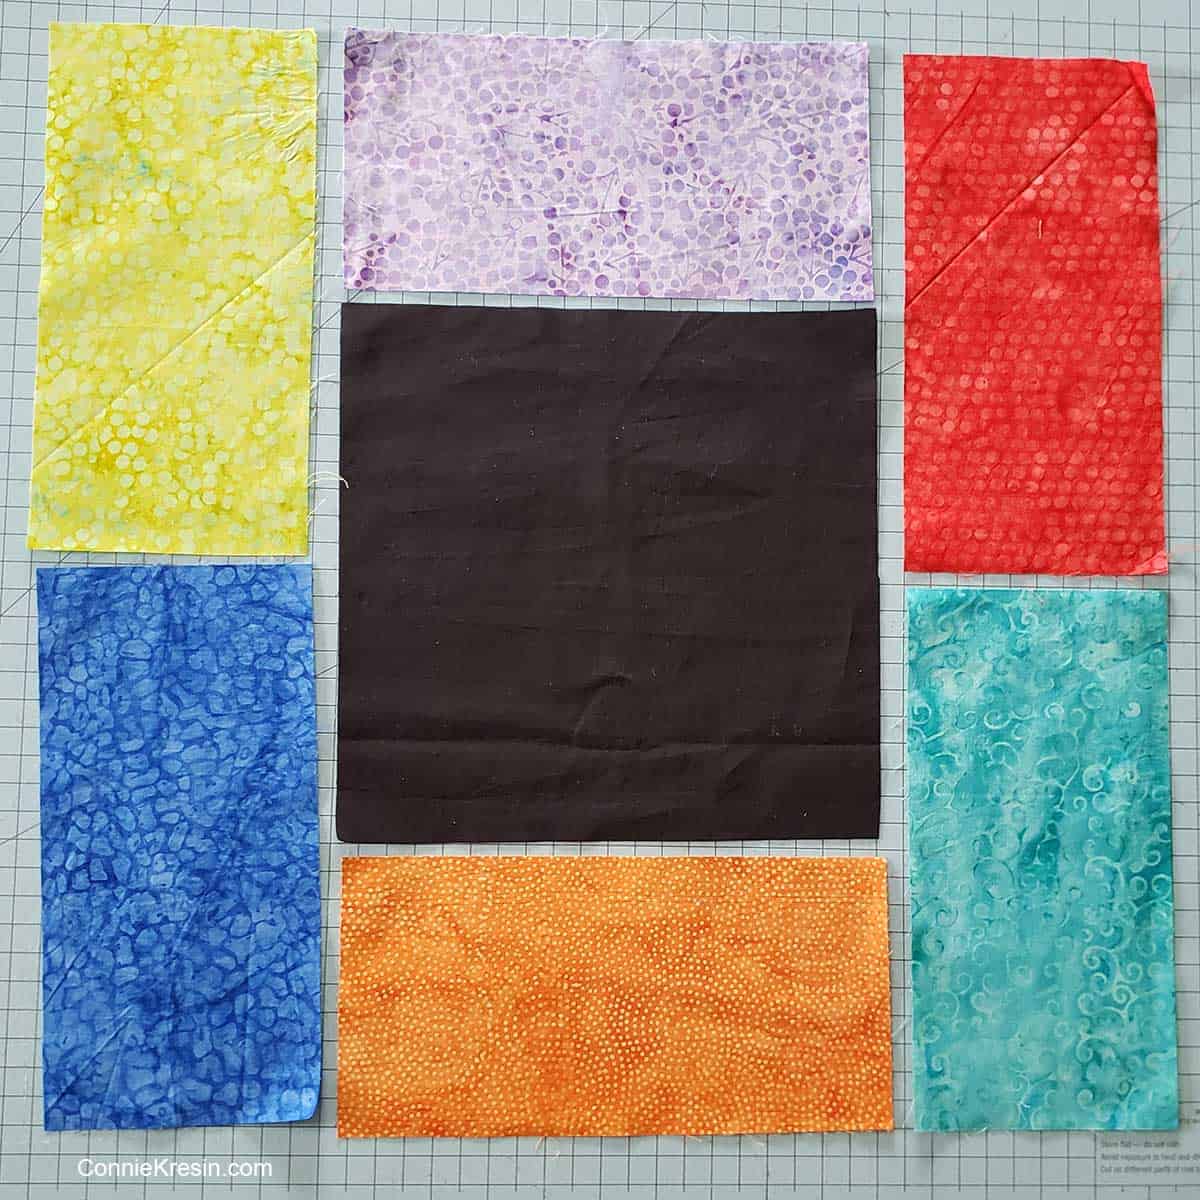
Layout your pieces as shown below.
Sewing:
Use a ¼-inch seam allowance throughout.
Sew two 5″ x 10″ rectangles to opposite sides of the black 10″ square. Press to the black fabric.
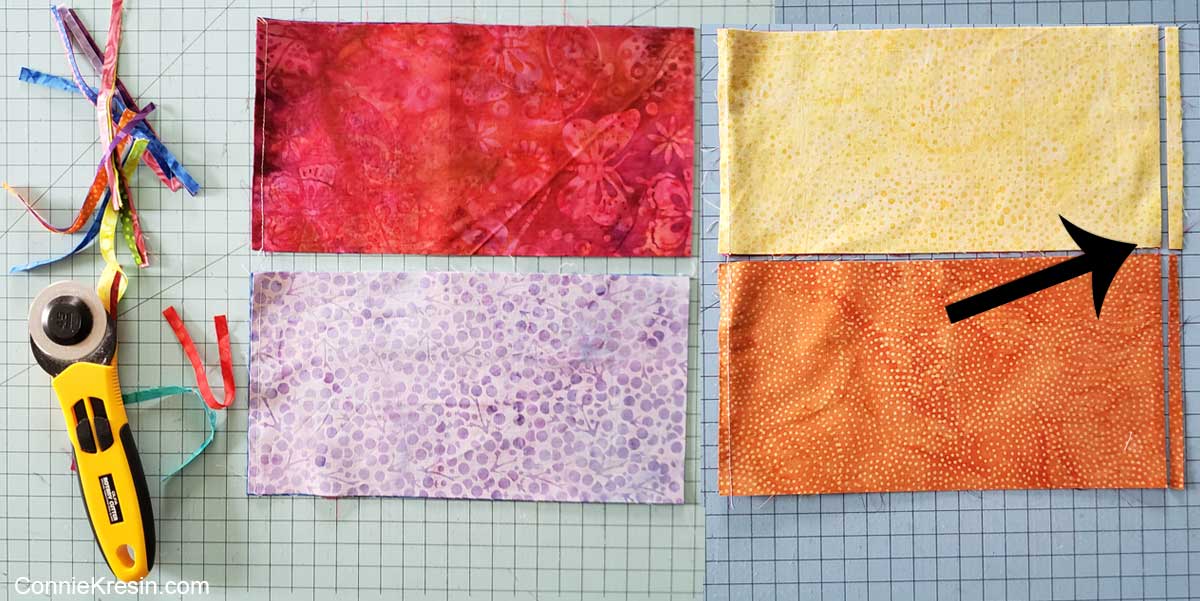
Read carefully
- Sew two 5″ x 10″ rectangles together lengthwise
- Make two for each block
- Trim ¼” off of each rectangle, I laid them out with the seam on one side and then trimmed the opposite side.
- The rectangles will end up being 5″ x 9¾” and the section will be 5″ x 19″
- Add one set to each side of your block
Here are four blocks finished. Each block is 19″ unfinished. When I made the blocks I wasn’t sure what I was going to do with them. When I saw how big the four blocks were I decided it would be perfect for a lap quilt so I decided to make two more blocks.
Sew all six blocks together

We had plans to build my new studio this spring but for now, that is at a standstill. Once I decided that I had to figure out what I didn’t like about my sewing space upstairs.
Cutting table
Do you know what I missed more than anything? A cutting table I could stand at! Once I figured that out I got creative. I have a 4-foot x 6-foot cutting table that is in storage and too heavy and big to move upstairs. Here is what I’m using right now.

I have two 4-foot fold-in-half tables that I use when quilting a large quilt and decided to put them at their highest level and use them for a cutting table.
I used cable ties to hold the tables together. I also taped two of my 24″ x 36″ cutting mats to the top of the tables. The back mat hangs over a little bit but it works.
I can also use the tables to lay out my quilt and pin the batting and backing while standing. Crawling on the floor to do this isn’t fun at my age.

I have two rooms upstairs that I am using. I am always moving things around and recently butted my sewing machine cabinet up to my makeshift desk. The height is perfect for free-motion quilting a quilt.

I just moved my keyboard and mouse out of the way. It is very important to keep your entire quilt supported while free-motion quilting. If it hangs over the side the weight will cause drag and you will have trouble with your stitching.
See how I have the quilt rolled up on the bottom and the right side? I always start in the center of my quilt and work out.

For the backing, I used a wild animal print flannel and cotton batting.
I used an Aurifil 40wt thread called Sand that I had in my stash. It is a little heavier weight which makes the quilting show up a little more. I just did a simple meandering with loops.

Finish the quilt – binding.
Cut four 2½” strips the width of the fabric for your binding. Use my easy to follow machine binding tutorial to bind your lap quilt.
Your Midnight Glow lap quilt will finish at approximately 37½” x 56″.
I hope you enjoy this tutorial and please send me a photo if you make it. This would make a wonderful gift for someone in a nursing home or hospital.

Get the Midnight Glow quilt pattern that includes placemats, a baby quilt and several other quilt projects made with the Midnight Glow block.
Would you like to make a table runner? Take a look at my Midnight Glow table runner tutorial.
Please note that this post contains affiliate links, which means I’ll earn a small commission if you purchase through my link at no extra cost to you. Please see the full disclosure here. As an Amazon Associate, I earn from qualifying purchases.
Great deals for you!
Looking for great buys on fabric and things? Check out these links
- Connecting Threads
- AccuQuilt Deals
- Fat Quarter Shop Daily Deals
- Green Fairy Quilts – Daily Deals
- Missouri Star Quilt Co – Daily Deals
- Scrapbooking
- The Quilt Keeper
- SewingMachinesPlus
- Electric Quilt
- My Amazon Store for all the quilting things I use and more

About Connie
Hi, I’m Connie Kresin Campbell, the quilter, writer, and photographer behind Freemotion By the River. I enjoy inspiring others with my quilt tutorials and patterns. You’ll also see my sweet adopted dogs from time to time.
Be sure and subscribe to my newsletter for more free tutorials and printables.
I love it,it would work good for my son a quilt. Seeing it on the bed made it possible to see how big the blocks are. Love them both. Can’t print pattern out as printer is taking a (breakdown). Makes me mad but is life. Thank you so much for helping me.☺️
Love the simplicity of this pattern. May I ask about your machine seen there in the photos? Is that your “go to” machine? Is it a Singer? If so what model? Do you do free motion quilting with that machine?
Hi Connie,
I love the bigger size and I have lots of layer cakes that would look great in this pattern. I have the pattern already, I don’t remember if it has the bigger size in it. Hopefully I’ll get to it this summer. Our quilt guild is off for the summer.
I love the pattern you shared with us!! Your fur babies are so cute! Hugs,
I love your posts. Your quilt’s give me lots of ideas. Enjoyed all the pixs of your studio. Makes me want to keep working on mine to get it right. Are you still planning to follow your daughter? I’d hate giving up your home. It looks so pretty. Have a good new year and thanks for being someone like me to follow!
Thanks for sharing, love your work space and all the useful tricks and hints. Stay safe.
This is a nice quilt but I was noticing the wall hanging you have in the 3rd shot of your sewing room. It’s the one with the upright flowers on a beige background. Perhaps you could share that. I love all of your work and Mr Mickey. I hope you have a Happy and healthy New Year.
Here you go Lorena! https://conniekresin.com/wild-rows-flower-tutorial/
This is a wonderful pattern. I got into quilting around 5 years ago, but still feel like a newcomer! I made a quilt for my 26 year old son who is autistic. He loves everything about Legos and Disney and it’s many characters. For years I collected various printed fabrics with the Disney characters on them, with the intention of making him a memory quilt one day, and I finally achieved that goal. I presented him with the quilt on Christmas Day. He loved it; however, he didn’t want to use it on his bed for fear of damaging it (so I have to figure out how to turn it into a wall hanging). I used hexagon shapes in solid primary and secondary colors for the backing pieces, and hexagon shape pieces of the various printed fabrics as the top focal pieces, with a piece of batting sandwiched in between the solid and printed hexagon pieces. I hand stitched the entire piece together, as I didn’t want the stitching between the pieces to show. It was truly a labor of love💕! I have been collecting batik fabrics for many years now, and want to make something special with them. Maybe I’ll give your pattern a try. By the way, your sewing room looks very much like mine; with the make shift cutting table and storage bins underneath! Somehow, I feel a kindred spirit in you! I look forward to your next posting! May you and your family have a blessed Happy New Year! Stay safe and keep on quilting!
This looks really simple. I was also looking for instructions on how to do the interesting binding shown in your newsletter.
Thanks for all that you do.
I appreciate your easy to follow patterns and tutorials and am grateful for the tip about free blueprnt classes. These are great times to keep busy and have the time to brush up or learn something new
I love all the bright colors you use.
Mickey looks very cute if impatient for his walk. You’ve come up with great solutions for your temporary studio. Let’s hope it’s a short temporary and we can all get back to our lives sometime soon. Meanwhile, stay safe. Oh, and thanks for the tip about bluprint. I have a lot of friends here that are going a bit stir crazy. Maybe they can find something to do.
This is really a good looking design done in these “solids”. Love the animal print on the back. It must be disappointing to postpone your new studio. Looks like most everything in life is postponed for now. I know I’m having a hard time focusing on anything, but at least we are safe at home for now. Stay safe!