
How to make the Brick Road Pillow or Table Topper
This post may contain affiliate links which won’t change your price but will share a commission.
I finished up the tutorial for the Brick Road pillow! If you would like to know how to make the Brick Road Quilt Pillow just keep reading. Since I already have lots of pillows, I decided to make a table topper instead. I never know what I’m going to make sometimes until I’m done. Are you that way also?

As I mentioned yesterday, I couldn’t find the original photos of the pillow so I decided to make it again so I could show you photos of the steps. Here is the pieced top before I decided to make it into a table topper instead of a pillow.
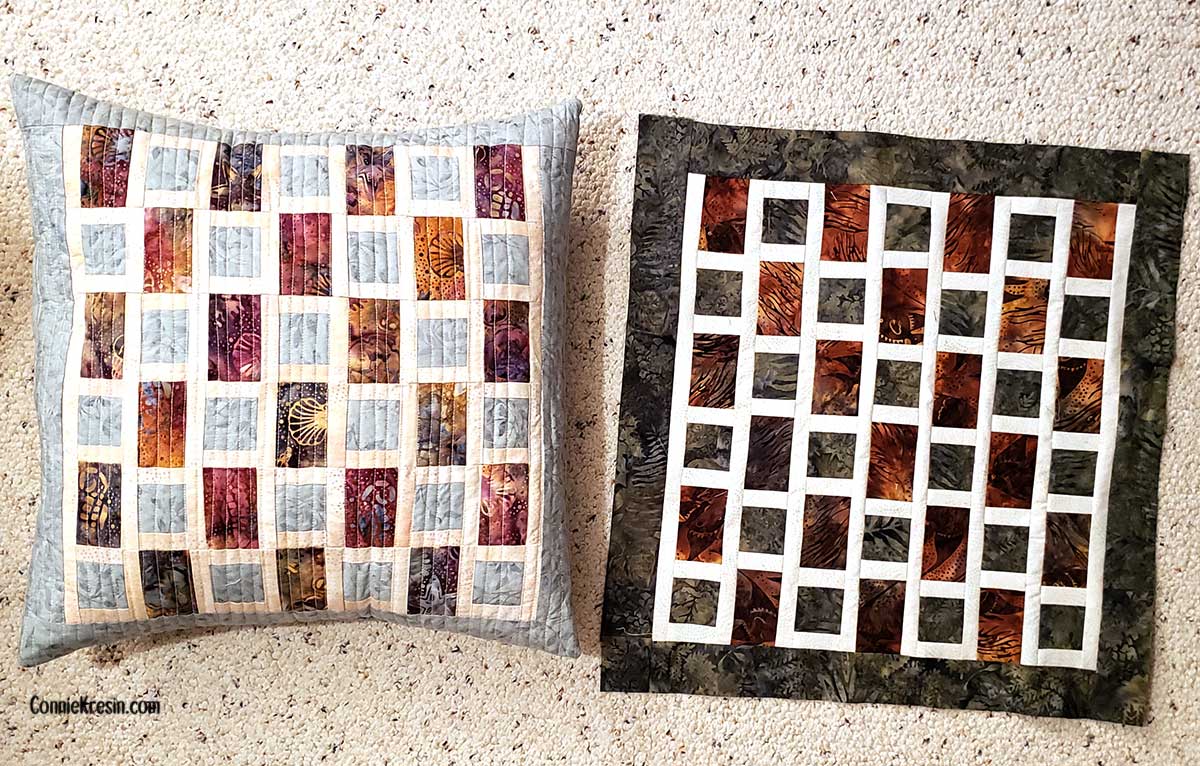
Here you can see the pillow and the table topper. You can also read my first post when I talked about working on the light blue Brick Road pillow.

This is a very simple pattern that uses 3 colors. I am using batiks and one of them is a fairly large multi-colored print. Each rectangle cut looks entirely different.
I also picked a green that was in the print for my accent color. I’m still having trouble getting the colors right with my camera when I use it in the house. Very frustrating.

Fabrics
- White – 1/8 yard
- Multi-print – 1/8 yard
- Green – 3/4 yard includes pillow back or table topper & binding
I used scraps for this project so most of my pieces were cut individually. If you use yardage then cut strips the length of the fabric as shown below. The pieces I had weren’t long enough to make this work so I just cut separate pieces.
Cutting Strips WOF
- White – cut strips 1″ x width of the fabric (WOF)
- Green – cut strip 2″ x width of the fabric (WOF)
- Multi-print – cut strip 3″ x width of the fabric (WOF)
Sew with a ¼” seam allowance.
- Sew a white strip to both sides of the green print
- Press seams toward the green print
- Sew the mult-print to one side of the white strips
- Press toward the multi-print
- Cut sections 2″ wide

Step One
Cut Individual Pieces
- White – cut 42 – 1″ x 2″ rectangles
- Green – cut 21 – 2″ x 2″ squares
- Multi-print – cut 21 – 2″ x 3″ rectangles
Set one white 1″ x 2″ piece to the left side of the green 2″ square. Repeat adding one white 1″ x 2″ piece to the right side. Press seams toward the green fabric. Next add one multi-print 2″ x 3″ rectangle to the section you just made. Press the seam toward the multi-print.
Colors used in diagrams
When I wrote up this tutorial for the pdf I used a brown in place of the multi-print. I hope this doesn’t confuse anyone.

Step Two
Make 21 sections like this.

Step Three
Sew 3 sections together to make a row. Press the seams toward the multi-print. Repeat this step for a total of 7 rows.

Step Four
Cut the following:
White – cut 8 – 1″ x 15½” sashing strips, sew the strips between the rows and also at the top and bottom.

Normally I don’t do much pinning and the design is very forgiving in the way the rows line up and I’m not a perfectionist.
To get everything to line up better, you may want to do a little pinning. I’m using my vintage 15-91 Singer which has painter’s tape marking my ¼” seam allowance.

Step Five
Add the borders
- The piece should measure 15″ square
- Cut 2 – 2″ x 15″ strips, sew to the sides
- Cut 2 – 2″ x 18″ strips, sew to the top and bottom
Pillow
Add batting and a backing like muslin – quilt as desired. Here is a closeup of the quilting that I did. This is just straight-stitch sewing with a regular foot on my machine. I didn’t mark any lines, I just eye-balled it. If you are hesitant to try free-motion quilting then you should definitely try this!

Pillow Backing
- Cut 2 pieces of the green fabric – 13″ x 18″.
- On each piece fold one of the 18″ sides under ¼” and press.
- On one piece, fold under another 1″ and top stitch it.
- On the other piece, fold under ¼” again and top stitch.
- Place the 1″ top stitched piece face down on the right side of the pillow top.
- Next place the ¼” top stitched piece face down on top of it.
- Pin the pieces and stitch around the pillow with a ¼” seam allowance.
- Double stitch over the area where the back pieces overlap to make the seams stronger.
Table Topper
Add batting and a backing, the green yardage will be enough for the backing and binding. Since I used scraps in my stash, my backing is different. You can also see some of my stitching done with Auifil thread.
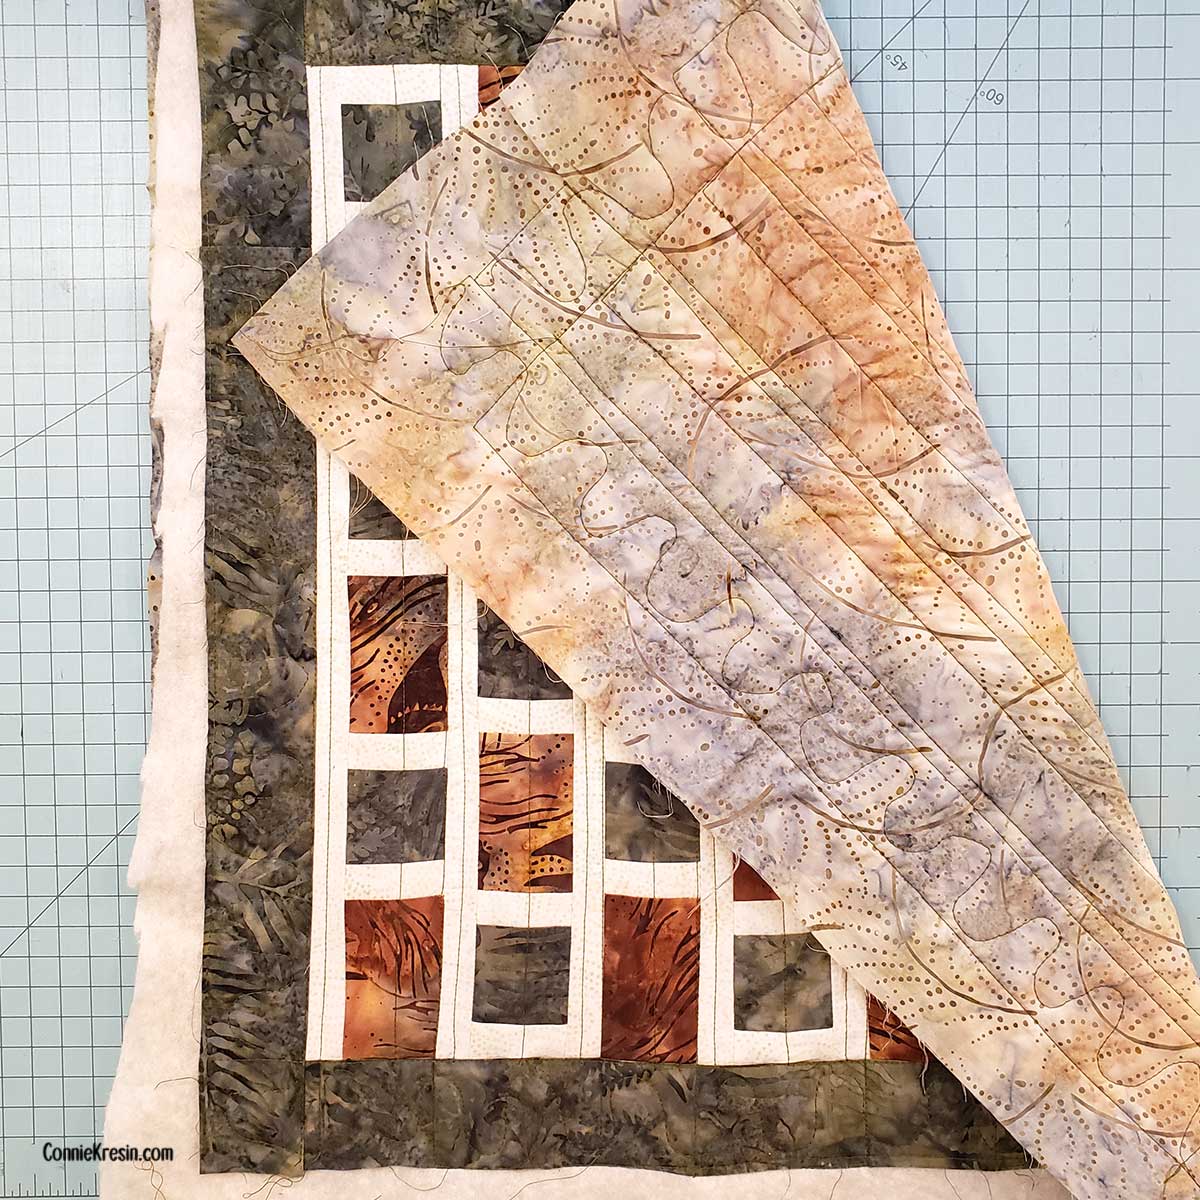
Cut 2 strips of 2½” x width of fabric for the binding. Sew your binding strips together and then fold lengthwise. I like to sew my binding to the front of the quilt and then topstitch on the back of the quilt just a hair past the stitching line. You can also hand stitch your binding.

This could also be used as a giant mug rug. So nice to actually have a photo that shows the correct colors!

I hope you enjoy this tutorial and I would love to see any project your make with it. I created a pdf that is just 2 pages but has all of the information needed to make either the pillow or table topper. There are full-color diagrams included.
Purchase an ad-free printable PDF version of the Brick Road Pillow/Table Topper tutorial here.

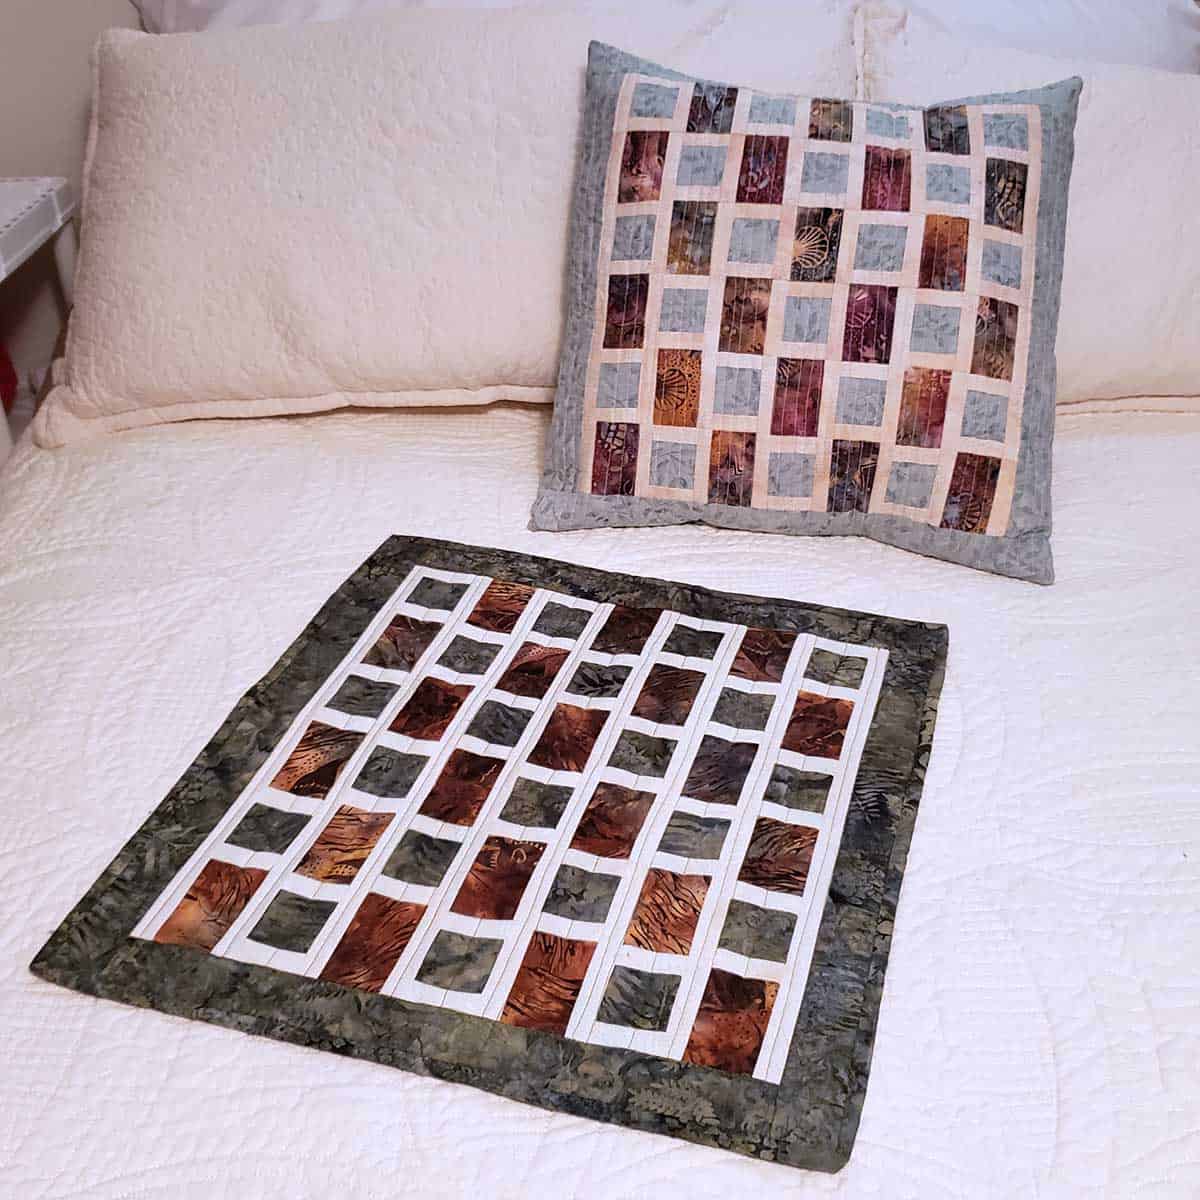
You might get a kick out of this photo, I laid the Brick Road table topper on top of the pillow and it gives you an idea of how this would look if I had made it into a pillow like the light blue Brick Road pillow.

Other tutorials you will enjoy!
Great deals for you!
Looking for great buys on fabric and things? Check out these links
- Connecting Threads
- AccuQuilt Deals
- Fat Quarter Shop Daily Deals
- Green Fairy Quilts – Daily Deals
- Missouri Star Quilt Co – Daily Deals
- Scrapbooking
- The Quilt Keeper
- SewingMachinesPlus
- Electric Quilt
- My Amazon Store for all the quilting things I use and more

About Connie
Hi, I’m Connie Kresin Campbell, the quilter, writer, and photographer behind Freemotion By the River. I enjoy inspiring others with my quilt tutorials and patterns. You’ll also see my sweet adopted dogs from time to time.
Be sure and subscribe to my newsletter for more free tutorials and printables.
Your pillows turned out wonderfully. Where you find the time to do what you do is amazing.
Once again, you’ve given us a great tutorial and a way to make gifts for others! Thanks!
Thank you so much, Connie. I appreciate all the time and planning you put into this tutorial. I can’t wait to make a Brick Road pillow. They would be great Christmas gifts, maybe even this year. Happy Holidays and thanks again.
Glad you like it Toni, you’re right this would be a great Christmas present!
I used to know a Tommy Vitrano in San Diego, CA — nice to see that name again! Carol Westover — Tehachapi, CA (formerly San Diego, CA)
A great pattern ! I plan to make it with all of my Christmas fabric scraps !
Great Eileen and I hope you will share it with me!