
Fat Quarter Fabric Baskets Tutorial
This post may contain affiliate links which won’t change your price but will share a commission.Fabric Baskets are so much fun to make and it is hard to make just one and when you can use fat quarter fabrics for the baskets that is even more fun!
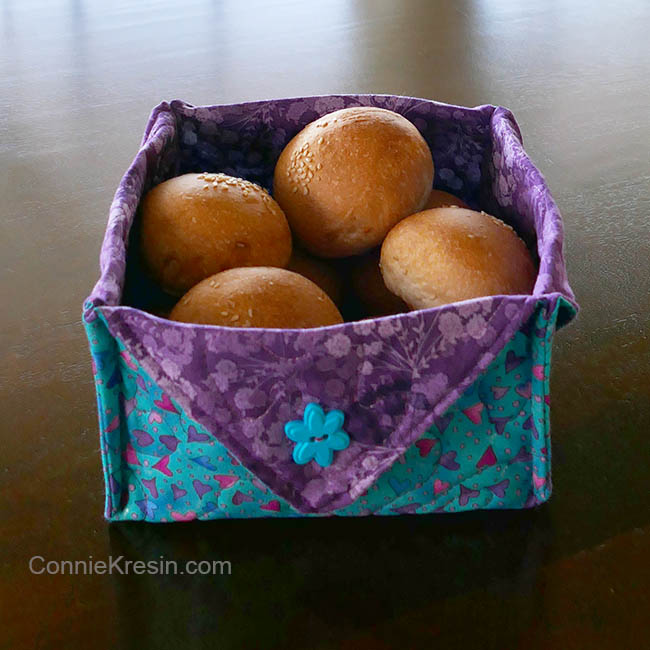
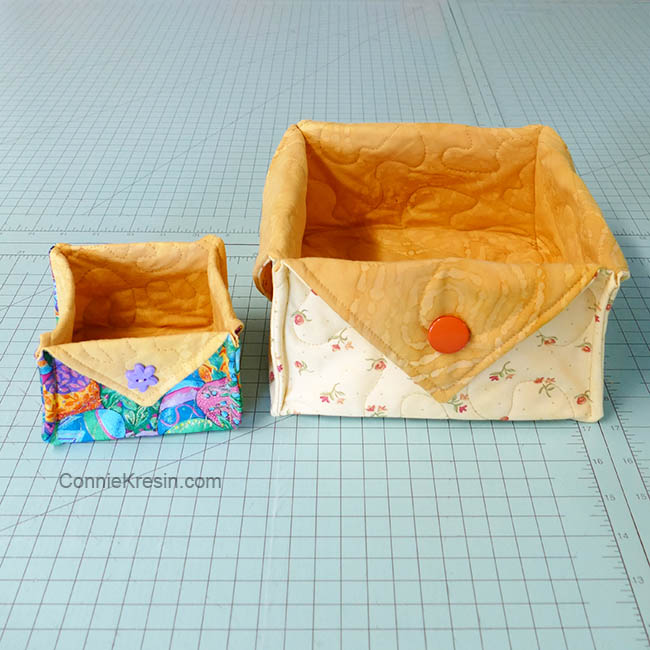
I recently had someone ask what size would be good for a breadbasket. I wasn’t sure so I pulled some fabrics out of my stash and experimented with a couple of sizes using my Fabric Basket tutorial (link below).
I already had some baskets that I had made last year and this one was just a little too small to hold some hard rolls that I had. I don’t remember what size I made this basket.

I wanted something a little bigger. This cute teal and purple basket is holding the same amount of hard rolls so you can see that it is a lot bigger.
Fat Quarters in your stash are great for baskets this size.
A fat quarter is approximately 18″ x 22″. Just cut the fabric into a square. Some of my fabrics had been washed which made them slightly smaller. All I did was square up the fabric.
Basket sizes

The first basket I made was this green one which turned out with higher sides than I wanted for a breadbasket. The corners were 3″. After I made this one, I switched to 2½” corners.
Green fabric with a large floral print
Two 18″ x 18″ fabric squares and 3″ corners.

A 2½” corner creates a perfect basket with sides that aren’t too tall, this ended up being my favorite size.
Yellow rose print fabric and a yellow batik
Two 18″ x 18″ fabric squares and 2½” corners.

Pink fabric and a light yellow floral print
Two 17½” x 17½” fabric squares and 2½” corners.
Purple tone on tone and a teal heart print
17″ x 17″ fabric squares and 2½” corners.

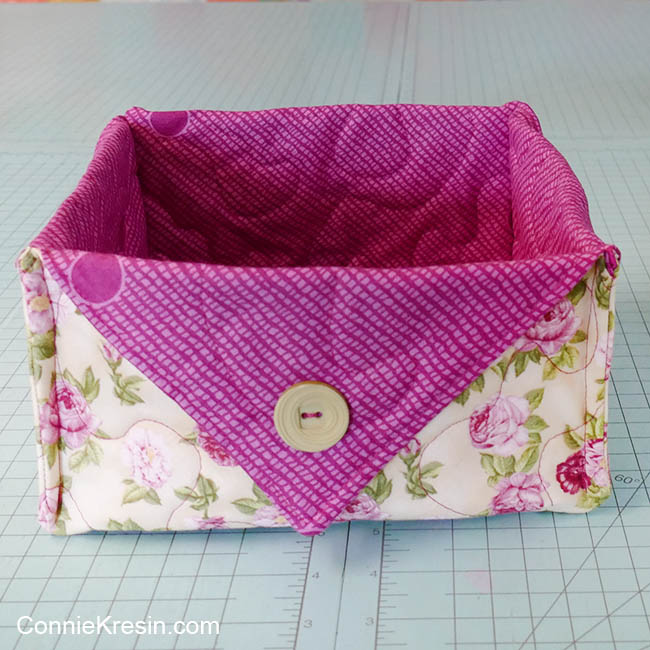
Pink floral and pastel pink batik
17¼” x 17¼” fabric squares and 2½” corners.
I had this beautiful large floral fat quarter that had been in my stash for a long time. I paired it with a pastel batik and really like the way it turned out.

Inside of the basket
Here you can see the inside of the basket and clean the inside looks all finished.

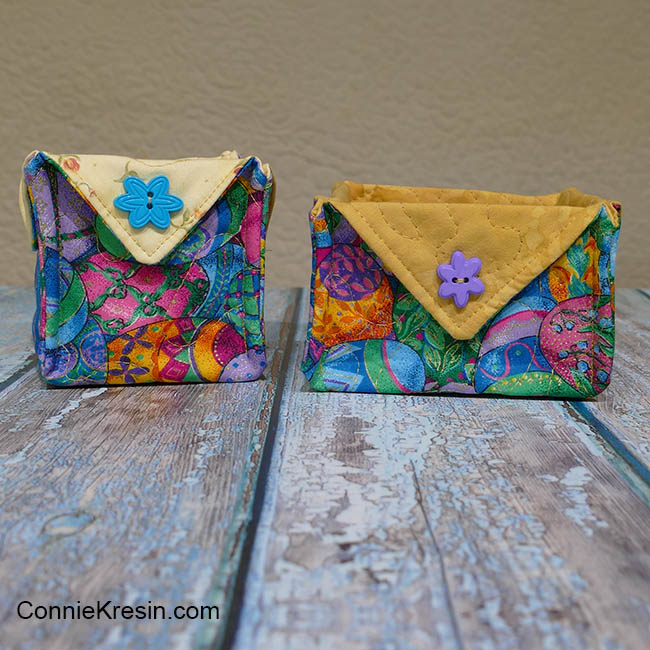
I also found a cute print with Easter eggs on it. The piece wasn’t very big and I was able to get two small pieces out of it. One piece was 9¼” square and I made 2″ corners. The other piece was 9½” and I made 1½” corners. Can you see the difference?
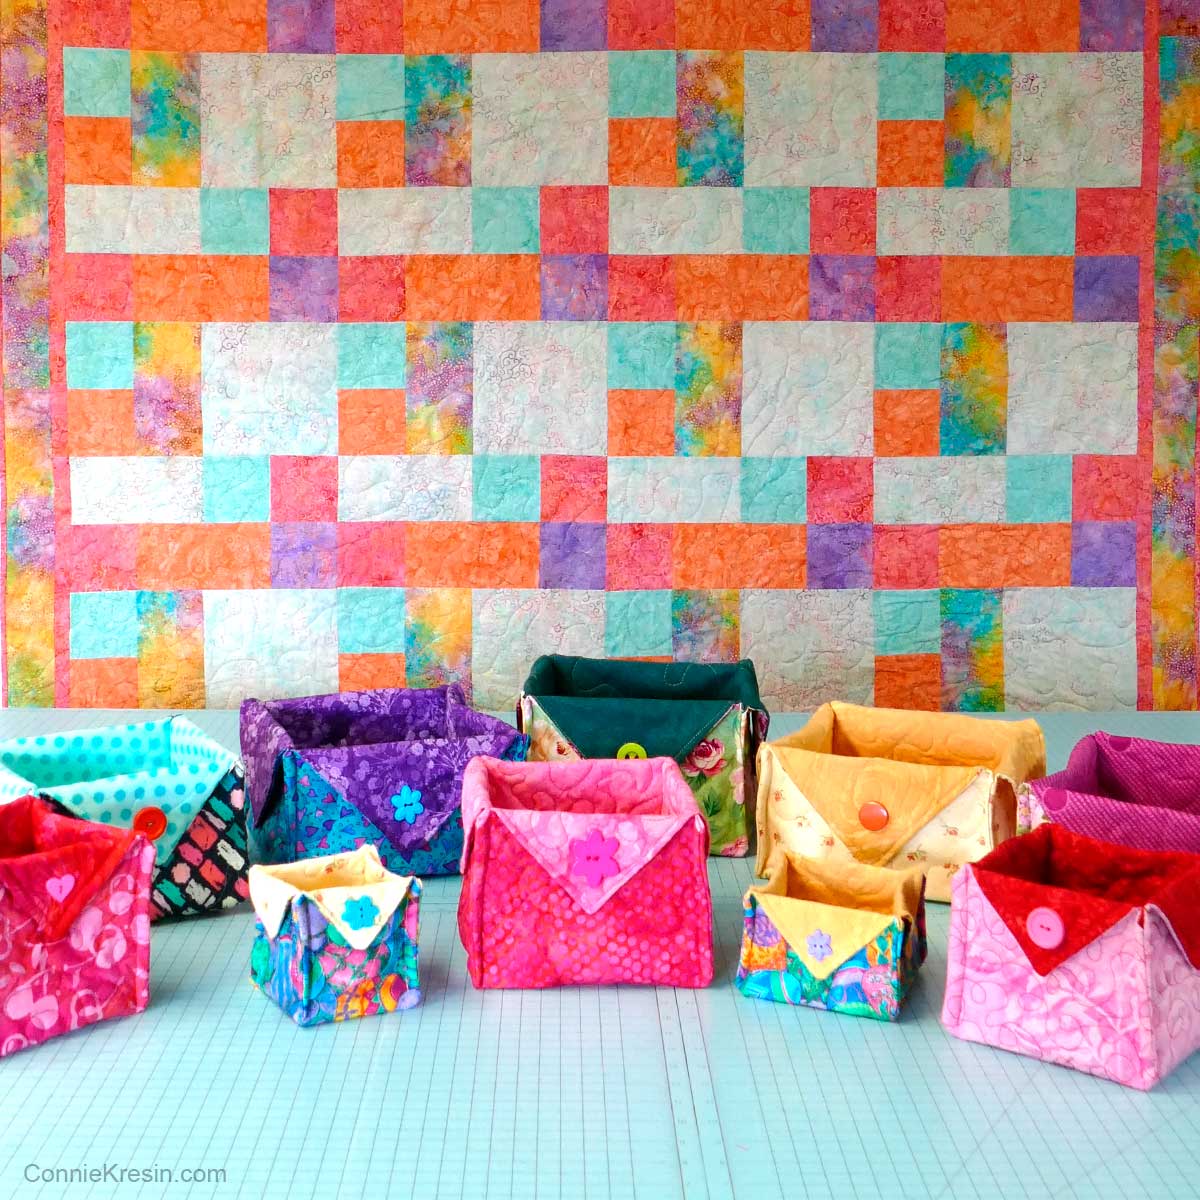
Take a look at the difference in sizes of the fabric baskets. I made 7 different baskets in just a couple of hours. Each basket was quilted with a fairly large free motion meandering.

Batting
Are you wondering what is the best batting or wadding to use?
I have used scraps of batting, whenever I finish quilting a large quilt I will save the leftovers for mug rugs and other small projects.
I squared up the scraps and used a zig-zag stitch to join the pieces if needed. Anything with some polyester seems to have better stability.
My favorite is Soft & Stable
Soft & Stable byAnnie’s is fantastic to use for baskets! I also use it for placemats also.
It is 100% polyester and firm. It maintains it’s safe and is easy to sew through. Buying a piece that is 18″ x 58″ will allow you to make several of the fabric baskets.
Quilting
You can do any kind of quilting on the baskets. This is a perfect time to practice some free motion quilting or you can just sew straight lines with your regular sewing machine foot.
Any kind of quilting just helps to firm up the fabric basket.
Sewing down the flaps
I also hand-stitched the flaps and button using the same color of thread that I did the quilting with. Quite a few people say they do this step using their free arm sewing machine and don’t bother adding the buttons.
30 Fat Quarter Fabric Baskets
I thought you might enjoy seeing 30 fabric baskets that Ginny made using my tutorial. Something that she did differently from my tutorial was to sew the flaps down using her sewing machine with a free arm. I never thought to suggest that as my vintage 15-91 Singer is in a cabinet and I don’t have that option. Great tip Ginny and thanks for sharing the photo!

I dare you to make just ONE of these cute fat quarter fabric baskets! I’ll be using several them for Easter baskets and will share that soon.
Fabric Basket tutorial
Here is the link to my Fabric Baskets tutorial that will show you exactly how to make the baskets and finish the corners.
This is a post where I show more detailed photos of the enclosed seams on the baskets.
Would you like to make some baskets for Valentine’s Day? Take a look at these cute red and pink fabric baskets!
Great deals for you!
Looking for great buys on fabric and things? Check out these links
- Connecting Threads
- AccuQuilt Deals
- Fat Quarter Shop Daily Deals
- Green Fairy Quilts – Daily Deals
- Missouri Star Quilt Co – Daily Deals
- Scrapbooking
- The Quilt Keeper
- SewingMachinesPlus
- Electric Quilt
- My Amazon Store for all the quilting things I use and more

Thank you so much for this little basket! I made 25 of them to use for our love in action at church this year. Our church brought in small things to fill the baskets – hygiene things, Candy, lotions, gift cards, soaps, etc. We filled the baskets and put them in cellophane bags to give to the homeless and less fortunate in our area. They were a big hit. Thank you.
I love the fabric baskets. I made some for my two teenage granddaughters to keep ‘important bits n pieces’ in. They love them. Thanks for the inspiration.
I love the basket family picture on the stairs. I can see that you can’t make just one…..😊 I’m going to give them a try…..buttons are so cute.
Love them
Instead if buttoning down
I stitched a ribbon around
Could be used as a handle
Thanks
Connie, you are amazing with all the generous sharing. Thank you.
Now that I have tidied up my sewing room, I shall make some of these.
I printed your Fabric Basket Tutorial and plan on making a few more. I made some before but gave them away. Now I need some more for hostess gifts since I have all new friends and neighbors. Thank you sew very much Connie Dear. <3
Love these not sure I will get to it this year but I’m thinking of doing one and not sew corner flaps down but adding a button and loopI to close the “lid” ….I make ornament gifts and sometimes a whole handmade ornament advent these would be great to give ornaments in and be a storage container as well for the very delicate ones ….now I just gotta remember this idea for next year lol
Love the baskets — thanks for the tutorial. These would serve two purposes; one to help use up some of the huge fabric stash I have, and then to help organize what is left! So, thanks again!!
I’m not familiar with the free motion technique. My sewing machine is older, what do you suggest in place of free motion technique? Thank you.
Just do some straight line stitching
Such a satisfying easy make when you just need something inspirational to go right. Huge thanks 🤗
How do you get them to stand up?
Adding the batting and then quilting gives the baskets body.
Show videos how to do it
Each one is lovely, but seeing them all stacked together on the stairs is amazing!
Thank you Connie, I just made one and put it on my blog today.
Connie, I think I should make some of these every time you do a post about. but, somehow, I never do. Maybe this will be the year. lol
Hi Connie…I remember having a conversation about your baskets LAST YEAR and since you put out a DAR this year I’m going to have to make a point to make one or more!! (but not 30–but that was a cute photo lol) Since I”m in the FQS button club it will give me an opportunity to dress up my baskets with expensive -handmade/dyed buttons. 🙂 🙂
Hi Connie! I love the fabrics that you chose for these baskets, especially that last one with the purple and turquoise. The hearts on that fabric are SO cute. I also love the photo of the 30 baskets on the stairs – such a cute variety. Ginny sure made a lot of them. Happy Tuesday to you. ~smile~ Roseanne
I love making baskets
using your pattern. Love
that purple and teal
basket, lovely!
Carla from Utah
What fun are these!!! I am going on a spring fling sewing retreat – may have to bring this along with some FQs!
These are really great baskets and so fun in different fabrics. The sizes and corners really make for flexible sized baskets. I adore them all. Ginny must be amazing wiith her many baskets.
Great baskets!! I definitely need to make some of them!! Thank you for the tutorial!!
those are pretty – do the ends flip over to keep the bread warm or do you cover with a towel or napkin?
Just cover the bread with a napkin.