
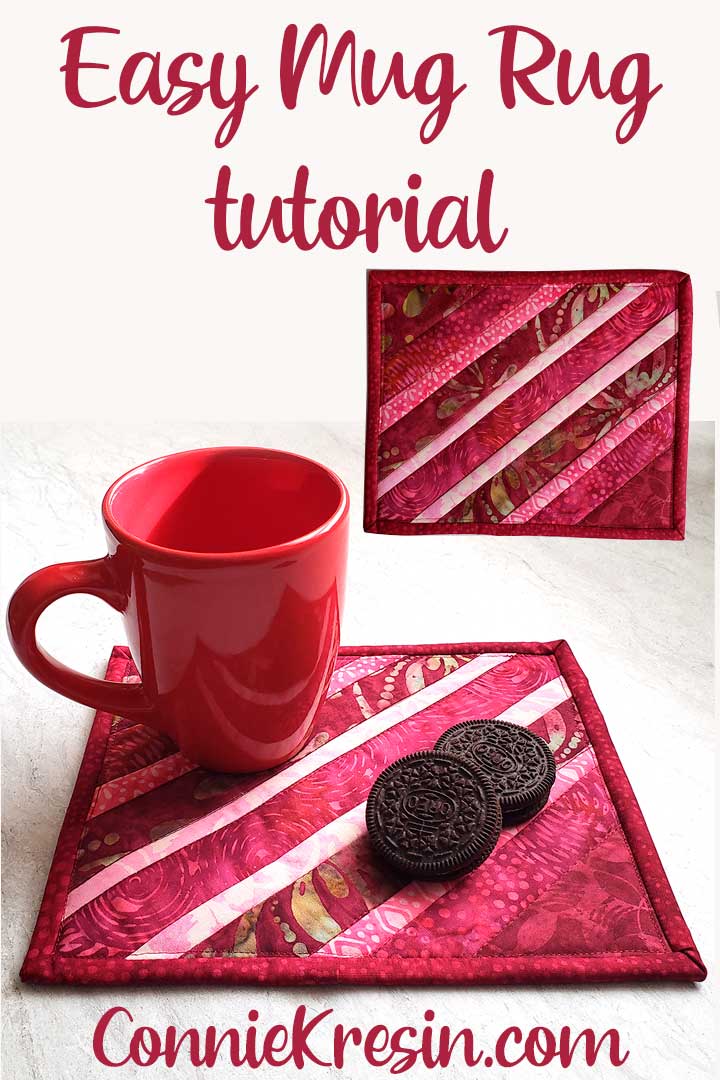
Easy Quilted String Mug Rug Tutorial
This post may contain affiliate links which won’t change your price but will share a commission.
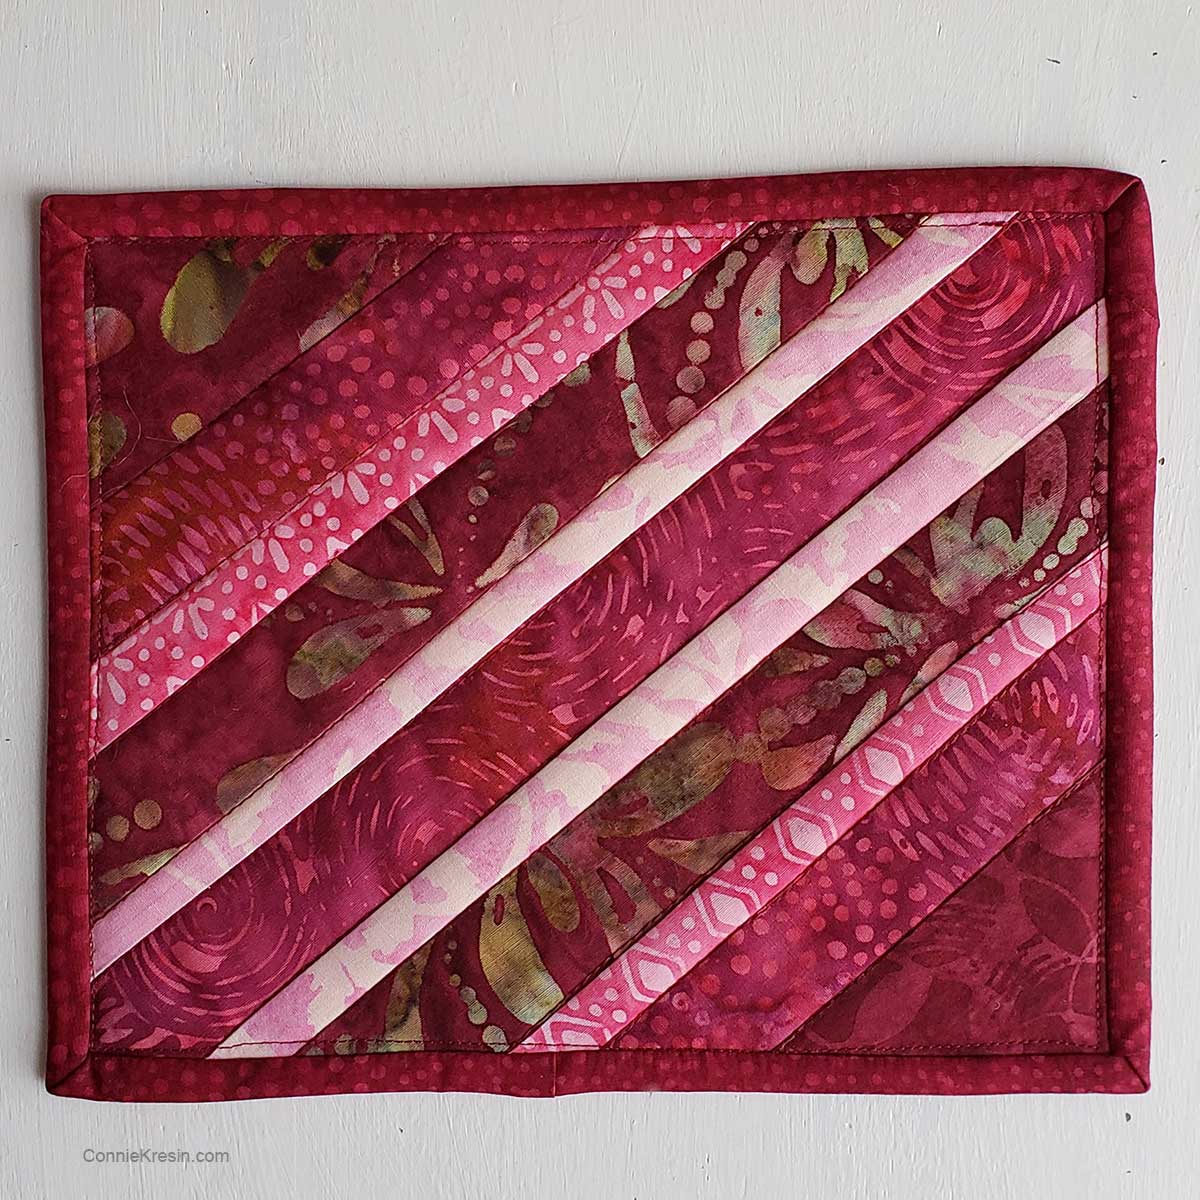
One of my favorite things to do is make a mug rug. It is relaxing and something that can be completed in no time at all. This little quilted mug rug was made using batik scraps from a table runner that I am working on.

Wine String Mug Rug tutorial
7″ x 9.5″
How to make one
Pick some leftover scraps of batiks or other quilt fabrics that you have on hand. Most of the pieces are between 3/4″ and 1½” wide.

I happened to have an old telephone book and the pages are perfect for strip piecing. You could also use copy paper.
Mug rug size
There is no set size for a mug rug, I just go with whatever size paper and fabric strips I have. Sometimes I have pieced lengths of scraps to have a length to cover the size I have chosen.
Start adding strips to the paper foundation. Add one strip to the center of the paper right side up. Sometimes it helps to put a dab of Elmers Washable Glue on the phone book page.
Add strips to each side of the center strip. Place them right side down on top of the center strip.
Purchase an ad-free printable version of my
Easy Quilted String Mug Rug Tutorial here
Add fabric strips

Normally you would use a ¼” seam allowance. Since this is going to be a mug rug and I had narrow strips, I decided to go with a narrower seam allowance. Press your seams as you go.

Continue adding strips of batik scraps to cover the entire paper.

Use larger scraps for the corners if you have them. If not you can keep adding narrow strips.

Here is the back of my strip-pieced fabric. Completely cover the paper foundation, press, and trim. Next, carefully pull off the paper.

Simple quilting
Add batting, backing, and quilt. I was able to find enough of the pink batik for the backing. You can see my stitching on the backside.

All I did was change my thread length to basting and stitched along each seam. Some of my lines are a little wonky but that is okay, you really don’t notice it that much on the front.
Binding
Cut the binding width 2¼”. I had a fat quarter piece that I was able to use. I cut two pieces 2¼” x 22″ and had more than enough to bind the mug rug.

I like to sew my binding on using my sewing machine. You can also hand-stitch your binding. Normally I will stitch on the front side right next to the edge of the binding. When stitched from the back sometimes the stitching is over just a bit as shown below.
Here is the back of the mug rug. I stitched right along the edge of the binding.

This coffee cup is the only one that works with the mug rug. When we moved I downsized and took my huge assortment of mugs to Goodwill. Guess I’ll have to start a new collection of props!
It isn’t too early to start thinking about Valentine’s Day. This would be a perfect little gift. Be sure and look at my other tutorials for Valentine’s Day.

A mug rug would also make a perfect gift with a wine glass and….a bottle of wine!

Purchase an ad-free printable version of my
Easy Quilted String Mug Rug Tutorial here
Other mug rug tutorials you might like
Great deals for you!
Looking for great buys on fabric and things? Check out these links
- Connecting Threads
- AccuQuilt Deals
- Fat Quarter Shop Daily Deals
- Green Fairy Quilts – Daily Deals
- Missouri Star Quilt Co – Daily Deals
- Scrapbooking
- The Quilt Keeper
- SewingMachinesPlus
- Electric Quilt
- My Amazon Store for all the quilting things I use and more
Nice design and color. Could this be paper pieced using freezer paper? Of course, a little extra time to make a template. I think I will try it. Such a wonderful pattern. Thanks Connie
Very nice.
I think this will be my first work with this technique.
Red like a heart, but easier;) to start.
Pressée de me mettre au travail.
I am following the strip pieced mug rug tutorial and have a question. It looks like you quilted the batting and backing together separately from the top. Am I correct? I have lots of scraps that could be used with this pattern.
Hi Jackie,
For this one, I strip pieced the mug rug top, added batting and back and then quilted. You can do it either way.
Perfect colors for this Valentine themed mug rug. Your tutorials are always so informative and easy to follow. Thank you sew very much Connie Dear.
I love using old phone books for foundation piecing… I have all my friends save them for me. Some day they will be a thing of the past like so many thins. Thanks for the cute idea.
Love this for a quick gift and love the fabrics you chose!! Great idea for Valentine’s Day!!
I love this tutorial. Plan on making some with my granddaughter.
So glad to hear that Joy, I hope you both have a lot of fun!
Oh, the fabrics/colors in your mug rug are scrumptious!!! I love that raspberry! Thank you for the tutorial…I have strings!!
That is really cute! Thanks, I’ll try making one. BTW, did I miss you mentioning whether you were going to be a batik ambassador this year?
Luv it ! Thank you.
Cute! And great tutorial!
Great idea for a quick gift. Thanks. I may make some of these using my selvages too.
Connie, another great little quickie project. Very cute. Thanks for the inspiration.
Love, hugs and prayers coming your way. Candi