
Batik QAYG Placemats Tutorial
This post may contain affiliate links which won’t change your price but will share a commission.
If you have never tried to Quilt As You Go then a set of placemats is the perfect fast and easy project.
You can have quilted placemats in no time at all by following this QAYG Placemats tutorial.
What is QAYG?
Not sure what that is? Well, if you like to see results right away and don’t really care for free-motion quilting you will probably love the Quilt As You Go style of quilting.
You will sew the backing, batting and quilt top all together at the same time.

For the month of August, the Island Batik Ambassadors were challenged to make some kind of QAYG project using some of their beautiful batiks. Quilt as You Go projects are one of my favorites things to make, have you ever tried this technique?
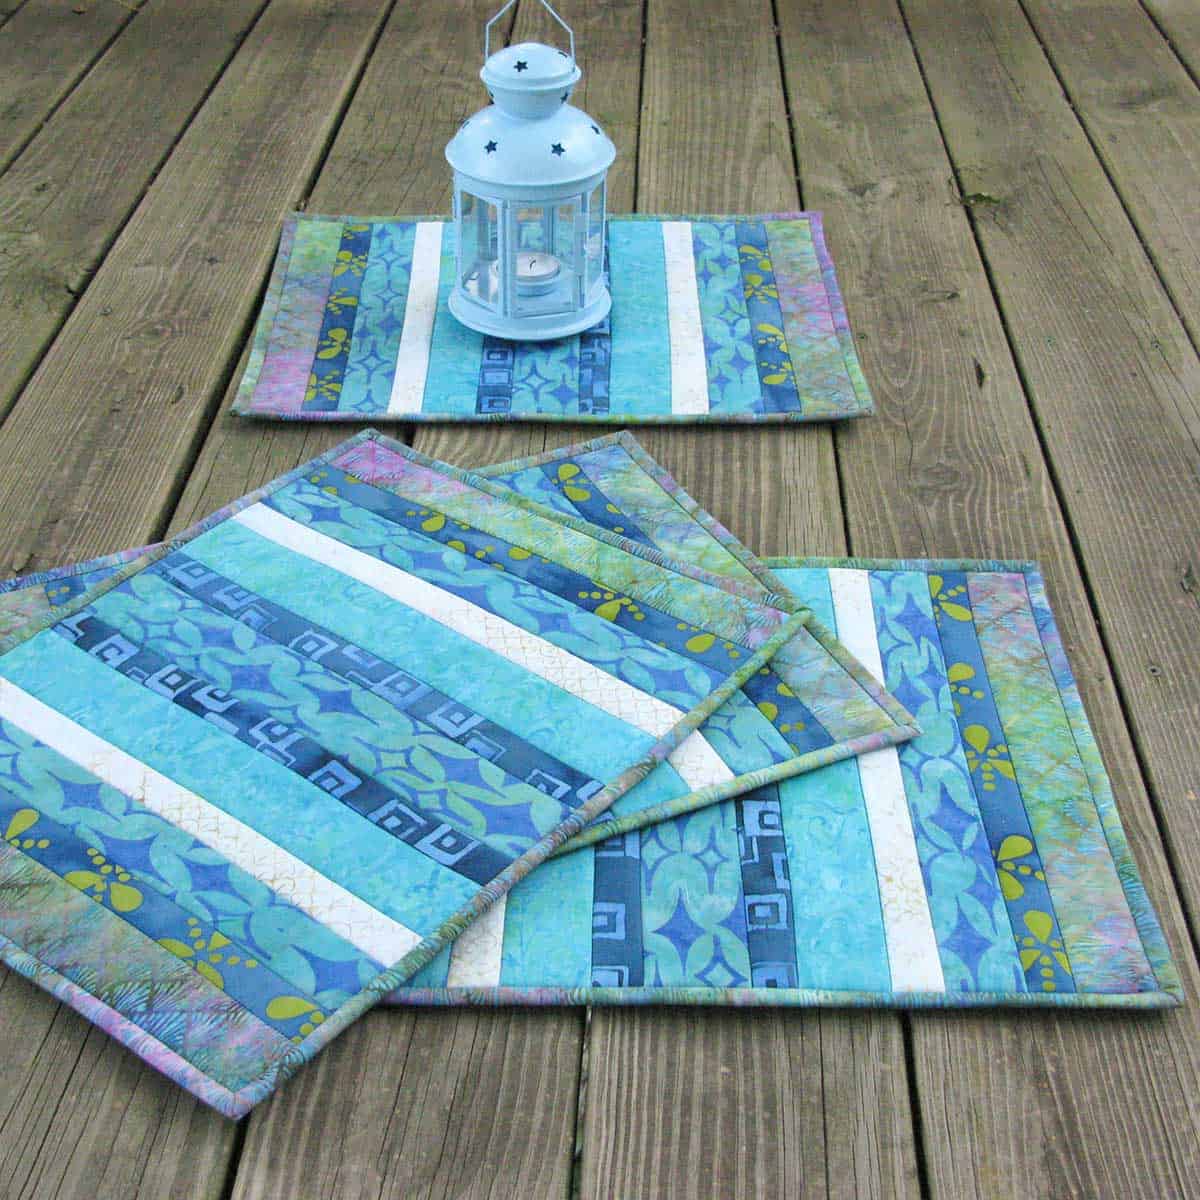
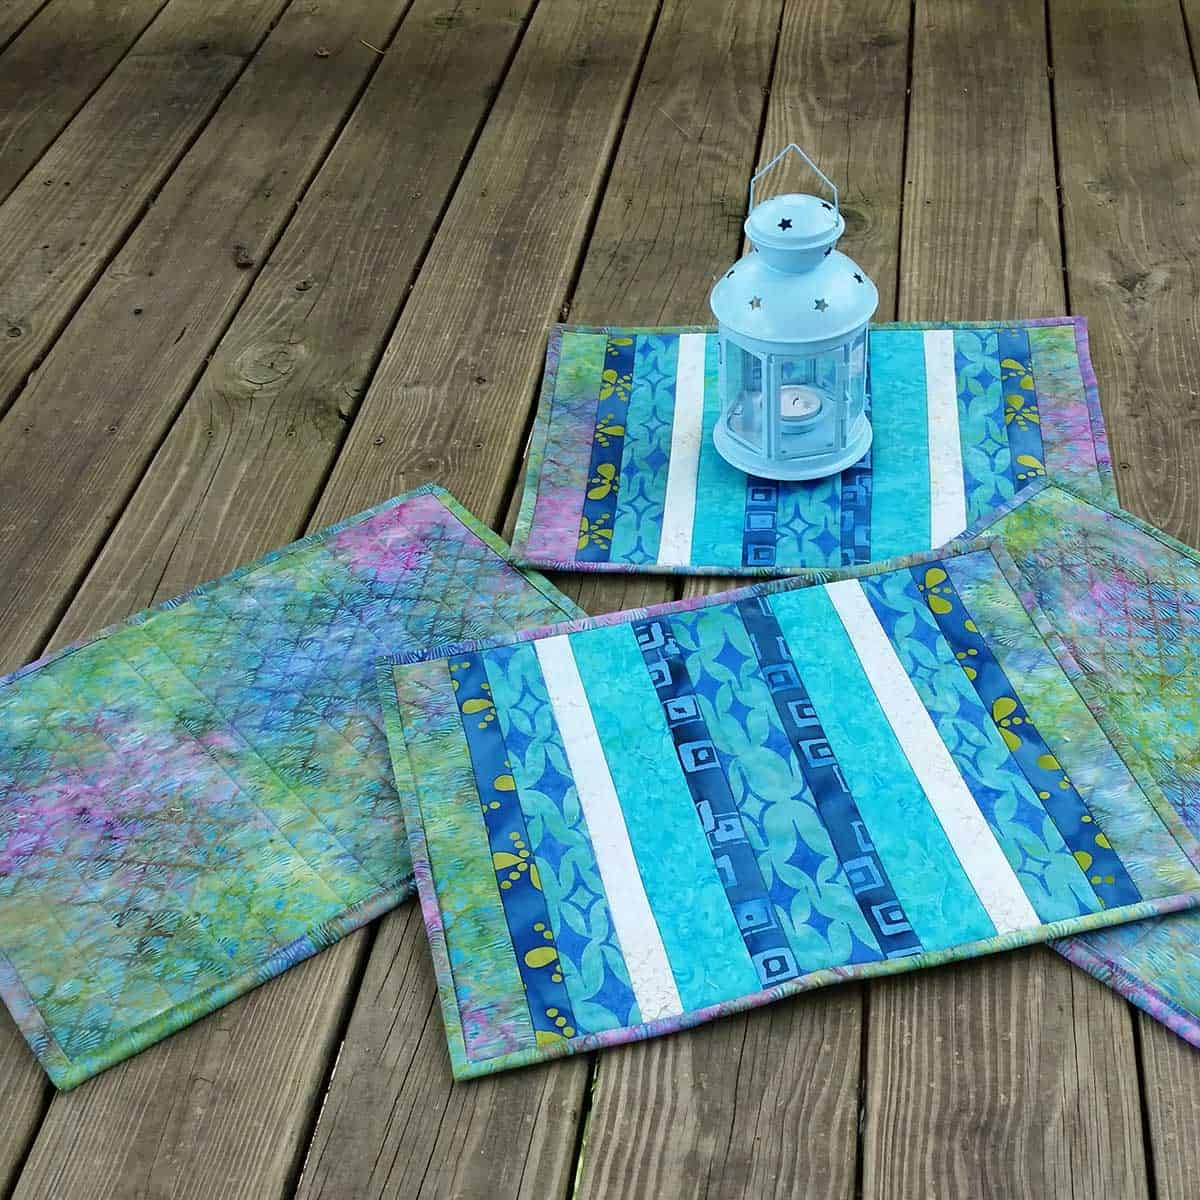
We use placemats on our table all the time and it was time for some new ones! I usually always have three or four sets of them ready to use.

QAYG placemats are also a wonderful gift and take no time at all to make.
Batik QAYG Placemats Tutorial
A couple of months ago I picked up a package of Soft and Stable Stabilizer which was already cut into four 13½-inch x 18½-inch pieces.
13½-inch x 18½-inch
That is a perfect size for placemats and the price is very reasonable. I had used Soft and Stable Stabilizer before for a batik crazy tote and really like the stability it gave to it. I made another tote and I think I forgot to blog about it! I’ll have to get to work on that one. You can also buy it by the yard.
I pulled out my bin of teal and turquoise fabrics from my Island Batik stash – have I ever mentioned how much I love my batik stash? The backing was used on one of the first quilts I made for Island Batik – Blue Sapphire.
Supplies:
- Strips of fabric that are at least 14½-inches long – width can be any size – I had originally written 18½-inches but the height of the placemat is 13½-inches – cutting 14½-inches gives you a little bit to trim off at the end
- Backing fabric – 1 yard – sub-cut (4) pieces at least 15½-inches x 20½-inches
- (4)13½-inch x 18½-inch pieces Soft and Stable Stabilizer (batting could also be used)
- ½ yard fabric for binding

Since I was using scraps I just cut different widths of my fabrics. The center one was 2 1/2 inches wide and then I added a 1 3/4 inch wide strip to each side.
Lay the first strip in the center of the Soft and Stable Stabilizer right side up and then place the next strip right side down on top of it and stitch your seam.
The neatest thing about batiks……you usually can’t tell the right side from the wrong side.

Use a 1/4″ seam allowance or to make it easy…..just use the width of the foot on your sewing machine. I am sewing on my vintage 15-91 Singer sewing machine.

Continue adding batik strips.

I decided to go with 2 1/2″, 1 3/4″ and then back to 2 1/2″, 1 3/4″ using the same batiks on both sides.

Trim your placemats
I made the first placemat and when I went to trim it I had a little problem telling where the Soft and Stable Stabilizer ended so for the other 3 I decided to trim them BEFORE I add the last strips.

Can you see how I trimmed them and then added the last strip of batik?

I had enough of the backing batik to use for my binding which I stitched on by machine.

Are you ready to make some QAYG placemats?
The placemats are a little large right now for our small table but I am sure they will shrink when I wash and dry them.
Get the FREE PDF
If you are already a subscriber, you can find the pdf for the QAYG placemats in my Library. The password is always at the bottom of my newsletters.
If you do, I would it if you would send me a photo of them.
Please note this post contains affiliate links, which means I’ll earn a small commission if you purchase through my link at no extra cost to you. Please see full disclosure here. As an Amazon Associate, I earn from qualifying purchases.
Great deals for you!
Looking for great buys on fabric and things? Check out these links
- Connecting Threads
- AccuQuilt Deals
- Fat Quarter Shop Daily Deals
- Green Fairy Quilts – Daily Deals
- Missouri Star Quilt Co – Daily Deals
- Scrapbooking
- The Quilt Keeper
- SewingMachinesPlus
- Electric Quilt
- My Amazon Store for all the quilting things I use and more

About Connie
Hi, I’m Connie Kresin Campbell, the quilter, writer, and photographer behind Freemotion By the River. I enjoy inspiring others with my quilt tutorials and patterns. You’ll also see my sweet adopted dogs from time to time.
Be sure and subscribe to my newsletter for more free tutorials and printables.
Your patterns and videos are great. Thank you for sharing them with us!
I love your colours in the batik QAYG placemats. I will be making either placemats or a qayg runner for my dining room table. We just installed new flooring and I have to match the colours,LOL. Thanks again
Good Morning Connie. Your QAYG Placemats are gorgeous. I love Island Batik fabrics and especially in my favorite blues. It is grey and cold and rainy here this entire week. We ar grateful for the rain.
I love making QAG. I usually make my table runners using that method. I have also made bags that way. A great way to use up those extra 2.5″ strips of fabric. I was going to post pictures but I’m not sure how on your site.
Thank you Connie…..Well, I decided to do placemats as Christmas presents this year. Your Churn Dash pattern looks like a winner. It is gorgeous. I hope I do it justice, being a fairly new quilter and haven’t made these yet. Looking forward to making them.
Thanks so much Connie, I haven’t done much quilting lately, these will help me get started again. Love this. Lynda M
Always love the table toppers, placemats, runners! Sounds like a great Christmas gift! Thanks
l usually use this method to make Christmas stockings. I have a few more projects planned to finish first. thanks so much.
I have made lots of these over the the years. I put the strips on the diagonal and randomly place the fabrics, so no pattern and no two placemats exactly alike. These are so fun to make.
Love these place mats, so fresh looking an a sinch to make.I have made this style before. I started with a diamond shape near one end, or you could start with a triangle and quilt from that shape. or add prairie points here and there. Makes it a little different and your own thing. Thanks you rekindling the fire. I have some fabrics to use up. You are a dear.
Love your Placemats and techneque, Very effective. I have used this method back in the 80’s. Then I used Needle Punch for the filler, Is this similar to what you are using. You have stirred up my sewing juices again. Thank you,,,you are a jewel. HUGS.
So, the Soft & Stable replaces regular quilt batting?
Hi Connie,
Thanks for the tutorial — these will make a great gift!
I am a new quilter and have not done the QAYG, but want to, I have looked back but do not see what measurements you curt your backing. You gave the width but not the length, or I am not seeing it.
Love the material.
Glad to have found your website and tutorials.
I do hope my place mats do not shrink though. ?
Thank you
Hi Marilyn, I usually cut the backing at least 2 inches wider and taller and then trim when I have all of the strips added to the front. Shrinkage will depend on the fabric you use and whether or not you have prewashed them.
If you pre wash your fabric in hot water it should not shrink after you make your place mats. I always pre wash fabric.
Very nicely done. Great tutorial and, yes, it looks like the way to get started with QAYG. Thank you.
Gorgeous Island Batik fabrics in my very most favorite blues. Your QAYG placements are lovely and match your dishes. I made a small mug mat with this method and it was quick and easy to do. Thank you for sharing your techniques dear. <3
Thanks for the great tutorial! I need to get going on some new place mats for our table. This is a fun way to “get ‘r done”!
You always have something that makes me excited to stop in. Your beautiful batiks remind me to enjoy the last sweet days of summer, and to eat outside in the cool tonight. I appreciate you sharing the stabilizer brand, too. Some things are much easier to pick up when we know someone else has used them.
neat placemats. (btw your site is kind of jumpy, maybe it’s my connection but I was leaving a comment, then it jumped up, then down on the page a few times)
Placemats are cute and doable, but I LOVE the dishes! Thanks for the tutorial, I’ll be using it.
Love your placemats and the colors you chose.
Great ideas and I love your color choices. Very nice dishes, too.
Love this idea!!! Those batik fabrics are gorgeous!!!
Those are gorgeous placemats. I love the colors and your dishes, too. Perfect combination.