
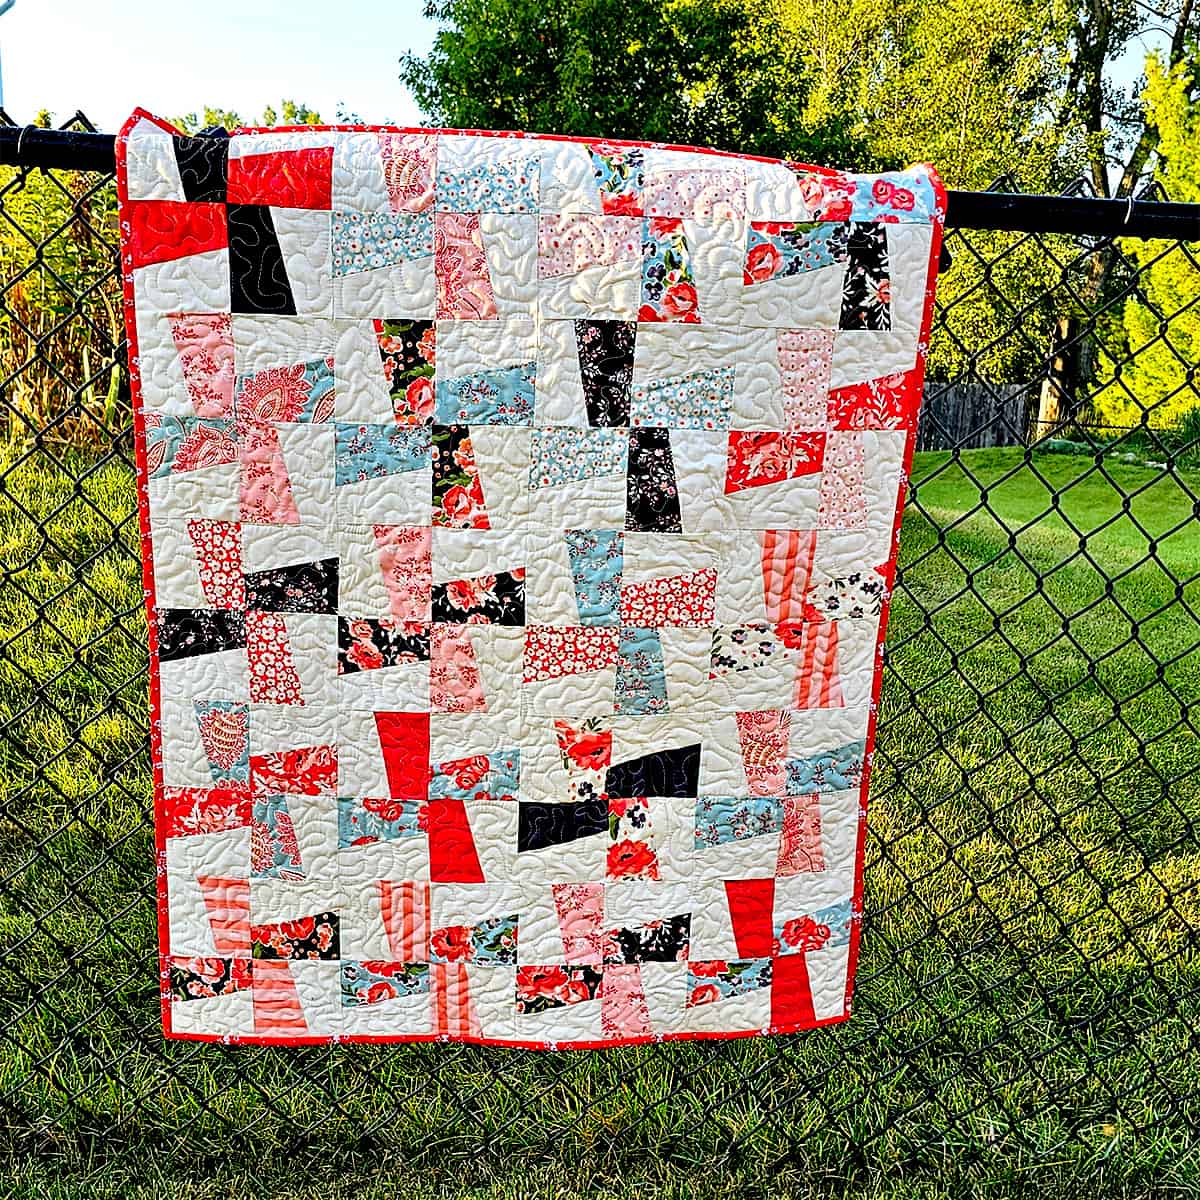
Another River Whirls Baby Quilt
This post may contain affiliate links which won’t change your price but will share a commission.Sometimes I can’t believe how time gets away from me! I started making another River Whirls baby quilt the first week of May and have just finished it. Was it hard? Nope, I just put it aside and forgot about it.
This past week, I spent part of two days working on the baby quilt and then it was finished!
I used a beautiful charm pack called Ava Kate from Carina Gardner and I love the colors in it.
Sometimes I make a mistake
Look closely at the quilt blocks, two of them are made the wrong way, sometimes I make a mistake.

I really should read my own tutorials before I start working on something. My memory isn’t as good as it used to be, I’ll blame that on age. LOL
All of the blocks have to be cut exactly the same. Here is my template and I just added the note “This side up” – hopefully this will help me so I don’t cut the pieces wrong when I decide to make another quilt with this block.

Quilt size is 32″ x 40″
The baby quilt is made with 4 blocks across and 5 blocks down and finishes as approximately 32″ x 40″. I made 20 quilt blocks and used 40 of the 5-inch squares in the charm pack. I didn’t add a border but you could if you wanted it bigger.
I decided to mix up the fabrics in the quilt blocks as I wanted to use as many of the 5-inch squares as possible.
This River Whirls tutorial has been converted into an optional PDF that has been optimized for printing and is 8 pages. It includes both River Whirls quilts.
Equipment
- Sewing Machine
- Basic Sewing Tools
- Thread
- Quilt Ruler
- Rotary Cutter
- Cutting Mat
- Clover Flower Head Pins
- Binding Clips
- Clapper – excellent for setting seams
- Wool Pressing Mat
- Lighting
Yardage:
- 1 – 5-inch charm pack
- 1-yard premium muslin for the background
- 1/4 yard for binding
- 1-yard backing
- batting
Cardboard backing from the charm pack set or a 5-inch square of cardboard to make the template. You can also download the template here.
- Pick (40) 5-inch squares from your charm pack
- Cut (40) 5-inch squares from the premium muslin
- Make your template, click on the image to download a pdf of it

- Place the template on top of your 5-inch squares and cut the squares
- ALWAYS have your fabrics with the right side up
- Make sure the template is facing the same way all the time
- Cut the pieces

- Sew the pieces together with a 1/4-inch seam allowance
- Overlap the edges by about 1/4 inch on each side (you don’t have to be exact as you’re going to trim the block
- Press the seam to the dark fabric

- Trim the block to 4½ inches square – using a ruler that size makes it easy.

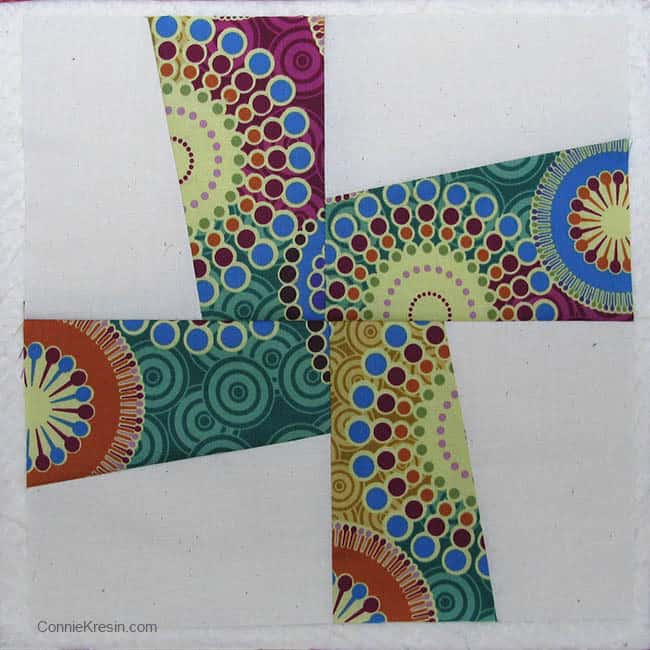
Finished River Whirls quilt block
Sew 4 of the blocks together to make the River Whirls quilt block.

- Make 40 quilt blocks
- Sew 5 rows of 4 quilt blocks, then sew them together

Layout your backing and batting, pin and then quilt. I am using my 15-91 vintage Singer sewing machine.

I had enough of this floral red fabric to use for the back and binding, I think it is a good match.
Add your binding to finish the baby quilt.

I did a simple freemotion meandering to quilt it.

Rusty is getting better at posing by my quilts, he is such a cutie!

This River Whirls tutorial has been converted into an optional PDF that has been optimized for printing and is 8 pages. It includes both River Whirls quilts.
CLICK HERE TO GET THE PRINTABLE PDF
Tutorial for my original River Whirls
When I made my original River Whirls quilt I only made 15 quilt blocks and used 15 different fabrics for the blocks. I then added borders and the quilt finished at 30″ x 46″.

You will need:
- 15 pairs of 5-inch blocks (total of 30 blocks)
- 30 – 5 inch blocks of muslin
- 1 yard of muslin for borders
- 1/2 yd of stripe for binding
Grab a charm pack or cut up some of your stash into 5-inch squares. Most charm packs have 2 of each print like this charm pack of Lily & Loom Butterfly Blooms. I just bought this and will remake this quilt with this fun collection.
I used 2 charm packs of Spirograph by Benartex which only had 22 blocks – one of each print. I needed 2 blocks of each print.
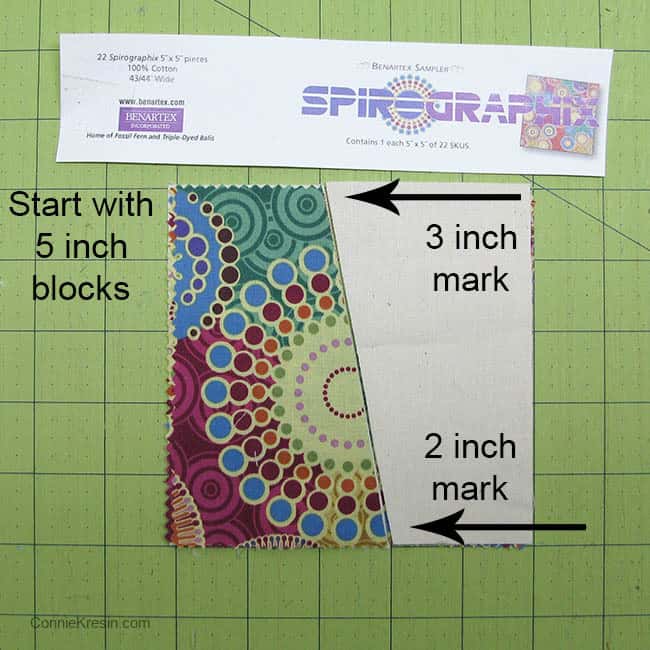
Cut your blocks at the angle shown above.
Take your ruler and measure over 2 inches on the bottom and 3 inches on the top, then cut all of your blocks. (in the photo I removed the muslin off the left side so you could see the cutting line better.
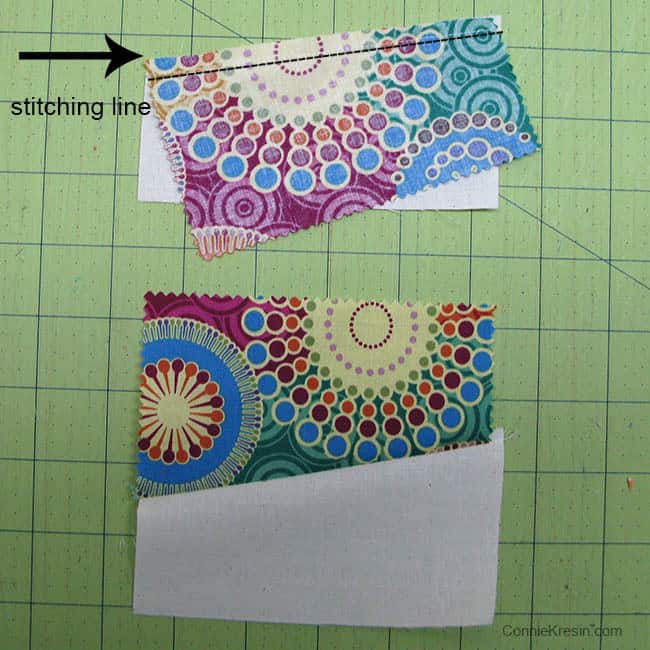
Sew your pieces together as shown using a 1/4 inch seam allowance.
Press your block and then trim it to a 4½-inch square, using a 4½-inch square ruler makes it very easy to do.


Here are 4 blocks ready to be sewn together.

One block done – 14 more to go.
Layout your blocks in the following pattern.

Start sewing the rows together.

I wanted to make the baby quilt longer so I added a 2 ½” strip at the top and added another row of blocks.
I made 4 rows of 3 blocks then added a 2.5-inch strip and then the last row.
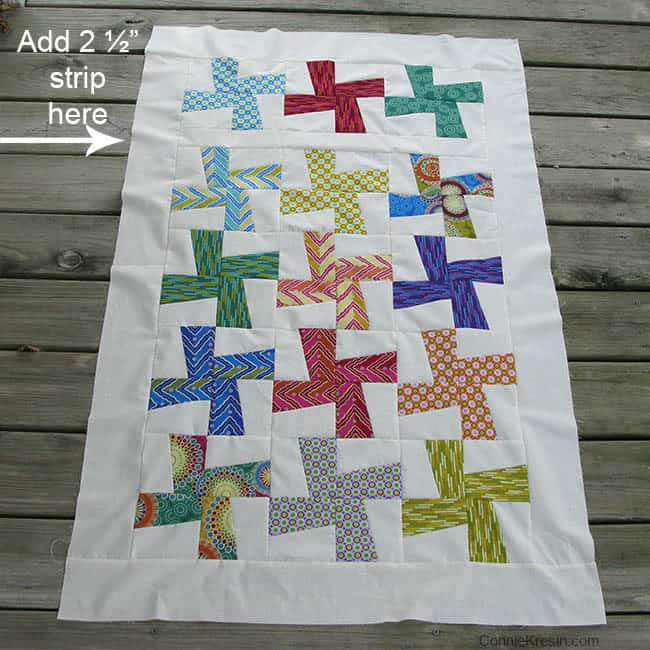
Then I added a 4-inch border on all sides of the quilt top.
I did a little flower design on the River Whirls.
The quilt finished at 30″ x 46″.

This River Whirls tutorial has been converted into an optional PDF that has been optimized for printing and is 8 pages. It includes both River Whirls quilts.
CLICK HERE TO GET THE PRINTABLE PDF
Please note that this post contains affiliate links, which means I’ll earn a small commission if you purchase through my link at no extra cost to you. Please see the full disclosure here. As an Amazon Associate, I earn from qualifying purchases.
Great deals for you!
Looking for great buys on fabric and things? Check out these links
- Connecting Threads
- AccuQuilt Deals
- Fat Quarter Shop Daily Deals
- Green Fairy Quilts – Daily Deals
- Missouri Star Quilt Co – Daily Deals
- Scrapbooking
- The Quilt Keeper
- SewingMachinesPlus
- Electric Quilt
- My Amazon Store for all the quilting things I use and more

About Connie
Hi, I’m Connie Kresin Campbell, the quilter, writer, and photographer behind Freemotion By the River. I enjoy inspiring others with my quilt tutorials and patterns. You’ll also see my sweet adopted dogs from time to time.
Be sure and subscribe to my newsletter for more free tutorials and printables.
Thanks for two lovely designs, Connie.
Rusty seems to be happy posing for your quilts now that he’s settled in your new home.
Both quilts have their own appeal with great colours and interesting shapes.
I’ll use my favourite purple and blue tones for one quilt and the red and white with a touch of black for the other.
Love, love, love this design! Thanks for sharing the ‘how to’!
Love your choice of fabric on this one. And I love your sewing room, so bright and spacious! The mistake won’t be noticed if not pointed out! I suspect all of us have done that at least once!
I love the fabrics you used! I cannot tell you how many times my pinwheels have been sewn wrong! It turned out beautifully anyway. Your sewing room is so light and pleasant.
Love the quilt, I would never have noticed the mistake. Rusty is adorable, just love that little face.
A man on a fast horse wouldn’t spot a mistake – or so my grandmother always said. Since most of my quilts go to dogs, they only judge the soft landing. But I get it. I finished a quilt, hung it in the dining room and had to take it apart because the bottom block was sideways. This is a wonderful, fun quilt!!!!! And Rusty looks like he’s having a great time!
What a beautiful quilt! I was trying to finish up a quilt I was already working on before I started anything new. But this one is calling me. Not sure if I have enough will power to wait until I finish my current project.
It’s nice to have two different versions 🙂
I love this quilt! It looks more complicated than it is! I was thinking that if you wanted a bigger size quilt, you could us a layer cake to cut the blocks! I have a couple of layer cakes I won at an event and I don’t have any plans for them, but this gives me a great idea! My guild does quilts for charity and I think I’ll make this for a charity quilt. Thank you for your patterns and easy instructions.
Beautiful quilt and design. Appears that it would be difficult, but very EZ to make. I love your new sewing/quilting studio- a very happy place!
Rusty doesn’t seem to mind posing anymore.
Thank you, again, for all your inspirational projects.