
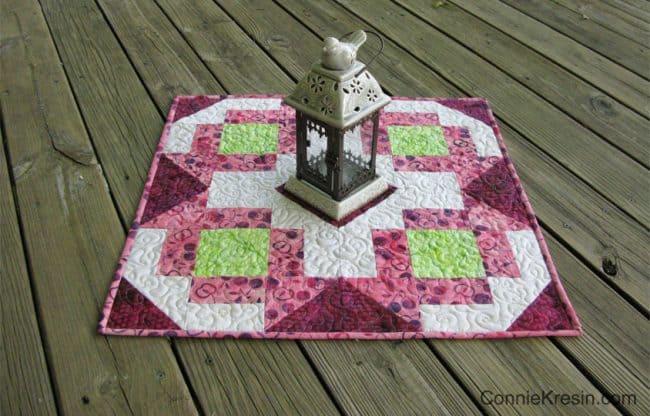
Churn Dash Medallion Table Topper Tutorial
This post may contain affiliate links which won’t change your price but will share a commission. Churn Dash Medallion Table Topper
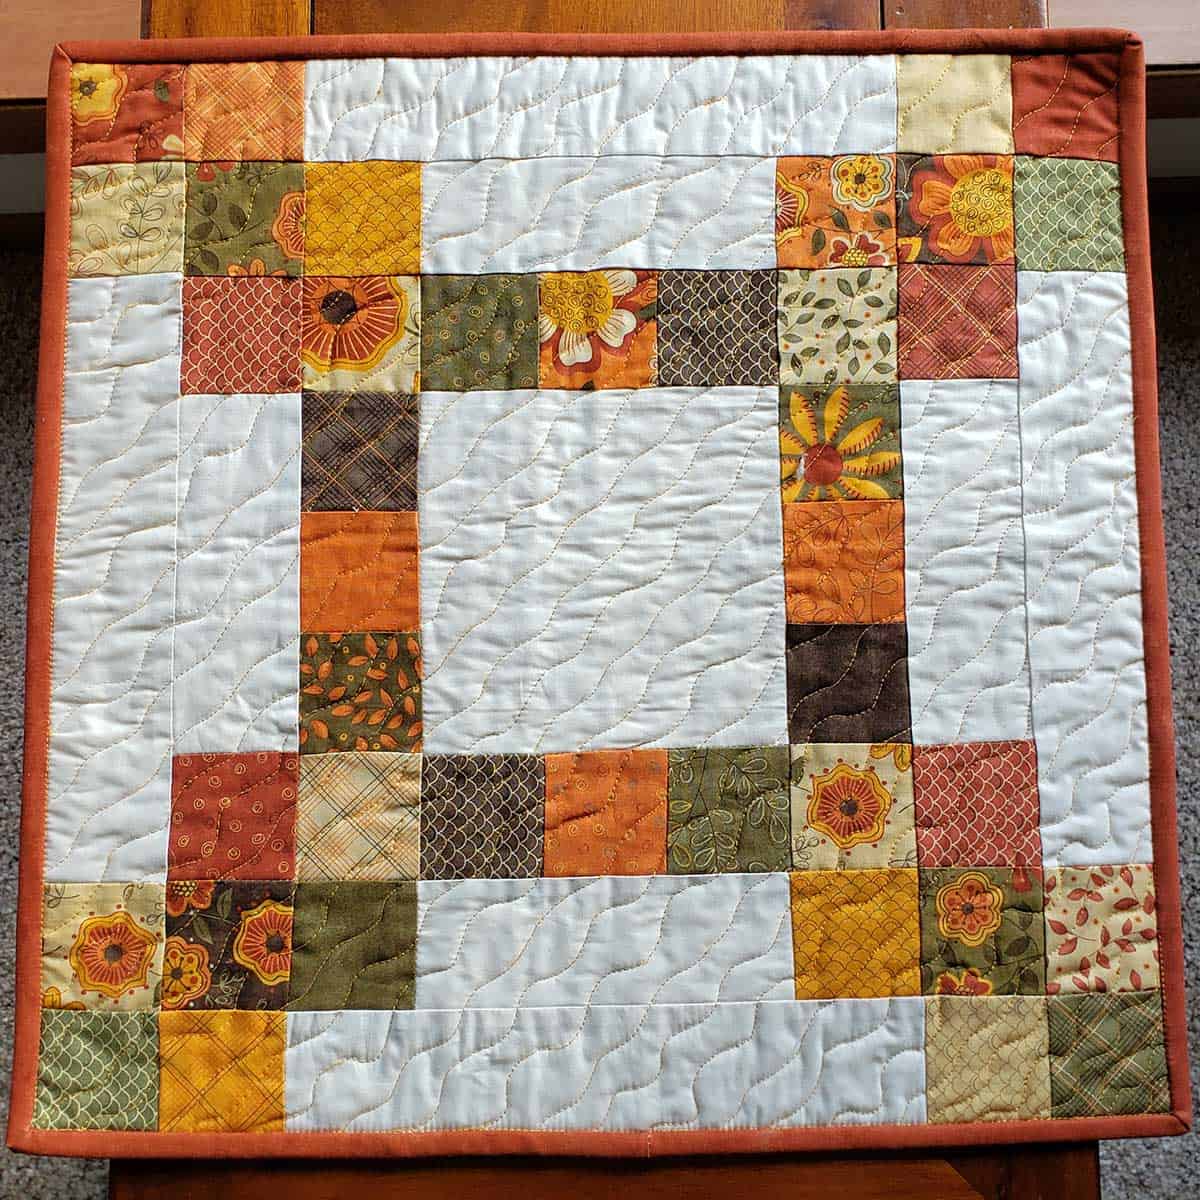
 The Churn Dash block is one of my favorite quilt blocks and cutting the pieces out with the AccuQuilt GO! Big Churn Dash die is fast and easy. I have another fun tutorial for you and will include directions for making it with the AccuQuilt GO! Big Churn Dash die and also by rotary cutting your pieces if you don’t have the die cutting machine.
I thought it would be fun to show how you can use the pieces from the Churn Dash die and come up with an entirely new design.
Churn Dash Medallion Tutorial
24″ x 24″
Materials Needed:
- 1/2 yard white batik
- 1/2 yard Pink batik (this includes the binding)
- 1 Fat Quarter Green batik
- 1 Fat Quarter Dark Red batik
- 1 yard backing and batting
I am using Island Batik fabrics from the Cherry Berry collection. The wonderful thing about using batiks is that both sides usually look the same.
- Sew with a 1/4″ seam allowance.
Rotary Cutting:
- Green – Cut 4 – 4 1/2″ squares
- White – Cut 4 – 4 7/8″ squares (then cut diagonally for half square triangles)
- White – Cut 16 – 2 1/2″ x 4 1/2″ rectangles
- Pink – Cut 4 – 4 7/8″ squares (then cut diagonally for half square triangles)
- Pink – Cut 16 – 2 1/2″ x 4 1/2″ rectangles
Follow the piecing directions below that start with sewing the half square triangles (HST) together.
GO! Fabric Cutter:
GO! Cutting Dies:
- GO! BIG #55459 Churn Dash – 12″ finished
- GO! #55017 2 1/2″ Strip Cutter for the binding

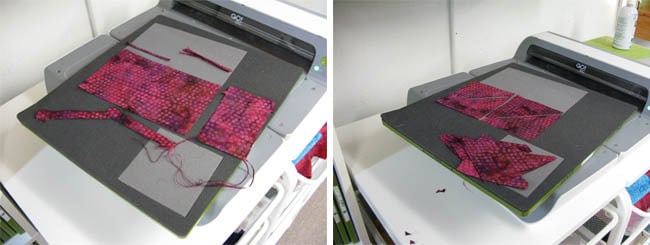
Cutting Instructions using the GO! Big 12″ Churn Dash die:
- Cut 8 – Pink Half Square Triangles (HST)
- Cut 16 – Dark Red Half Square Triangles (HST)
- Cut 8 – White Half Square Triangles (HST)
- Cut 8 – Green Squares
- Cut 16 – Pink Rectangles
- Cut 16 – White Rectangles
The GO! Big Churn Dash die can be used for all types of designs. The die is divided into sections.
The next photo shows how I cut the dark red HSTs.
I cut the fabric 5 1/2″ wide by the width of the fabric and laid the fabric over the half square triangle section of the die. Do this for the white and pink HSTs and also for the green squares and the pink and white rectangles.
Sew the half square triangles together.
- Make 8 white/pink units
- Make 8 white/dark red units
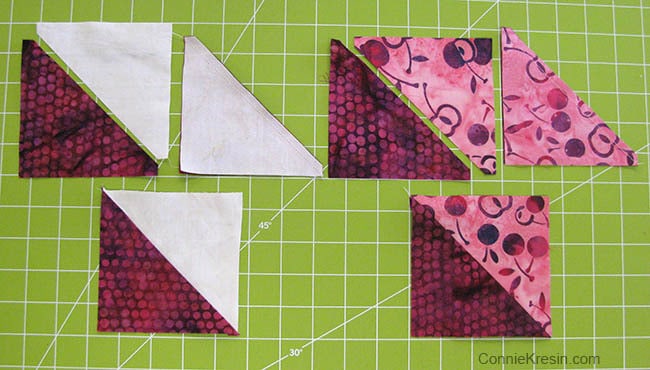
Sew the rectangles together.
- Make 16 white/pink units

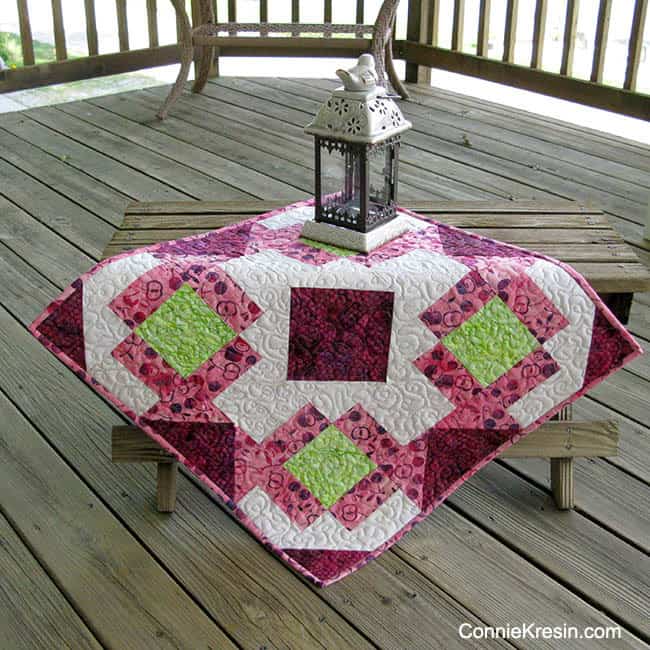
- Lay out the units to make a block like the photo below with the green square in the middle.
- Sew together – this will make a 12 1/2″ unfinished block.
- Make 4 blocks.

Arrange the 4 blocks as shown in the photo below and sew together.

Add your batting and backing and quilt as desired. Cut your binding with the 2 1/2″ strip cutter die. I did a simple free-motion design using a beige Aurifil thread that blended well with all of the fabrics.
 If you would like to make this table topper in a smaller size, try the 9″ Churn Dash die for a 18″ x 18″ table topper.
I hope you have enjoyed the Churn Dash Medallion tutorial made with the AccuQuilt GO! Fabric Cutter and GO! dies. If you are looking for more ideas you might enjoy some of my previous quilt tutorials.


More posts you might enjoy:

This post may contain affiliate links. Please see my full disclosure policy for details.


Love your creativity Connie, as always. That is a really clever use of the churn dash die. And a really pretty project too.
Your step-by-step really makes the block sew easy. I didn’t see the Churn Dash until the end when I realized you have created a new and exciting layout. Creative Bliss Dear…<3
Hello Connie; I think the fabrics you chose for your Table Topper are beautiful! Plus, the design that you created using the Churn Dash is such an exciting and bold difference. I really like it. My best friend owns a Go Cutter, yet we only have a few dies due to our finances….LOL. So it is truly appreciated that you also add the written cut out directions. If I ever get caught up and finish a dozen UFO’s, I have a dozen or more fabulous projects lined up from your site. Like the Coffee Table Topper I pinned this morning. Those are the basic color line I will be making my Table Topper in for my Mom. Thank you for designing and sharing all of your brilliant and beautiful patterns! Have a fantastic day!
Love it. Love the colors you picked.
That looks so pretty and I really like the pop of green in there,
When I first looked at this, I thought that you had ‘lost it’! Surely, this wasn’t a churn dash. But, I didn’t consider your design capabilities nor originality . . . . how lovely! So glad to see the difference color placement can make in this block. Thank you.
this is lovely. thank you so much for including the rotary cutting pieced chart
Connie, I love the way you rearranged the churn dash block to create this table topper! And, of course, I love the colors and fabrics! Thanks for sharing!
Love your mini quilt table topper, Connie! What a clever way to use those same pieces made for the Churn Dash block and turn them into a whole new design. I love it!