
AccuQuilt Block Party and a block tutorial
This post may contain affiliate links which won’t change your price but will share a commission.Welcome to the first day of the AccuQuilt Block Party Blog Hop and a block tutorial. AccuQuilt has come out with 11 new dies and we will be sharing some of them with you during this block party blog hop.
AccuQuilt Block Party and a block tutorial
I thought I would also share a project using a couple AccuQuilt dies.
Yesterday I stopped by Exuberant Color and saw Wanda’s beautiful half square triangle blocks that she made using her AccuQuilt Studio.
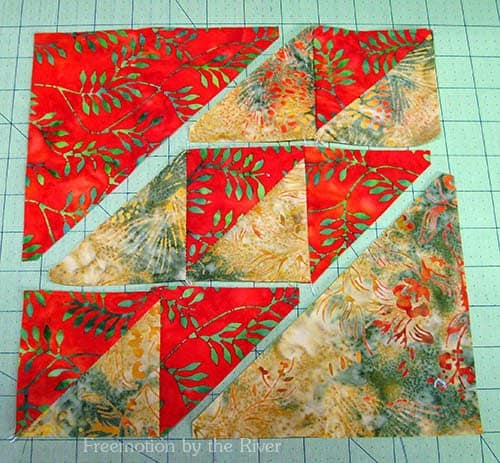
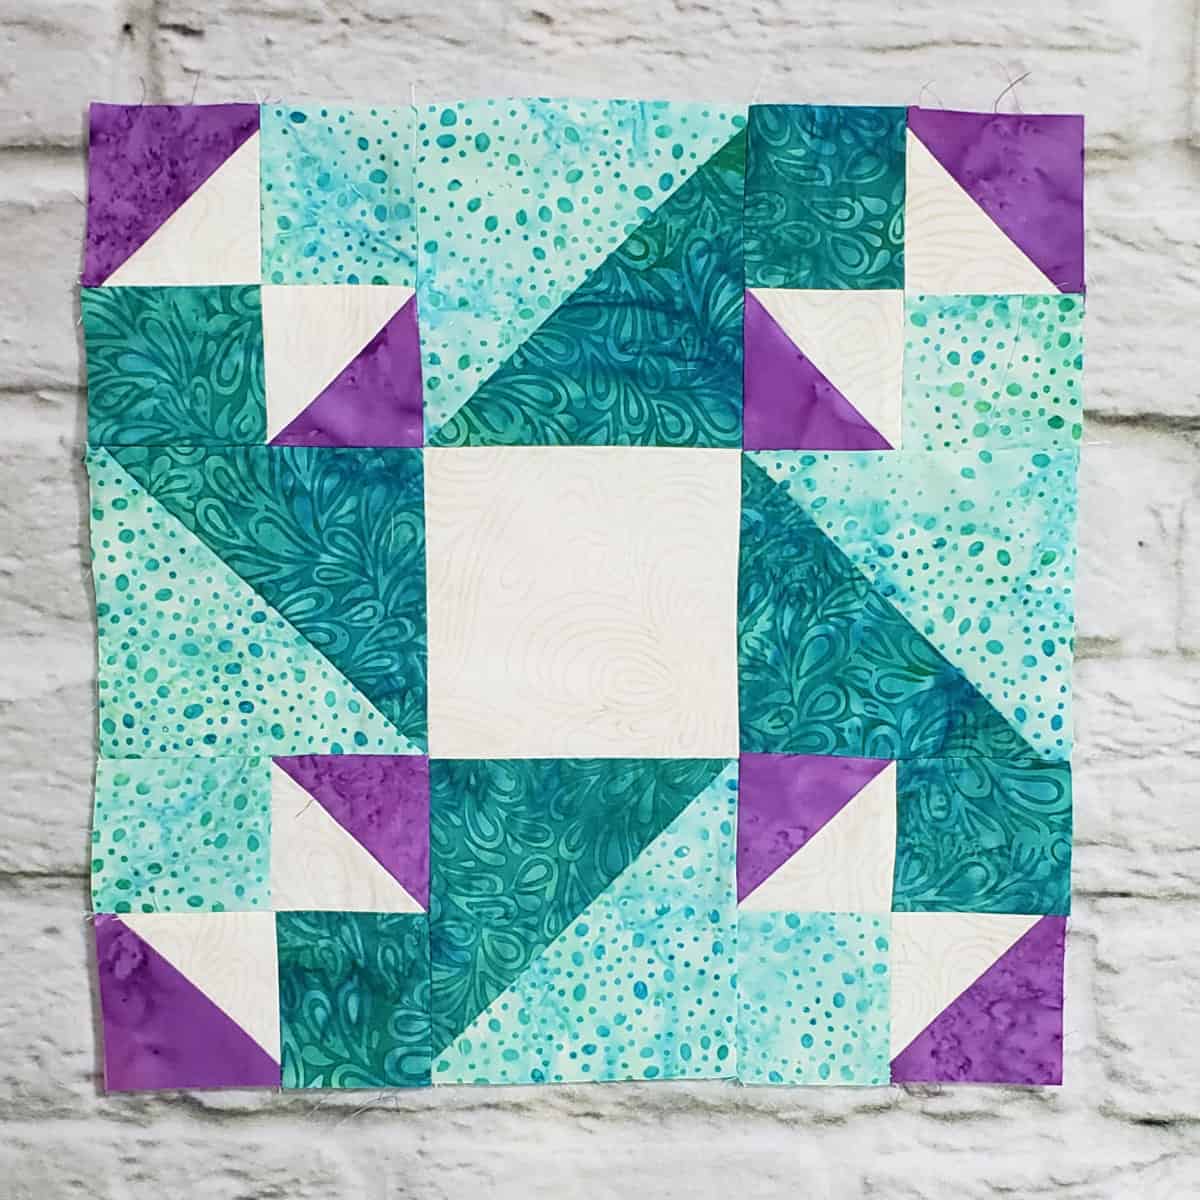
I just happened to have the same size dies that go with my AccuQuilt GO! and I couldn’t wait to cut out some batiks!
The AccuQuilt 3 inch finished triangle die is one of the first dies I bought and I use it all the time.
A couple weeks ago JoAnn’s had a clearance on a couple dies and I picked up the AccuQuilt 6 1/2″ triangle die for 75% off.
In the photo below I wrote 6 inch die instead of 6 1/2″ – that is because the 3″ die says “finished size” while the 6 1/2 inch die doesn’t but….is actually 6″ finished.

I used fat quarters of batiks. I made sure the lengthwise grain of the fabric would run parallel to the die going through the roller. I usually remember that the little white tag on the side of the die is the “lengthwise grain”. The lengthwise grain has very little stretch. One of the fat quarters had the lengthwise grain running the 22 inches while the other piece ran on the 18-inch side. For the 3″ half square triangles I cut the fabric 3-3/4 inches and for the 6-inch, I cut my fabric 7 1/4 inches.
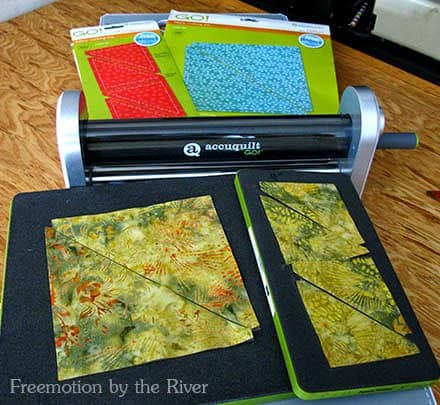
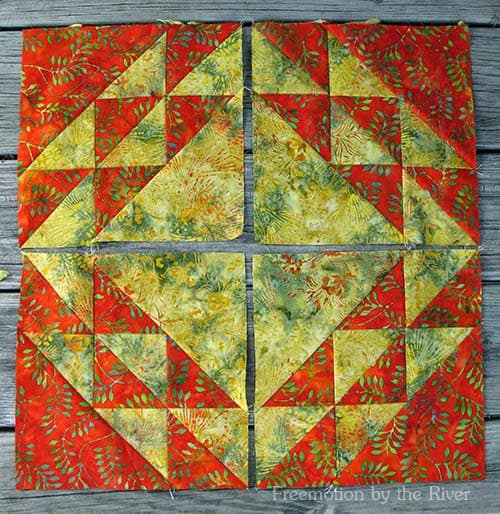
I was able to get 4 blocks out of each fat quarter. I could have cut out another block but…..I have another die I want to use for the rest of the fabric.
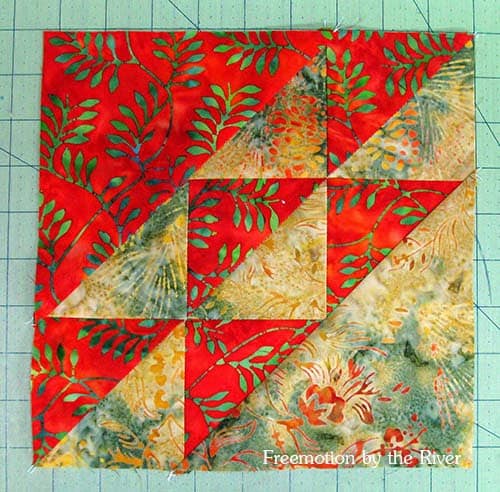
How to make the quilt block
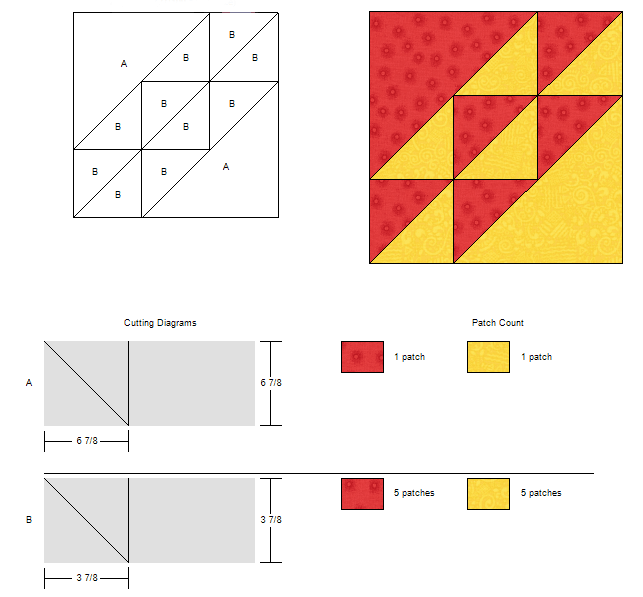
For each block you need:
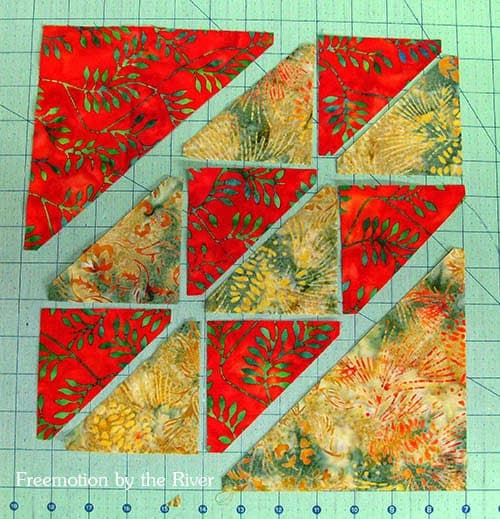
- 1 – large half square triangle – RED
- 1- large half square triangle -YELLOW
- 5 – small half square triangles – RED
- 5 – small half square triangles – YELLOW
If you don’t have the dies I have directions for rotary cutting below.
Sew the small half square triangles together first following the diagram and using a 1/4 inch seam.

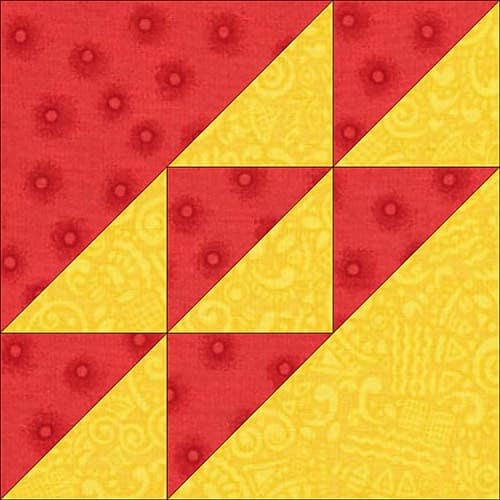
This is really a fun block!
If you don’t have an AccuQuilt and the dies you can still easily make this block. I made up the block in Electric Quilt 8 and here are the rotary cutting sizes.
Rotary Cutting the quilt block
It is easier to cut two blocks at one time. I also have directions on how to make perfect half square triangles.
Your block will measure 6½-inches and will be a 6-inch finished block in a quilt.
- Cut one yellow 6 7/8 square and cut diagonally – use one for each square
- Cut one red 6 7/8 square and cut diagonally – use one for each square
- Cut three yellow 3 7/8 squares and cut diagonally – use five for each square
- Cut three red 3 7/8 squares and cut diagonally – use five for each square
Sew your blocks together the same way I showed how to piece the blocks cut with the AccuQuilt GO! die.
Great deals for you!
Looking for great buys on fabric and things? Check out these links


Love the blocks. I love seeing the blocks finished on Wanda's blog.
Very nice block and I love batiks.
I would not have thought to put these two fabrics together but you are brilliant and they look fabulous in your designs. Creative Block Bliss…
What a sweet block, Connie! Love your fabric choices. They really shine!
I love this block and they look great. Hmmm, I may have to think about getting a Go!
Wow. Lots of neat movement with the batiks. It gives the block more depth too.
These batiks are so pretty together. Thank you for the great instructions.
What a beautiful block. I love the red and yellow batiks together!
Very clear directions. I'm sure this block goes so much faster with a die cutter!
I need to get myself one of these! Love your block and the batiks you used. Thank you!
I need to drag out my dies to see what I have because this block is really beautiful!
That is a very pretty block. I love the colors.
thats a lovely block I really like it in batiks – I love Wanda's blog too and have followed her for years – now if I had a accuquilt cutter I would be in heaven but I'm afraid I have to do it the old fashioned way 🙁
Thanks, Connie, your graphic is a great treat to save. These are neat blocks!
Have fun with these blocks because they are SO MUCH fun!!!!
Neat block.