
Garden Fence block tutorial
This post may contain affiliate links which won’t change your price but will share a commission.I finally have the pattern for the Garden Fence block for you!
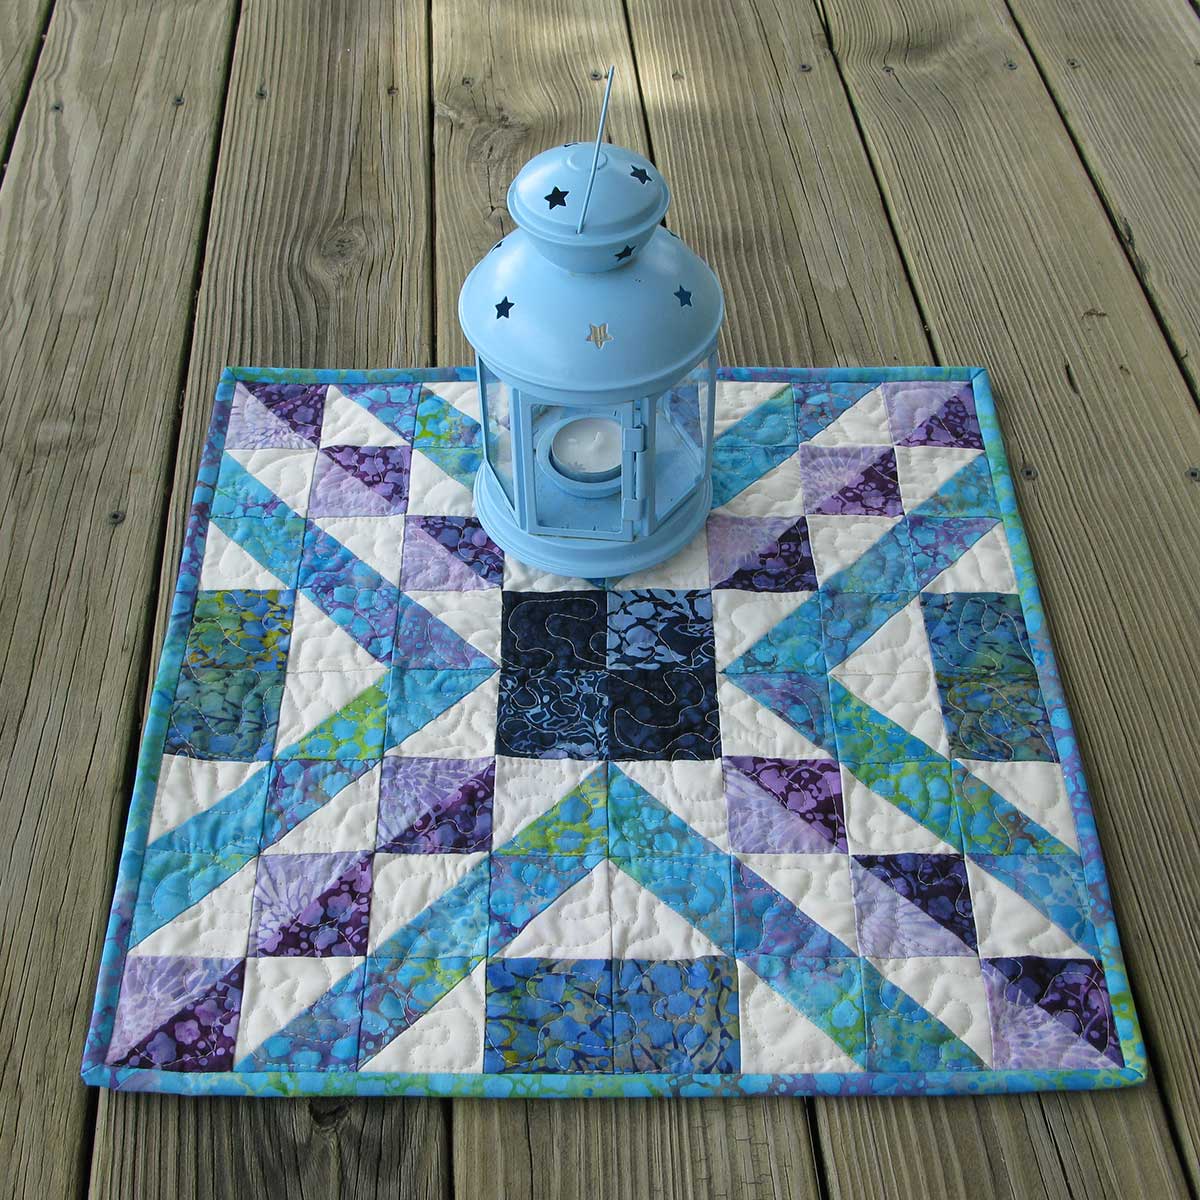
I even found the first post I did about the quilt here which even tells what fabric bundle I used. I also showed more photos of my finished quilt just the other day here. This block is so much fun to make and would be perfect for a scrap quilt. I am going to share the pattern for the block only, amounts of fabrics…..that is up to you.
This will make a 10 1/2″ block which finishes at 10 inches when you sew the blocks together.
Here are the cutting sizes:
- 1 – 4 1/2 inch square of orange
- 2 – 1 1/2 inch x 4 1/2 inch muslin
- 2 – 1 1/2 inch x 6 1/2 inch muslin
- 4 – 1 1/2 inch x 2 1/2 inch muslin
- 4 – 2 1/2 inch x 3 inch pink print
- 4 – 2 1/2 inch x 5 inch pink print
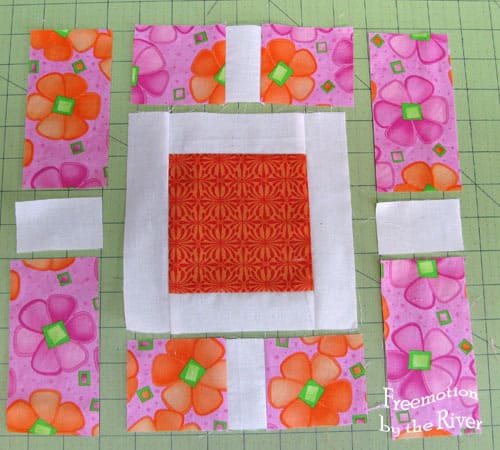
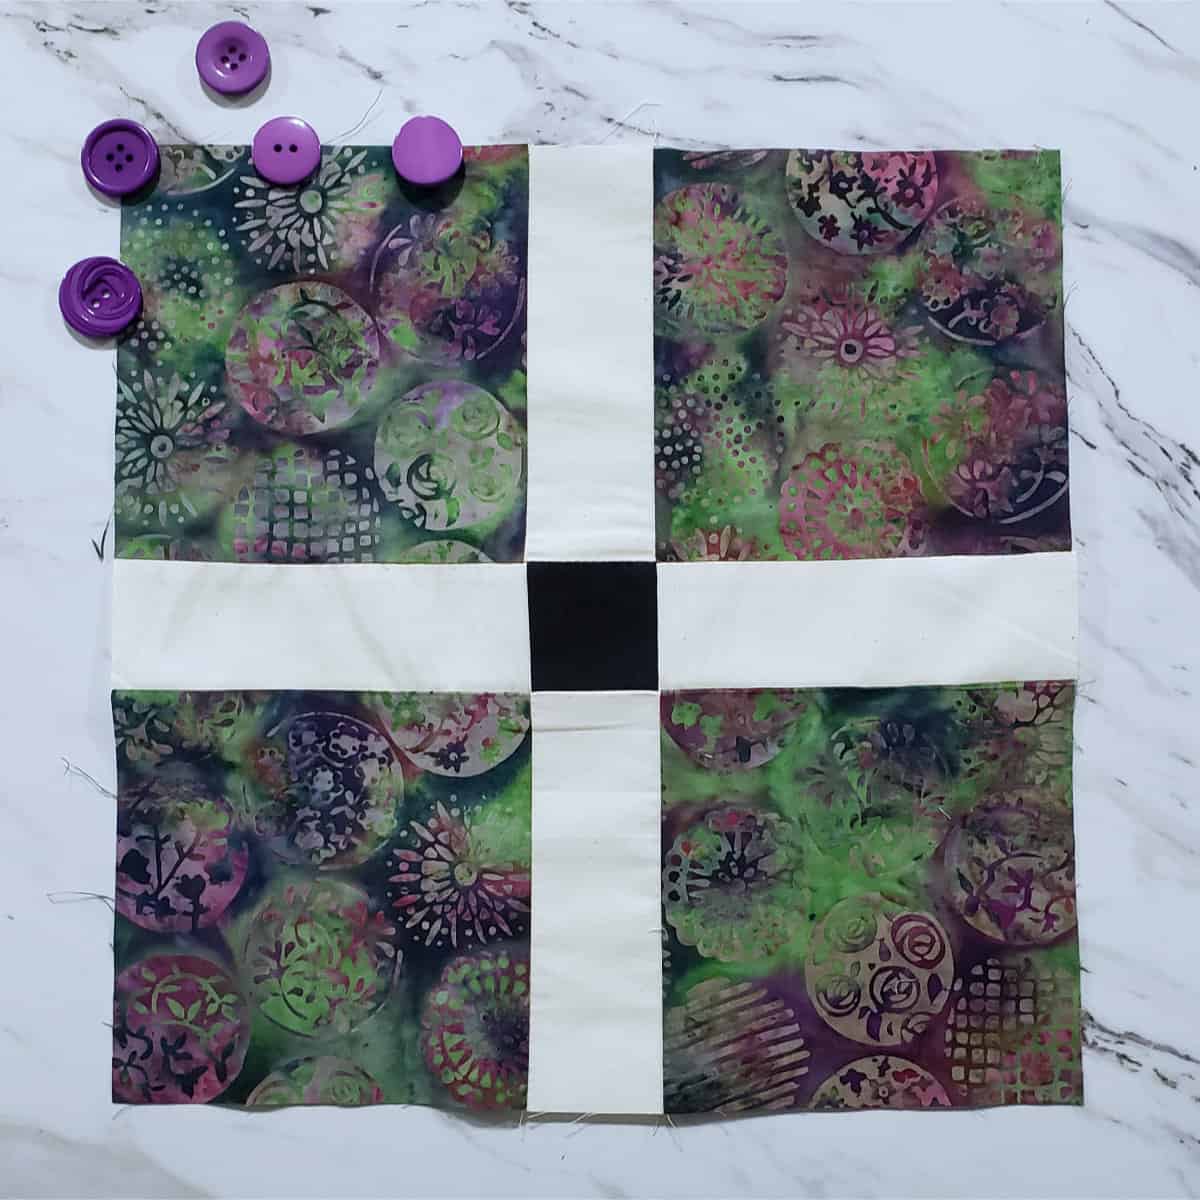
The following diagrams show how to sew the pieces together. Here are all of the pieces laid out.
Now add the next row. Looks like I skipped a couple steps, don’t worry there is a diagram at the end for you to use too.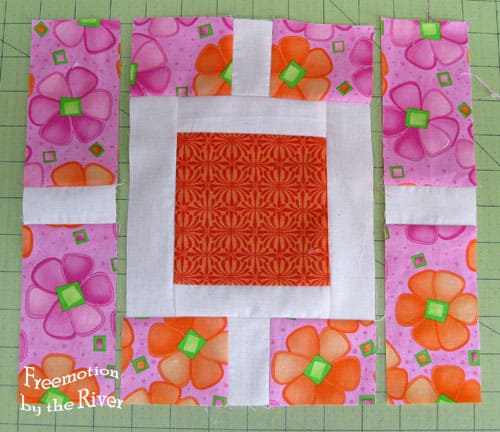
Here is the final block.

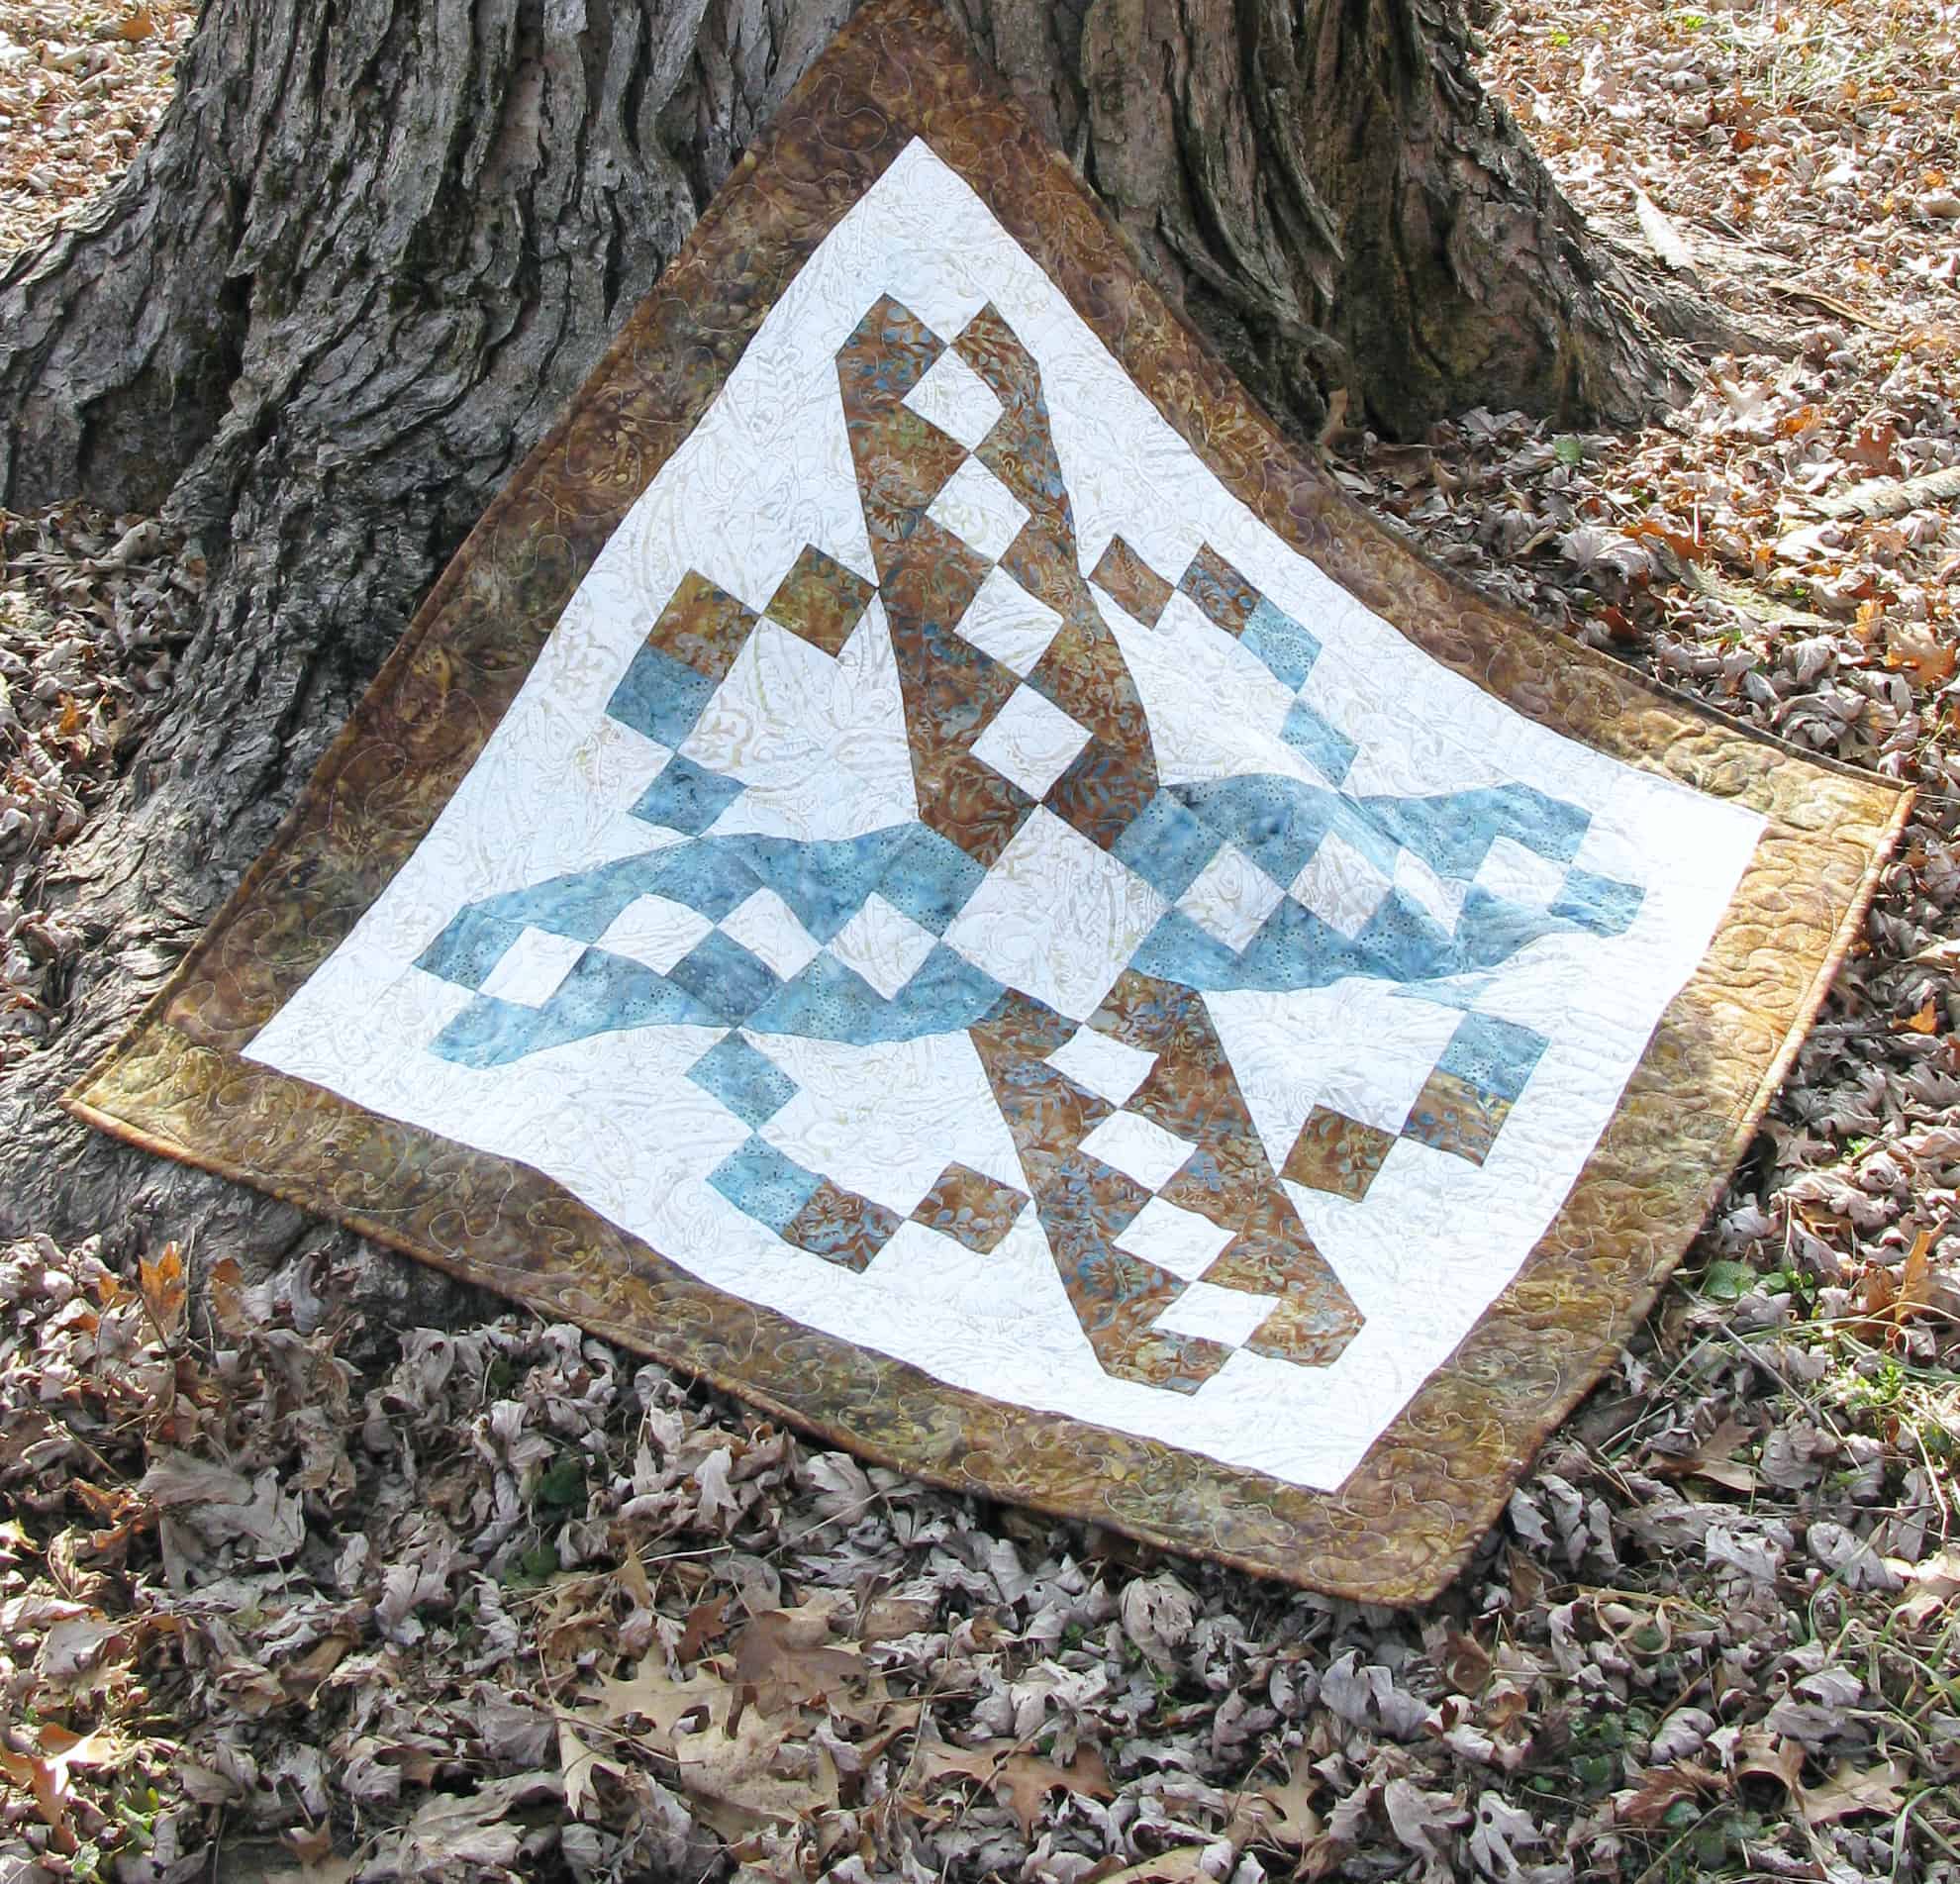
Now I will tell you why I really like this block. I have a bunch of string blocks that I made and did applique on and used this pattern. What I did was just pick a size for the center……….these are actually 6 1/2 inch blocks and just adjusted the pattern to fit those blocks. I really need to think about finishing this UFO…..in fact I’m going to pick it for this month’s A Lovely Year of Finishes at Sew BitterSweet Designs.
I actually finished this quilt and you can read about it – Garden Maze.
The size of the muslin strips can be wider, I used the dark green in place of the muslin. Do you have any blocks that you enjoy making over and over?
Click here for the PDF file.
Now I’m off to do some quilting!


Hi Connie,
I have made the garden fence block before—it’s a great block and fun to do! Yours looks terrific. Before I start another project using it, though, I wanted to know if you pressed the seams open or to the side on this one. Do you think it matters?
Thanks!
Julie
Your choice Julie!
Thanks Connie. This pattern is ideal to make more community quilts using my stash.
This is so pretty Connie and really great that you shared it as a tutorial! Thank you!
I hopped over from your very first newsletter, which by the way was awesome!
Thank you SO much for this pattern, Connie! I LOVE IT! This is DEFINITELY going on my ToDo List! Have a great day!
I love the looks of the quilt and the fact it is easy to make! Thanks for sharing–great tute.
Found you on Sew Linky.
Thank you so much for the pattern, Connie! The quilt is just stunning!
Beautiful! Thanks for the tutorial, I have to admit, that you give me the desire to make a quilt with this design. I pinned for future reference. Personally I love the colors of the fabrics you used, thanks for the inspiration!
Marisa from
http://passionetcouture.blogspot.ca/
I just love this quilt Connie. Thank you so much for taking the time to show us how you made it.
I hope you finish your March Goal, I know you will, it will look so pretty along with all of the flower wall art you are doing lately. Did you pin this I will go look now so I can.
By far one of my favorite patterns. Thanks, Connie, for the cute tute. LOVE your color choices in your quilt!!!
Awesome tutorial Connie! Thanks for sharing!
Thank you Connie. I love this!
Wonderful! Thanks!
Thanks for the tutorial! I have been seeing this pattern on several blogs. I wondered how it was pieced together! Yours is beautiful! Love all the bright fabrics. The ones with the applique centers are pretty cool too.
Thanks so much Connie, That is a wonderful block! You make everything look so easy…. Hugs, Lyn
That is a great block…Thanks for sharing.
Thank you for sharing Connie! I like that you put the whole tutorial in a pdf file.
I love this pattern! It looked difficult but you made it simple. It's a fresh, colorful design. I am so ready for flowers in the garden this spring. Thank you!
I love this block especially the string block with applique. I am a little bored with my string blocks and a bit of applique will perk them up. Thank you so much for the tutorial and sharing you pattern with us.
I love this block especially the string block with applique. I am a little bored with my string blocks and a bit of applique will perk them up. Thank you so much for the tutorial and sharing you pattern with us.
Great tutorial – thanks for sharing!
I used to trade 4" applique blocks on line, and have dozens of them. I felt a bit overwhelmed making a quilt of 4" blocks, but as soon as I saw this quilt, I knew I had the perfect block to showcase the applique while making a more do-able size block. Thanks so much for this.
This is lovely, Connie and thanks for writing it up to share. I think my mom may have done a similar block in the past but it had an itty bitty nine patch at the center??? Trying to remember. Great way to feature fabrics at center.
Thanks Connie this one will be on my list of quilts to make love it.
what a great quilt!! Love the strings in the middle with the applique flower. Oh, I want spring 🙂
Thanks Connie for a great tutorial and a very pretty pattern . I will definitely have to try this in the future .
Thanks for sharing this tutorial. I will put this block on my to-do list!
Thanks for the tutorial. Great project for my stash pile! 🙂
I love this block. Thanks for the tutorial!
This is such a pretty quilt! I think I could use up some charm square for the center of each block. Hmmm… I like it even more! Thanks for the tutorial – especially the cheat sheet!
Thank you for the instructions. I love your quilt.
Thank you so much for this tutorial. I really like this block; and love the scrappy look.
Thanks for the tutorial. I printed it out and will be making this one soon.
I loved this quilt Connie when you shared the photos taken by the frozen river. Thanks so much for sharing the instructions now too 🙂
I love this block. Thanks for the tutorial, this is a quilt I will be making later in the year.
Thanks, Connie, Your graphic and description is so clear. This is a block that will use up a lot of scraps.
Thanks, Connie. I can hardly wait to try this (but I'm afraid I'll have to). But it looks like so much fun.
Thanks Connie! I can't wait to play! I love the flower centers~~Sew much fun.
Thanks Connie. Looks like a fun pattern..the quilt is just lovely!
Love this block!! I can't wait to make one!
Thanks for the tutorial! This looks like a great way to use up a lot of great scraps. And the scraps are really building up around here!
Fabulous, Connie. You gave us a great tutorial to make it easy. I really like the string version too. Lots of ways to make this our own. Thanks too for the direction card….I love them.
Great block and great tutorial for a great quilt! Thanks Connie.
That is so pretty and I am going to make it, lovely!! Your tutes are so awesome.
Thanks. I love this quilt and am so glad you put the instructions in a PDF file. Thanks again.
I have that pattern earmarked for making too. I just love that it can be used with scraps. Yours looks terrific and I think the flowered one is going to be stunning.
Connie, I can't tell you how much I appreciate this tutorial. I have a stack of 6" pieced blocks at home that have been waiting patiently for me to do something with them. Every once in awhile I see an idea, and I take them out and audition them…I think this block would be perfect and when I return to the island, this will be my first UFO to finish!!! ~karen
Oh Thank you Connie!! Love this pattern.
Oh thank you for this. I won't be starting it today, but it is definitely going on my to-do list! The tutorial and the graphics are excellent.